

Key Takeaways
- Essential Tools Needed: Gather all necessary tools including a replacement battery, screwdriver, heat gun, plastic pry tool, tweezers, and more to ensure a smooth process.
- Step-by-Step Process: Follow a structured guide involving powering off the device, removing the back cover, disconnecting the old battery, and installing the new one.
- Handling with Care: Handle components gently to prevent damage. Use proper tools like a suction cup and plastic pry tool to avoid cracks or breakage.
- Avoid Common Mistakes: Be mindful to prepare adequately, avoid excessive heat, use static electricity precautions, and ensure a secure battery connection to prevent issues.
- Initial Battery Charge: Charge the new battery fully before use to maximize its performance and monitor its efficiency post-installation.
Is your Samsung Galaxy S10 struggling to hold a charge? You’re not alone. Many users face the frustrating reality of a dwindling battery life, and it can feel like a hassle to get it replaced. But don’t worry—replacing the battery isn’t as daunting as it sounds.
Tools Needed for the Replacement
Gathering the right tools ensures a smooth battery replacement process for your Samsung Galaxy S10. Here’s a list of the essential items you’ll require:
- Replacement Battery
Choose a compatible, high-quality battery specifically for the Galaxy S10.
- Screwdriver
Use a Phillips #00 screwdriver to remove screws from the phone case.
- Heat Gun or Hair Dryer
Apply gentle heat to loosen adhesive around the battery.
- Plastic Pry Tool
Utilize a plastic pry tool to gently detach the screen from the chassis.
- Tweezers
Utilize tweezers for handling small components and connectors.
- Suctions Cup
A suction cup helps lift the screen without causing damage or stress.
- Anti-Static Wrist Strap
Wear an anti-static wrist strap to prevent static electricity from damaging your phone’s internal components.
- Microfiber Cloth
Keep a microfiber cloth handy for cleaning your device during the process.
Having these tools on hand streamlines the replacement effort and minimizes potential issues. Prepare your workspace and make sure everything is within reach to keep the process efficient.
Recommended Products

【Compatible Model】It is compatible with Samsung Galaxy S10 SM-G973, EB-BG973ABU, EB-BG973ABE, G973A, G973T, G973V, G973P, G973R4. Not for S10 Plus. Please double identify check your phone model matches before purchasing the battery.

Compatible Model: Replacement Battery Galaxy S10 plus. Compatible with Samsung Galaxy S10 Plus Carriers, include Galaxy S10 Plus EB-BG975ABU G975V( Verizon ),G975A( AT&T ),G975T( T-Mobile ),G975P( Sprint ), G975R4(US Cellular) NOT for Other Samsung Model. Please Confirm Your Phone Model From Phone Back Cover to Avoid Wrong Order

【Compatible Model】:This Battery Model is EB-BG973ABU,Compatible with Samsung Galaxy S10, SM-G973F, SM-G973U, SM-G973W, SM-G973U1, SM-G9730, SM-G973N, SM-G973X, SCV41, SM-G973C series. NOT work for Galaxy S10 Plus.Please confirm your phone model and your old battery part number before placing an order.
Step-by-Step Guide
Follow these steps to replace your Samsung Galaxy S10 battery efficiently.
Recommended Products

Designed exclusively for Galaxy S10 Plus variants: SM-G975F, SM-G975U, SM-G975W, SM-G975U1, SM-G9750, SM-G975N, SM-G975X, SC-05L. Double-check your device's model (found under Settings > About Phone) to ensure perfect fitment.

HIGH CAPACITY --- This replacement battery for Samsung Galaxy S10 is 4500mAh high capacity, with more power than original battery.You can use your phone for a longer time!

HIGH CAPACITY --- This replacement battery for Samsung Galaxy S10 Plus is 4500mAh high capacity, with more power than original battery.You can use your phone for a longer time!
Preparing Your Device
First, power off your Galaxy S10 to prevent any electrical issues. Gather all the necessary tools in one place. This ensures you’re organized and saves time during the process.
Removing the Back Cover
Heat the edges of the back cover using a heat gun or hair dryer for about 30 seconds. This softens the adhesive. Next, place a suction cup near the bottom edge of the phone. Pull gently while inserting a plastic pry tool into the gap. Slide the pry tool around the edges to detach the back cover fully.
Disconnecting the Battery
Locate the battery connector on the motherboard. Use a Phillips #00 screwdriver to remove any screws securing the battery connector cover. Carefully lift the cover with tweezers, then gently disconnect the battery by prying up on the connector. Do this slowly to avoid damaging any components.
Installing the New Battery
Take your compatible replacement battery and position it in the same orientation as the old one. Connect the battery securely to the motherboard. Ensure the connection is snug and properly seated to avoid any power issues.
Reassembling the Device
Align the back cover with the frame of the phone. Press down firmly to secure the adhesive. If necessary, use the heat gun again to ensure a strong bond. Finally, replace any screws removed earlier and power on your device to test the new battery.
Tips for a Successful Replacement
Replacing the battery in your Samsung Galaxy S10 requires attention to detail and a steady hand. Following these tips ensures a smooth battery replacement experience.
Recommended Products
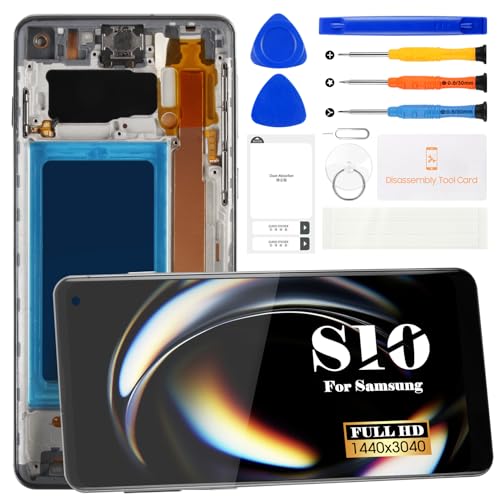
【Compatible with Samsung Galaxy S10 Only】Compatible with Samsung Galaxy S10 6.1" models SM-G973F, SM-G973U, SM-G973W and G9730. Not compatible with Galaxy S10 Plus, S10...
Handling the Components with Care
- Avoid Damage: Handle the back cover and internal components gently. Excessive force can lead to cracks or breakage.
- Use Proper Tools: Utilize the recommended tools like the plastic pry tool and suction cup for safe disassembly.
- Keep Track of Screws: Use a small container to keep screws organized. Label them if necessary to remember their original positions.
Testing the New Battery
- Initial Charge: Charge the new battery fully before using the device. This practice maximizes battery performance.
- Monitor Performance: After installation, pay attention to the battery’s charge levels. If it discharges too quickly, recheck the connections.
- Use Battery Health Apps: Install applications that monitor battery health. This helps track the battery’s efficiency over time.
Common Mistakes to Avoid
Avoiding common mistakes during the battery replacement process helps ensure success. Here are key pitfalls to watch out for:
- Skipping Preparation
Don’t start without gathering all necessary tools. Having everything on hand simplifies the process.
- Using Excessive Heat
Don’t overheat the device when removing the back cover. Too much heat can damage internal components.
- Neglecting ESD Precautions
Avoid static electricity damage by using an anti-static wrist strap. Ground yourself to prevent shorts.
- Forgetting to Disconnect the Power
Always power off your device before starting work. This protects both you and your device during the replacement.
- Rushing the Disassembly
Take your time when removing the back cover and battery. Hurried movements can cause scratches or breaks.
- Ignoring Screw Arrangement
Keep screws organized by placing them in a labeled container. Misplaced screws can delay reassembly.
- Not Securing the Battery Connector
Ensure the battery connector is firmly attached during installation. A loose connection causes battery issues.
- Overcharging After Installation
Don’t charge the new battery immediately after installation. Allow it to stabilize before charging.
By avoiding these mistakes, you enhance the likelihood of a smooth battery replacement.
Conclusion
Replacing your Samsung Galaxy S10 battery doesn’t have to be a daunting task. With the right tools and a bit of patience you can breathe new life into your device. Remember to take your time during each step and handle everything with care to avoid any mishaps.
Once you’ve installed the new battery and reassembled your phone it’s a good idea to monitor its performance. This way you can ensure everything’s working smoothly. Don’t forget to keep an eye on battery health apps to track efficiency over time. Enjoy your refreshed battery life and the seamless experience that comes with it!
Frequently Asked Questions
What are common battery life problems for Samsung Galaxy S10 users?
Many Samsung Galaxy S10 users experience issues like rapid battery drain, reduced battery capacity, and devices not holding a charge. These problems often stem from age, software issues, or physical damage to the battery.
How can I replace the battery in my Samsung Galaxy S10?
To replace the battery, gather essential tools like a replacement battery, Phillips #00 screwdriver, heat gun, plastic pry tool, tweezers, suction cup, anti-static wrist strap, and microfiber cloth. Follow a step-by-step guide to remove the back cover, disconnect and replace the battery, and reassemble the device.
Which tools do I need for battery replacement?
You’ll need a compatible replacement battery, Phillips #00 screwdriver, heat gun or hair dryer, plastic pry tool, tweezers, suction cup, anti-static wrist strap, and a microfiber cloth to safely replace your Samsung Galaxy S10 battery.
What are the steps to remove the back cover of the Galaxy S10?
Start by powering off your Galaxy S10. Use a heat gun or hair dryer to soften the adhesive around the back cover. Then, use a suction cup to lift the cover slightly and insert a plastic pry tool to gently detach the cover.
How do I ensure the new battery is installed correctly?
After disconnecting the old battery, carefully connect the new one, ensuring the connector is firmly attached. Double-check that you’ve returned screws to their original locations before sealing the device to avoid any loose connections.
What mistakes should I avoid when replacing my Galaxy S10 battery?
Avoid common mistakes like neglecting to gather all tools beforehand, using excessive heat, failing to disconnect power properly, rushing disassembly, and overcharging the battery right after installation. Being careful will help ensure a smooth replacement process.
How should I handle the new battery after installation?
After installing the new battery, charge it fully before use. Monitor its performance and consider using a battery health app to track efficiency and identify potential issues over time.
