

Key Takeaways
- Recognize Battery Types: Understand that most Android tablets use lithium-ion (Li-ion) or lithium polymer (LiPo) batteries, each with unique characteristics.
- Identify Signs of Failure: Look out for signs of battery failure such as decreased battery life, swelling, overheating, or charging issues to take timely action.
- Gather Essential Tools: Prepare necessary tools like a precision screwdriver set, plastic pry tools, and an ESD wrist strap for a smooth battery replacement.
- Follow Safety Precautions: Always power off your tablet, work on a non-conductive surface, and handle components carefully to prevent damage during the process.
- Follow Step-by-Step Instructions: Adhere to detailed steps for removing the old battery, installing the new one, and reassembling the tablet to ensure successful replacement.
- Test New Battery Performance: After installation, fully charge the tablet and monitor battery life, charging time, and heat levels to ensure proper functionality.
Have you noticed your Android tablet struggling to hold a charge? You’re not alone. Many people face this issue as their devices age, leaving them frustrated and searching for solutions.
Replacing a tablet battery might seem daunting, but it’s more manageable than you think. With the right tools and guidance, you can breathe new life into your device without breaking the bank. This article will walk you through the steps to safely replace your Android tablet battery, ensuring you get back to enjoying your favorite apps and content in no time.
Understanding Android Tablet Batteries
Android tablet batteries are essential for device functionality. Knowing their types and recognizing signs of failure helps you maintain optimal performance.
Recommended Products

【Battery Specifications】Model:SCUD-WT-N19; Battery Type: Rechargeble Lithium polymer; Capacity:27.1 Wh 7040 mAh; Voltage:3.85V; Battery life: Up to 500 recharge cycles.


Replacement For Tablet: Fit for Samsung Galaxy Tab A8 10.5 Inch SM-X200 SM-X205 SM-X200N SM-X205N SM-X205NZAAEUE SM-X200NZAAEUA Tablet.
Types of Batteries Used
Most Android tablets use lithium-ion (Li-ion) or lithium polymer (LiPo) batteries.
- Lithium-ion (Li-ion): These batteries are common due to their high energy density. They charge quickly and work well in various temperatures.
- Lithium Polymer (LiPo): These batteries offer more flexibility in shape and size. Though they might not hold a charge as long as Li-ion, they’re lighter and can fit in slimmer devices.
Both types require careful handling. Avoid deep discharges, as they can reduce battery lifespan.
Signs of Battery Failure
Identifying battery failure can save you from unexpected device shutdowns. Look for these signs:
- Decreased battery life: If your tablet’s battery drains quickly after a full charge, that indicates potential issues.
- Swelling: A swollen battery can indicate chemical reactions inside. This poses safety risks and requires immediate replacement.
- Overheating: Excessively warm devices during charging or usage signal potential battery failure.
- Charging issues: If your tablet fails to charge or connects/disconnects erratically, the battery might be failing.
Recognizing these signs early helps you take action before complete failure occurs.
Preparing to Replace Your Battery
Replacing your Android tablet battery requires preparation. Gather all necessary tools and materials before starting to ensure a smooth process.
Recommended Products

Kaisi 20 pcs opening pry tools kit for smart phone,laptop,computer tablet,electronics, apple watch, iPad, iPod, Macbook, computer, LCD screen, battery and more disassembly and repair

LMQ 22 pcs opening pry tools kit for smart phone,laptop,computer tablet,electronics, apple watch, iPad, iPod, computer, LCD screen, battery and more disassembly and repair.

【Universal】These spudger kit and pry tools professional designed for disassembling a variety of electronics - iPhone, android phone, laptop, tablet, apple watch, iPad, iPod, Macbook, computer, LCD screen, battery and more
Tools and Materials Needed
- Screwdriver Set: Use a precision screwdriver set, ideally one with a Phillips and flathead option. This set provides the versatility for different screws in your tablet.
- Plastic Pry Tools: Utilize plastic pry tools to safely open the tablet without damaging the case. Metal tools can scratch or dent surfaces.
- ESD Wrist Strap: Wear an electrostatic discharge wrist strap to prevent static electricity damage to sensitive components. This wrist strap keeps your device safe from accidental shocks.
- Replacement Battery: Purchase a compatible replacement battery specific to your tablet model. Check online retailers or authorized service centers for verified batteries.
- Tweezers: Keep a pair of tweezers handy for handling small screws and connectors. This tool allows for precise movements in tight spaces.
- Isopropyl Alcohol: Use isopropyl alcohol and a lint-free cloth for cleaning components. This solution ensures no residue interferes with the new battery’s performance.
Safety Precautions
- Power Off Your Tablet: Always turn off your tablet before starting the battery replacement. This step prevents any electrical issues during the process.
- Work on a Non-Conductive Surface: Choose a safe, non-conductive workspace. A designated area helps avoid unintentional damage to your device.
- Avoid Heat Sources: Keep your workspace away from heat sources. Excessive heat can damage the battery and other components.
- Handle Components Carefully: Be gentle when handling internal parts. Excessive force can break delicate components or connectors.
- Dispose of Old Battery Properly: Follow local regulations for battery disposal. Proper disposal prevents environmental damage and promotes safety.
With these preparations and precautions, you’re ready to tackle the battery replacement process.
Step-by-Step Guide to Replacing Your Battery
Replacing your Android tablet battery can seem daunting, but it’s manageable with the right approach. Follow these steps to complete the process successfully.
Recommended Products

【Stylus for Touch Screen】This stylus can be used on touch screen, designed to replace your fingers, the stylus can free up your fingers and provide higher sensitivity and response on the screen.
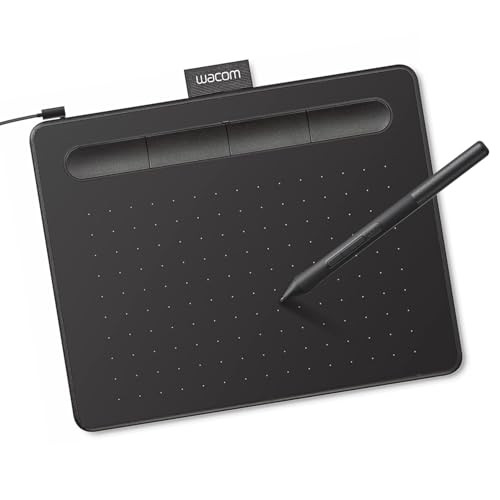
Wacom Intuos Small Graphics Drawing Tablet: Enjoy industry leading tablet performance in superior control and precision with Wacom's EMR, battery free technology that feels like pen on paper

[Nature Pen Experience]: The included battery-free stylus PW100 with 8192 levels of pressure sensitivity is light and easy to control with accuracy. If feels like a standard pen, giving you natural drawing experience on the drawing pad for computer. The pen side buttons help you switch between pen and eraser instantly.
Removing the Tablet Cover
- Gather your tools. Ensure you have your precision screwdriver set, plastic pry tools, and ESD wrist strap on hand.
- Power off the tablet. Always shut down your device to avoid any electrical issues.
- Use a plastic pry tool to gently separate the tablet cover from the body. Start at a corner and work your way around.
- Keep the cover in a safe place. Avoid damaging clips or connectors during this step.
Disconnecting the Old Battery
- Locate the battery connector. It’s typically found near the center of the device.
- Use a precision screwdriver to remove any screws securing the connector. Set the screws aside safely.
- Gently lift the connector. Ease it away without forcing it; the connection type varies by model.
- If the battery is glued in, carefully insert a plastic pry tool along its edges to detach it. Work slowly to prevent damage.
Installing the New Battery
- Place the new battery in the designated compartment. Ensure it aligns with the connectors.
- Reconnect the battery connector. Press it firmly until it snaps into place.
- If the battery was glued, you might need to apply a little pressure to secure it.
Reassembling the Tablet
- Align the tablet cover with the body. Make sure all clips fit securely.
- Press down gently around the edges to snap the cover back in place.
- Reinsert any screws removed earlier, ensuring they’re tightened without over-tightening.
- Power on your tablet. Confirm it charges and operates as expected.
Follow these steps carefully to enjoy your rejuvenated tablet with its new battery.
Testing the New Battery
Testing the new battery ensures your Android tablet functions as expected after replacement. This process involves charging the device and monitoring its performance.
Charging the Tablet
Start by fully charging the tablet after inserting the new battery. Connect the charger to the device and plug it into a wall outlet. Allow it to charge for at least four to six hours. This initial charge helps calibrate the battery. During this time, check for any unusual signs, such as swelling or overheating. If the tablet appears normal, continue to the next step.
Monitoring Battery Performance
After charging, use the tablet for a few hours to gauge battery performance. Pay attention to the following indicators:
- Battery Life: Monitor how long the tablet lasts on a full charge. A well-functioning battery should last several hours depending on usage.
- Charging Time: Test how quickly the battery charges. A normal charge time varies with the charger used, but it generally should not exceed four hours for a complete charge.
- Heat Levels: Notice if the tablet heats excessively during use or charging. Increased heat may indicate battery issues.
Track these factors for at least a week. If you notice significant discrepancies, consider revisiting the installation process or consulting a professional for further assistance.
Conclusion
Replacing your Android tablet’s battery can breathe new life into your device. With the right tools and a bit of patience you can tackle this task and enjoy your tablet like it’s brand new. Remember to follow the steps carefully and take the necessary safety precautions to ensure a smooth process.
After installing the new battery keep an eye on its performance. If everything goes well you’ll be back to enjoying your favorite apps and content without worrying about battery issues. Don’t hesitate to reach out for help if you encounter any problems. Happy tablet rejuvenation!
Frequently Asked Questions
What causes an Android tablet battery to struggle as it ages?
As Android tablets age, batteries can degrade due to factors like repeated charge cycles, heat exposure, and chemical reactions within the battery. These factors lead to reduced capacity, ultimately causing shorter usage times between charges and making it essential to consider battery replacement.
How do I know if my tablet battery needs to be replaced?
Signs that your tablet battery may need replacement include significantly decreased battery life, swelling or bulging of the battery casing, overheating during charging, or the tablet not charging properly. Recognizing these signs early can help prevent further damage.
What tools do I need to replace my Android tablet battery?
To replace your Android tablet battery, you’ll need tools such as a precision screwdriver set, plastic pry tools, an ESD wrist strap, a compatible replacement battery, tweezers, and isopropyl alcohol for cleaning. These tools will help ensure a safe and effective battery replacement.
Is it safe to replace my Android tablet battery myself?
Yes, replacing your Android tablet battery can be safe if you adhere to proper guidelines and precautions. Make sure to power off the device, work on a non-conductive surface, and handle components carefully. If unsure, consult a professional for assistance.
How do I test the new battery after replacement?
To test the new battery, fully charge your tablet for four to six hours after replacement. Monitor the device for signs like swelling or overheating, and assess battery performance over the week. Track battery life, charging time, and heat levels during use for any discrepancies.
