

Ever wondered how to store the energy your solar panels generate? If you’re looking to maximize your solar investment, connecting your solar panel to a battery is a smart move. It allows you to use solar energy even when the sun isn’t shining, giving you more control over your power supply.
Key Takeaways
- Understanding Components: A solar power system typically includes solar panels, a charge controller, and batteries, each playing a crucial role in energy generation and storage.
- Battery Selection: Choose the right type of battery (lead-acid or lithium-ion) based on your energy needs, ensuring it has sufficient capacity and depth of discharge.
- Wiring Protocol: Proper wiring is essential for safety and efficiency. Always connect cables in the correct order and check for secure connections.
- Charge Controller Configuration: Correctly configure the charge controller settings for your battery type to optimize charging and monitor performance.
- Regular Maintenance: Conduct routine inspections of all components, including cleaning solar panels and checking connections, to ensure optimal performance and longevity.
- Troubleshooting Tips: Be aware of common issues like voltage mismatches, wiring problems, and battery health, and know how to address them for smooth operation.
Understanding Solar Power Systems
Solar power systems convert sunlight into usable electricity. They typically consist of solar panels, a charge controller, and batteries for energy storage. Understanding these components helps you set up an efficient solar power system.
Components of a Solar Power System
- Solar Panels: These collect sunlight and convert it into direct current (DC) electricity. The number of panels required depends on your energy needs and available space.
- Charge Controller: This device regulates the voltage and current coming from the solar panels to the batteries. It prevents overcharging and prolongs battery life. Choose a charge controller compatible with your solar array and battery type.
- Batteries: Batteries store the energy generated by the solar panels. Common types include lead-acid and lithium-ion. Select a battery with sufficient capacity to meet your energy demands, especially during periods of low sunlight.
Importance of Battery Storage
Battery storage allows you to use solar energy during non-sunny periods. It ensures a steady power supply, especially during peak demand times or outages. Properly sized batteries can provide energy for essential appliances, improving your energy independence.
Consider the following when choosing battery storage:
- Capacity: Assess your daily energy consumption to determine the required battery capacity.
- Depth of Discharge: Know how much of the battery’s capacity you can use without damaging it. For instance, lithium-ion batteries often allow a 90% discharge, while lead-acid batteries typically allow 50%.
- Charging Time: Evaluate how quickly a battery can recharge. Shorter charging times are beneficial for daily use.
Implementing a solar power system with battery storage enhances your energy resilience and optimizes your solar investment.
Preparing for Connection
Preparing for the connection of solar panels to your battery involves gathering the necessary tools and materials, as well as ensuring a safe working environment. This preparation sets the stage for a successful and efficient setup.
Recommended Products
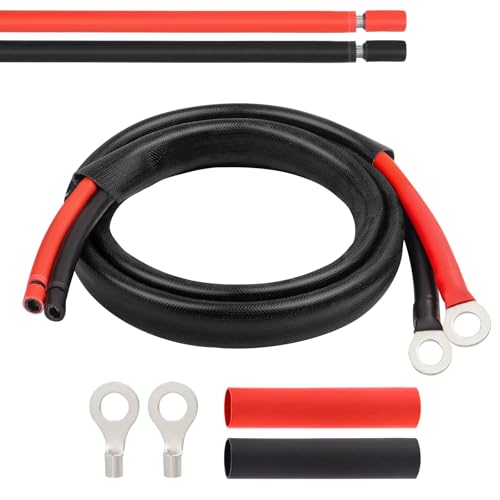
10AWG Tinned Copper Wire -- MOOKEERF solar battery cable is made of larger diameter 10AWG tinned copper wire which is minimize power loss in solar panel systems, the inner conductor consists of 84 tin-plated copper, well constructed and good conductive.

【DUAL-END, NO CRIMPING NEEDED】Pre-crimped tinned copper ferrules seat tight into MPPT/PWM controller terminals — no frayed strands; 5/16" (M8) ring lugs fit battery posts. 10AWG heavy-duty pair (red + black) for LiFePO4, AGM & lead-acid batteries.

12V Battery Compatibility + 20A PWM Charging: Designed specifically for 12V solar systems, this 20A PWM solar charge controller is compatible with LiFePO4, AGM and Gel batteries and supports solar panels up to 300W. The upgraded 20A design provides stable current management for everyday RV, marine, camping and off-grid solar applications. Not compatible with 24V/36V battery systems
Tools and Materials Needed
- Solar Panels: Ensure you have the right number of solar panels for your energy needs.
- Charge Controller: Select a charge controller compatible with your battery type to regulate the charging process.
- Batteries: Choose batteries with adequate capacity to store your generated energy.
- Battery Cables: Use cables rated for the appropriate amperage and length to connect the batteries and solar panels.
- Connectors: Ensure you have the correct connectors for your battery and solar panel setup.
- Multimeter: A multimeter helps check voltage and continuity during the installation.
- Wrenches and Screwdrivers: Have these handy for tightening connections securely.
- Fuse: Install a fuse to protect the circuit from overloads.
- Wear Protective Gear: Always wear safety glasses and gloves to protect yourself while working.
- Disconnect Power Sources: Disconnect all components before starting the installation to prevent shocks.
- Check Voltage Levels: Use a multimeter to confirm that voltage levels are safe before making connections.
- Avoid Wet Conditions: Check the weather and work in dry conditions to reduce the risk of electric shock.
- Secure Connections: Ensure that all connections are tight to prevent overheating and potential fire hazards.
- Follow Manufacturer Instructions: Refer to the manuals provided with your solar components for specific safety recommendations and requirements.
Following these guidelines ensures a smoother and safer process in connecting your solar panels to a battery.
Step-by-Step Guide to Connecting Solar Panel to Battery
Follow these steps to connect your solar panel to a battery effectively. This process enhances your energy storage capabilities and maximizes the benefits of your solar setup.
Choosing the Right Battery
Select a battery that meets your storage needs. Consider these factors:
- Capacity: Choose a battery with sufficient amp-hours (Ah) to store the energy generated by your solar panel. For example, a 100Ah battery can store 1200Wh of energy.
- Depth of Discharge: Opt for batteries that allow deeper discharges to prolong lifespan. Lithium batteries typically allow 80-100% depth, while lead-acid batteries recommend 50%.
- Type: Lithium-ion batteries offer longer life and efficiency, while lead-acid options are generally cheaper but heavier and less efficient.
Review these specifications to ensure reliable energy storage for your solar power system.
Wiring the Solar Panel to the Battery
Proper wiring ensures safe and efficient energy transfer. Follow these steps:
- Turn Off Equipment: Disconnect all power sources before starting the wiring process.
- Connect Battery Cables: Attach positive battery cable to the positive terminal on the battery. Secure the negative cable to the negative terminal.
- Connect Charge Controller: Link the corresponding terminals of the charge controller to the battery. Ensure correct polarity by matching positive and negative terminals.
- Attach Solar Panel Wires: Connect the solar panel’s positive and negative wires to the charge controller’s solar input terminals.
This wiring sequence ensures the panels charge the battery without risking damage or short circuits.
Configuring the Charge Controller
Configuring the charge controller sets the parameters for efficient charging. Perform the following actions:
- Set Voltage Settings: Adjust the controller for your battery type (12V, 24V, etc.). Consult the manual for exact settings.
- Monitor Readings: Use the built-in display to check voltage levels and current flow. This helps confirm proper operation.
- Configure Alarms: Activate alarms for low voltage or overcharging events. These alerts prevent battery damage and enhance safety.
Each charge controller has specific features. Familiarize yourself with its capabilities to optimize your solar battery system effectively.
Troubleshooting Common Issues
Sometimes, you may encounter problems when connecting solar panels to a battery. Knowing how to resolve these issues increases efficiency and ensures your system runs smoothly.
Identifying Connection Problems
- Check Voltage Compatibility
Confirm that your battery voltage matches the voltage output of your solar panels. Mismatched voltages can prevent charging. - Inspect Wiring Connections
Examine all wiring connections for corrosion or loose fittings. Secure any loose connections to maintain a reliable energy flow. - Test the Charge Controller
Use a multimeter to check the charge controller’s functionality. A malfunctioning charge controller can disrupt the charging process. - Look for Obstructions
Ensure that solar panels are not shaded or blocked. Obstructions reduce sunlight exposure and impact energy generation. - Monitor Battery Health
Evaluate your battery’s state of charge and health. A deteriorating battery may not hold a charge effectively, leading to power supply issues.
- Regular Inspection
Perform routine checks on your solar panels, charge controller, and battery. Look for any signs of wear, corrosion, or damage. - Clean Solar Panels
Keep panels clean from dirt and debris. This action maximizes sunlight absorption and boosts electricity production. - Check Connections
Periodically verify that all connections remain tight and corrosion-free. Well-maintained connections enhance system performance. - Monitor Battery Levels
Regularly check the battery’s voltage levels and state of charge. Ensure they stay within recommended parameters for optimal performance. - Follow Manufacturer Guidelines
Adhere to the maintenance instructions provided by the manufacturers of your solar and battery systems. This practice promotes longevity and efficiency.
By addressing these common issues and maintaining your system, you can enhance the performance of your solar power setup, maximizing the benefits of connecting solar panels to a battery.
Conclusion
Connecting solar panels to a battery is a smart move for anyone looking to harness the power of the sun. You’re not just storing energy but also gaining independence from traditional power sources. With the right setup and a bit of care, you can ensure your system runs smoothly and efficiently.
Remember to keep an eye on your battery health and perform regular maintenance. This way, you’ll enjoy the benefits of your solar investment for years to come. Embrace the journey of solar energy and take control of your power supply. You’ve got this!
Frequently Asked Questions
What are the benefits of connecting solar panels to a battery?
Connecting solar panels to a battery allows you to store excess solar energy for use during non-sunny periods. This setup maximizes your solar investment, provides greater control over your power supply, and ensures a steady electricity flow during peak demand or outages.
What components are involved in a solar power system with battery storage?
A solar power system typically includes solar panels, which convert sunlight into electricity, a charge controller that manages energy flow to the batteries, and batteries that store generated energy for later use.
How do I choose the right battery for solar power?
When selecting a battery, consider its capacity (total energy storage), depth of discharge (usable capacity without damage), and type (lithium-ion or lead-acid). Lithium-ion batteries offer greater efficiency and longer life, while lead-acid batteries are more traditional and cost-effective.
What tools do I need to connect solar panels to a battery?
You will need solar panels, a compatible charge controller, batteries, battery cables, connectors, a multimeter, wrenches, screwdrivers, and a fuse. Always prioritize safety by using protective gear and following proper procedures.
What safety precautions should I take during installation?
Ensure your safety by disconnecting all power sources, checking voltage levels, using protective gear, avoiding wet conditions, securing connections properly, and following the manufacturer’s instructions throughout the installation.
How do I wire solar panels to a battery?
Start by turning off all equipment. Connect the battery cables to the batteries, ensuring proper polarity. Then, connect the solar panel cables to the charge controller before linking it to the batteries. Follow the charge controller instructions for optimal configurations.
What should I do if I encounter issues with my solar system?
To troubleshoot common issues, check voltage compatibility, inspect wiring for corrosion or looseness, and test the charge controller’s functionality. Regular inspections, cleaning, and monitoring battery health are essential for maintaining system performance.
How can I ensure the longevity of my solar power setup?
Maintain your system by regularly monitoring battery health, cleaning solar panels, inspecting connections, and adhering to the manufacturer’s guidelines. These practices help enhance the performance and longevity of your solar power setup.
