

Key Takeaways
- Understand Battery Types: Familiarize yourself with removable and non-removable batteries in Android devices, as handling methods differ significantly.
- Follow Safety Precautions: Always power off your device and work in a clean area to minimize risks during battery removal.
- Gather the Right Tools: Use the necessary tools such as screwdrivers, plastic pry tools, and tweezers to ensure a safe and effective battery removal process.
- Carefully Follow Steps: Adhere to the step-by-step guide for battery removal to prevent damage to your device and its components.
- Troubleshoot Common Issues: Be prepared to handle problems like stuck batteries or battery adhesive challenges to avoid frustration during the process.
- Know When to Seek Help: If faced with non-removable batteries or swollen batteries, consult a professional to ensure safety and effective resolution.
Have you ever found yourself in a situation where your Android phone just won’t respond? Maybe it’s frozen or acting up, and you need a quick fix. Removing the battery can be a simple yet effective way to reset your device and get it back on track.
Understanding Android Batteries
Android devices generally use rechargeable lithium-ion batteries. These batteries provide a balance between performance and longevity. Knowing the types of batteries in your device and how to handle them can enhance your overall experience.
Types of Android Batteries
- Removable Batteries: Some older Android models feature removable batteries. You can access these batteries by simply taking off the back cover. This setup allows easy replacement and troubleshooting.
- Non-Removable Batteries: Modern Android phones most commonly use non-removable batteries. These batteries are sealed within the device, making removal more complex. If you encounter issues, you’ll typically need professional help for replacements.
- Lithium-Ion Batteries: These are the most prevalent battery types found in Android devices. Lithium-ion batteries offer high energy density and charge quickly. They can last several years with proper care.
- Lithium Polymer Batteries: Some premium models utilize lithium polymer batteries. They are lighter and can be shaped to fit snugly within a device. These batteries offer similar performance as lithium-ion but provide flexibility in design.
Importance of Proper Battery Removal
Proper battery removal minimizes the risk of damaging your device. If you remove a battery incorrectly, it may lead to issues like loose connections or even physical damage. Always follow these tips for safe removal:
- Power Off the Device: Before removing the battery, power off your Android phone to prevent electrical shocks or short circuits.
- Use the Right Tools: Employ appropriate tools like a plastic prying tool or screwdriver, especially for non-removable batteries. This approach minimizes the risk of damaging internal components.
- Handle with Care: Gently handle the battery to avoid punctures. Li-ion and lithium polymer batteries can be hazardous if punctured or crushed.
- Consult the Manual: Check your device’s manual for specific removal instructions tailored to your model. This ensures you follow manufacturer guidelines.
By understanding the types and the significance of proper battery removal, you enhance your capability to address Android issues effectively.
Preparing for Battery Removal
Before you start removing the battery from your Android device, gather the necessary tools and ensure your safety.
Recommended Products

HIGH QUALITY: Thin flexible steel blade easily slips between the tightest gaps and corners.

【Universal】These spudger kit and pry tools professional designed for disassembling a variety of electronics - iPhone, android phone, laptop, tablet, apple watch, iPad, iPod, Macbook, computer, LCD screen, battery and more

Start the First Gap on Glued Screens: Suction cup, ultra-thin metal pry tool, and curved screen opener help create entry on tight seams when opening iPhone, Android phones, iPad, and other tablets.
Gathering Necessary Tools
- Screwdriver: Use a small Phillips or Torx screwdriver, depending on your device.
- Plastic Pry Tool: A plastic prying tool helps avoid damaging the device’s casing.
- Tweezers: Handy for removing small parts or connectors.
- Magnetic Mat or Container: Keeps screws and small components organized.
- Anti-Static Wrist Strap: Protects your device from static electricity.
Make sure you have everything within reach before starting the process. This preparation simplifies your task and saves time.
Ensuring Safety Precautions
- Turn Off the Device: Power off your Android to prevent any electrical issues.
- Remove Any Accessories: Take off cases, SD cards, or SIM cards.
- Work in a Clean, Dry Area: A clutter-free workspace reduces the risk of losing parts or causing damage.
- Avoid Excessive Force: Handle components gently to prevent breakage.
- Be Aware of Battery Safety: Do not puncture or crush the battery, as it may result in hazardous situations.
Following these safety precautions ensures a smoother and safer battery removal process, allowing you to focus on your task without additional concerns.
Step-by-Step Guide on How to Take the Battery Out of an Android
Follow these steps to successfully remove the battery from your Android device.
Recommended Products
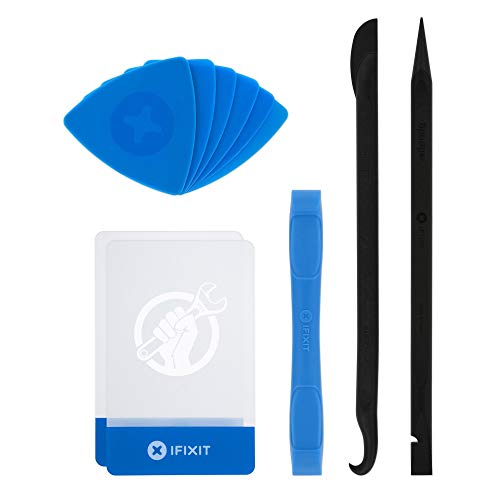
EFFECTIVE: Open your tech device and safely remove components with ease. Essential for DIY repairs like displays, batteries, motherboards, headphone jacks, joysticks, and more.

Powerful Function: This 2 in 1 opening repair tool kit is professtional tool that compatible with repairing moble devices, iPhone, iPads, iPods or any other smart phones.Good helper to remove screen when you need repair your phone.

Professional Tools: Showpin's 3-in-1 iopener includes LCD and double-headed screen opening tool plus a cleaning cloth. Suitable for mobile phones, iPads, and other mobile devices, facilitating the easy removal or replacement of the LCD screen and battery.
Powering Down the Device
- Press and hold the power button on your device.
- Tap “Power Off” on the screen, then confirm. Wait for the device to shut down completely.
Opening the Device’s Back Cover
- Locate the back cover release notch or screws. Use your screwdriver if necessary.
- Gently pry open the back cover with your plastic pry tool.
- Remove the back cover completely to expose the battery compartment.
Disconnecting and Removing the Battery
- Find the battery connector, usually at the top or side of the battery.
- Using your tweezers, carefully lift the connector away from the device.
- Grasp the battery edges and pull it out of the compartment. Avoid touching other components to prevent damage.
By following these steps, you’ll effectively remove the battery from your Android device.
Common Issues and Solutions
Battery removal can sometimes bring challenges. Understanding these issues and their solutions helps you manage your Android device effectively.
Recommended Products

【Versatile Watch Battery Replacement Tool Kit】This watch battery replacement tool kit includes 2 different styles of watch back remover tools, making it perfect for opening watch back cases and replacing watch batteries. It's a must-have tool for both professionals and beginners in the watch repair industry.
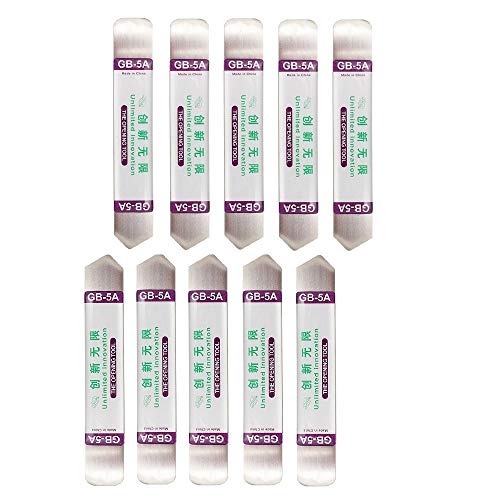
Ideal For Opening: iPhone, Smart phone, iPad, Tablet, Laptop, PC, LCD and other plastics or metals

【Professional Disassembly, Easy to Use】: 7 in 1 Mobile Phone Disassembly Tool Set for mobile phone/tablet LCD screen,battery,cables, disassembly and removal. The tip is polished to 0.1mm, allowing for easy insertion into gaps and non-destructive screen removal.
Troubleshooting Battery Removal Problems
If the battery doesn’t seem to budge, inspect the following:
- Insufficient Tools: Ensure you’ve got the right tools. A screwdriver, plastic pry tool, and tweezers simplify the process.
- Stuck Battery Adhesive: Adhesive strips may hold the battery in place. Apply gentle heat using a hairdryer to loosen the adhesive.
- Frustrating Connections: Check the battery connector. It might be stuck. Use a plastic pry tool to carefully disconnect it before removal.
Should you encounter a battery that feels overly snug, remember to keep calm. Don’t force it. Excessive force can damage your device.
When to Seek Professional Help
Some issues require expert assistance. Consider professional help in these situations:
- Non-Removable Batteries: If your device has a sealed case, don’t attempt to remove the battery on your own. Seek a technician’s aid.
- Swollen Battery: A swollen battery poses safety risks. It’s essential to stop using the device and consult a professional immediately.
- Persistent Device Issues: If problems persist after removal, your device might have underlying hardware or software issues needing expert diagnosis.
By being aware of these common issues and knowing when to reach out for help, you enhance your Android experience while ensuring safety and functionality.
Conclusion
Taking the battery out of your Android device can seem daunting but it’s a manageable task with the right tools and knowledge. By following the steps outlined and keeping safety in mind you can tackle battery issues with confidence.
Remember to always handle your battery carefully and consult your device manual for specific guidance. If you encounter challenges don’t hesitate to seek professional help when needed.
With a little patience and the right approach you’ll be back to enjoying your device in no time. Happy troubleshooting!
Frequently Asked Questions
What should I do if my Android phone becomes unresponsive?
If your Android phone is unresponsive, a simple solution is to remove the battery. This method can help reset the device and restore its functionality. Always ensure to turn off the phone before removing the battery to avoid potential damage.
How do I know what type of battery my Android phone uses?
Most Android devices use either removable or non-removable lithium-ion or lithium polymer batteries. You can find this information in your device manual or by searching online with your specific phone model for better understanding and handling.
What tools do I need for battery removal?
Essential tools for safely removing an Android battery include a screwdriver, plastic pry tool, tweezers, and an anti-static wrist strap. Additionally, having a magnetic mat or container to keep screws organized is helpful.
How can I safely remove my Android phone’s battery?
To safely remove a battery, first, power off your device. Next, open the back cover using the pry tool, disconnect the battery connector, and carefully remove the battery. Always follow the manufacturer’s instructions for best results.
What safety precautions should I take during battery removal?
Before starting, ensure the device is powered off and accessories are removed. Work in a clean area, avoid excessive force, and handle the battery with care to prevent any hazardous situations.
What if the battery is stuck?
If the battery is stuck, gently apply heat to the area to loosen adhesive. Use the right tools to carefully pry it out without damaging the device. If it remains unmovable, consult a professional for assistance.
When should I seek professional help for battery issues?
You should seek professional help if you’re dealing with non-removable batteries, swollen batteries, or if the device continues to have issues after you attempt a battery removal. Safety should always come first.
