
Ever found yourself stranded with a dead car battery? The frustration is real. Picture this: you’re running late, hop into your Honda Odyssey, and click, click, click – nothing. Don’t worry, we’ve all been there. But fear not, because in this article, you’ll learn how to replace your Honda Odyssey’s battery like a pro.
Imagine the convenience of being able to swap out your car battery on your own without breaking a sweat or the bank. No more waiting for roadside assistance or paying hefty service fees. By mastering this simple skill, you’ll not only save time and money but also gain the confidence to tackle basic car maintenance tasks with ease.
Get ready to say goodbye to battery-related woes and hello to a newfound sense of automotive independence. In the next few minutes, you’ll discover the step-by-step guide to replacing your Honda Odyssey’s battery, empowering you to hit the road worry-free.
Step 1: Gather the Necessary Tools
When replacing your Honda Odyssey’s car battery, having the right tools at hand is essential for a smooth process. Here’s what you’ll need:
- Safety gloves and goggles: Protect yourself while working on the battery.
- Adjustable wrench: To loosen and remove the battery terminals.
- Battery cleaning brush: Keep terminals free from corrosion.
- Battery terminal protection spray: Prevent future corrosion.
- New car battery: Ensure it matches your Honda Odyssey’s specifications.
By having these tools ready, you’ll be well-equipped to tackle the battery replacement task efficiently.
Recommended Products
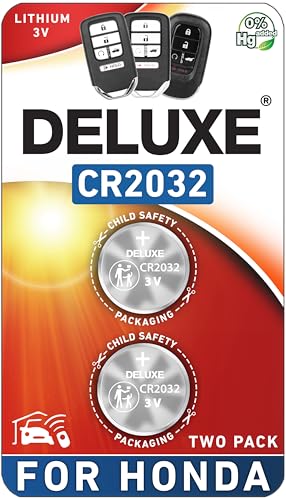
CONFIRM FIT - **Please confirm compatibility using the fitment guide located in the product images**

PACKAGE INCLUDED : Two (2) CR2032 Remote key Fob Battery and Opening/Pry Tools , Five item bundle (total 5pcs) , Please confirm compatibility using the fitment guide located in the product images.

Perfect Fit for Honda Key Fobs - Designed to match a wide range of Honda models, including the Civic, Accord, CRV, Pilot, Odyssey, HRV, Fit, Passport, Ridgeline, Crosstour, Insight, Clarity, CR-Z this CR2032 battery set ensures a precise fit for your key fob. Say goodbye to compatibility worries and hello to a hassle-free solution.
Step 2: Locate the Battery
When finding the battery in your Honda Odyssey, you’ll typically need to open the hood of your car. The battery is commonly located in the engine bay, near the front of the car. Some models may have a cover over the battery that needs to be removed for easier access.
Remember to always consult your vehicle’s manual if you’re having trouble locating the battery. The manual provides specific instructions tailored to your car’s make and model, ensuring you identify the battery correctly.
Step 3: Disconnect the Old Battery
Now that you’ve gathered your tools and located the battery, it’s time to disconnect the old one. Follow these steps carefully:
- Step 1: Ensure the car is turned off.
- Step 2: Locate the negative terminal; typically marked with a minus (-) sign.
- Step 3: Loosen the nut on the negative terminal clamp using a wrench.
- Step 4: Detach the negative cable from the terminal and secure it away from the battery.
- Step 5: Repeat the process for the positive terminal marked with a plus (+) sign.
- Avoid touching both terminals simultaneously to prevent any accidents.
- Inspect the cables for any signs of damage before reattaching them to the new battery.
It’s important to take these steps carefully to ensure a safe and successful battery replacement process.
Step 4: Clean the Battery Terminals
Now that you’ve disconnected the old battery, it’s time to clean the battery terminals to ensure a good connection with the new one. Here’s how to do it:
- Gather your materials: You’ll need a wire brush or battery terminal cleaner, baking soda, water, and an old toothbrush.
- Mix a cleaning solution: Create a paste using baking soda and water. Apply it to the terminals and scrub with the wire brush or an old toothbrush.
- Rinse with water: Use a spray bottle or damp cloth to clean off the terminals thoroughly.
- Dry the terminals: Make sure the terminals are completely dry before installing the new battery.
- Inspect for corrosion: Look for any signs of corrosion or buildup on the terminals. If you find any, clean them more thoroughly with the wire brush or a battery terminal cleaner.
Taking the time to clean the battery terminals can prevent poor connections and prolong the life of your new battery. It’s a simple step that ensures optimal performance from your Honda Odyssey.
Step 5: Install the New Battery
Now it’s time to install the new battery in your Honda Odyssey. Follow these steps carefully to ensure a smooth replacement process:
- Position the new battery: Place the new battery in the battery tray. Make sure it sits securely in place.
- Connect the cables: Begin by connecting the positive (+) cable. Then, attach the negative (-) cable. Double-check to ensure that the connections are secure.
- Tighten the nuts: Use a wrench to tighten the nuts on the battery terminals. This will help prevent any loose connections while you’re on the road.
- Apply battery terminal grease: A thin layer of battery terminal grease on the terminals can help prevent corrosion and ensure a good connection.
- Secure the battery: Once everything is connected and tightened, secure the new battery in place.
Step 6: Secure the Battery in Place
Now that you’ve connected the cables and tightened the nuts on the terminals, it’s time to secure the new battery in place to ensure it stays put while you’re on the road. Here are the next steps to follow:
- Double-check the battery: Verify that the new battery is positioned correctly in the tray to avoid any movement during driving.
- Verify the hold-down bracket: Ensure the hold-down bracket is in place and properly tightened to keep the battery secure.
- Inspect the battery tray: Check the battery tray for any signs of damage or corrosion that could affect the new battery’s performance.
- Test the battery connection: Before finalizing the installation, give the battery a slight tug to confirm it’s securely in place.
- Final touches: Once you’re confident the battery is secured, you can proceed with any final steps needed for the replacement process.
Remember, properly securing the new battery is essential for the safety of your Honda Odyssey and the functionality of the vehicle.
Step 7: Reconnect the Cables
Now it’s time to reconnect the cables to the new battery. Start with the positive cable, marked with a red color or a plus sign. Attach it to the positive terminal of the battery by sliding it over the post and tightening the nut securely. Next, connect the negative cable, usually black and marked with a minus sign, to the negative terminal in the same manner.
Remember to tighten both terminals snugly to ensure a secure connection. A loose connection can lead to electrical issues and starting problems down the road.
One key tip is to inspect the cables for any signs of damage or corrosion. If you notice any issues, it might be a good idea to replace the cables to prevent future complications.
Lastly, double-check that both cables are firmly attached before moving on to the next step in the battery replacement process.
Step 8: Wrap Up and Test
After securing the cables to the new battery, the final steps involve wrapping up the process and testing the replacement to ensure everything is in working order.
- Checking Connections: First, make sure both the positive and negative cables are tightly secured to their respective terminals. You can gently tug on each cable to confirm a firm connection.
- Inspecting Surroundings: Look around the battery area to ensure no tools or loose items are left behind. Keeping the workspace clean and organized is key.
- Testing the Battery: Before fully closing the hood, start your Honda Odyssey to verify that the new battery functions correctly. A smooth start-up indicates a successful replacement.
- Resetting Electronics: If you encounter any issues with electronic components after installing the new battery, consider resetting the systems. This can often resolve minor anomalies.
- Dispose of Old Battery: Properly dispose of the old battery by taking it to a recycling center. Many auto parts stores also offer battery recycling services for your convenience.
Remember, taking the time to wrap up the battery replacement process thoroughly and test the new battery can help prevent future complications and ensure a smooth driving experience.
| Important Reminder: | |
|---|---|
| Old Battery Disposal: | Recycle at a center or store |
Conclusion
You’ve now completed the battery replacement process for your Honda Odyssey. Make sure to double-check the cable connections, clear any remaining items, start the vehicle to test the new battery, reset electronics if necessary, and dispose of the old battery responsibly at a recycling center. By following these steps diligently, you’ll avoid potential issues and enjoy a seamless driving experience. Happy driving!
Frequently Asked Questions
Why is it important to check the connections of the positive and negative cables after replacing the battery in a Honda Odyssey?
It is crucial to check the connections of the positive and negative cables to ensure they are securely tightened. Loose connections can lead to electrical issues, poor performance, and even damage to the vehicle’s systems.
Why should you inspect the surroundings for any leftover items after replacing the battery in a Honda Odyssey?
Inspecting the surroundings is important to prevent any tools or parts from being left near the battery, which could cause damage when the vehicle is in operation. Safety and cleanliness around the battery area are essential for optimal vehicle operation.
How can you test the new battery in a Honda Odyssey after replacement?
You can test the new battery by simply starting the vehicle. If the engine starts smoothly and the electrical components function without any issues, it indicates a successful battery replacement.
Why is it necessary to reset electronics in a Honda Odyssey after installing a new battery?
Resetting the electronics may be necessary to ensure proper calibration and functioning of various vehicle systems. It helps to clear any error codes or malfunctions that occurred due to the battery replacement process.
What should you do with the old battery after replacing it in a Honda Odyssey?
Properly dispose of the old battery at a recycling center to prevent environmental pollution and promote sustainability. Recycling old batteries helps recover valuable materials and reduces the negative impact on the environment.