
Ever wondered how to easily remove the battery from your Gateway laptop without any hassle? Maybe you’re in a rush, and your laptop’s battery is acting up, causing you unnecessary stress. Well, fret not, because we’ve got you covered! In this article, we’ll walk you through the simple steps to safely remove the battery from your Gateway laptop, giving you peace of mind and a smooth laptop experience.
Imagine this: You’re working on an important project on your Gateway laptop, and suddenly, the battery starts acting out. It’s frustrating, right? That’s where knowing how to remove the battery comes in handy. By following our straightforward guide, you’ll be equipped with the knowledge to tackle any battery-related issues swiftly and efficiently.
Check your Gateway laptop model
When it comes to removing the battery from your Gateway laptop, the first step is to confirm your laptop model. This information is crucial as different models may have varying ways to access and detach the battery.
To determine your Gateway laptop model, you can:
- Check the bottom of your laptop for a sticker or label containing the model number.
- Access the system information on your laptop to find the model details.
- Visit Gateway’s official website and use their support or product page to identify your model.
Once you have identified your laptop model, you can proceed with the specific instructions tailored to your device.
Power off your laptop
When handling the battery removal process of your Gateway laptop, the first step is to ensure that your laptop is powered off. This prevents any potential risk of electric shock or damage to the laptop during the removal process.
To power off your Gateway laptop:
- Save any open files and close all applications to prevent data loss.
- Shut down your laptop using the operating system’s shut down option.
- Wait for the laptop to completely power off before proceeding to the next steps.
Remember, safety first! Always take precautions when working with electronic devices to avoid any mishaps.
Locate the battery
When removing the battery from your Gateway laptop, the first step is finding its exact location. The battery is typically situated on the underside of the laptop, secured by a latch or screws. It’s essential to Locate the battery carefully to avoid accidentally interfering with other internal components.
Recommended Products

Polymer. Voltage: 11.4V Capacity: 51.3WH ; Cells: 3-cell; Color: Black, Packages includes: 1x 5376275P battery , with two auxiliary installation tool and user manual;

【Customer First】24 x 7 email support. We specialize in providing quality power products and quality customer service. (Note: Amazon return windows will close after one month, If you have any problem with battery, please Contact us - in “YOUR ORDER” options click the “contact seller”.)

Model: UTL-509068-3S // Voltage: 11.4V // Capacity: 51.3Wh 4500mAh // Color: Black // Type: Plug & Play Li-ion Battery.
How to Locate the Battery:
- Flip your Gateway laptop over to unveil the underside.
- Search for a rectangular panel usually marked with battery symbols.
- Check for any screws or latches securing the panel in place.
- Gently remove any fasteners to access the battery compartment.
Identifying the Battery:
- Look for a rectangular unit often labeled with battery-related information.
- Note the connector attached to the battery, ensuring you can distinguish it from other components.
- Verify that the unit matches the shape and size of a standard laptop battery.
- Exercise caution to prevent damage to the laptop or yourself.
- Refer to your laptop’s manual for specific instructions.
- Take note of the battery’s position before proceeding with removal.
Remove the battery
To safely remove the battery from your Gateway laptop, here are the steps to follow:
- Locate the battery lock switch: This switch is usually found next to the battery.
- Slide the lock switch: Move the switch in the direction indicated to unlock the battery.
- Gently remove the battery: Once unlocked, carefully take out the battery from its compartment.
- Handle with care: Avoid applying excessive force or bending the battery.
| Note the Battery Position Before Removal |
|------------------------------------------|
| Before proceeding, record the battery's position to ensure correct reinstallation. |
Remember to refer to your laptop’s manual for specific instructions tailored to your Gateway model.
Recommended Products
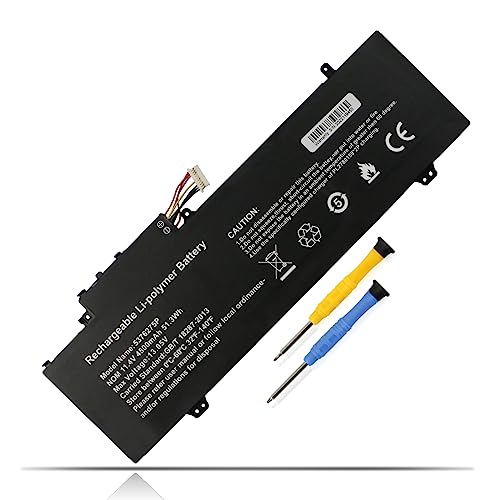
【Battery Specification】Capacity: 4500mAh 51.3Wh Voltage: 11.4V.100% brand new. Up to 500 recharge cycles over the life of the battery. High-quality materials and circuit board.

【Customer First】Rest assured with 30 days Refund and 12 months Warranty; 24 x 7 email support. We specialize in providing quality power products and quality customer service. (Note: Amazon return windows will close after one month, If you have any problem with battery, please Contact us - in “YOUR ORDER” options click the “contact seller”.)

【Replacement Battery Type】Voltage:11.4V; Capacity:51.3Wh/4500mAh.
Conclusion
That’s it! You now know how to safely remove the battery from your Gateway laptop. Remember to always handle the battery with care to avoid any damage. Make sure to take note of its position before removal for a smooth reinstallation process. If you have any doubts or need model-specific instructions, don’t hesitate to refer to your laptop’s manual. Happy battery removal!
Frequently Asked Questions
How can I safely remove the battery from my Gateway laptop?
To safely remove the battery from your Gateway laptop, locate the battery lock switch, slide it to unlock the battery, gently remove the battery, and handle it carefully to avoid damage. Note the battery’s position before removal for correct reinstallation. Refer to your laptop’s manual for model-specific instructions for a secure removal process.