
Key Takeaways
- Understanding Your Model: Familiarize yourself with the specific Asus Vivobook model you own, as battery removal procedures can vary between models with integrated and removable batteries.
- Essential Tools Required: Gather necessary tools like a precision screwdriver set, plastic pry tool, tweezers, anti-static wrist strap, and a soft cloth to ensure a smooth battery removal process.
- Safety Precautions: Always power off your laptop and unplug it before beginning, discharge static electricity, and handle components carefully to prevent damage.
- Step-by-Step Removal Process: Follow a clear step-by-step guide to power down the device, remove the back cover, disconnect the battery, and replace it if necessary.
- Troubleshooting Common Issues: Be prepared to troubleshoot common problems, such as ensuring proper connections, checking battery health, and addressing any overheating or hardware issues post-removal.
Have you ever found yourself struggling with a laptop that just won’t turn on? If you own an Asus Vivobook, you might need to remove the battery to troubleshoot or replace it. It’s a common issue that many users face, and knowing how to do it can save you time and frustration.
In this article, you’ll learn the step-by-step process to safely remove the battery from your Asus Vivobook. Whether you’re looking to replace a faulty battery or perform some maintenance, these simple instructions will guide you through it. By the end, you’ll feel confident tackling this task on your own.
Overview of Asus Vivobook Models
Asus offers a variety of Vivobook models, each tailored to specific needs and preferences. Understanding your model can simplify the battery removal process.
Common Asus Vivobook Series
- Vivobook Essential Series
- Targets budget-conscious users.
- Features lightweight designs and decent performance for everyday tasks.
- Vivobook Pro Series
- Designed for creative professionals.
- Boasts powerful processors and enhanced graphics capabilities for intensive applications.
- Vivobook Flip Series
- Offers 2-in-1 functionality with a touchscreen.
- Ideal for users who need flexibility for both laptop and tablet modes.
- Vivobook Gaming Series
- Caters to gamers with robust hardware.
- Equipped with advanced cooling systems and high-refresh-rate displays.
Identifying Your Model
Check your laptop’s bottom or inside the battery compartment for the model number. It usually starts with “X” followed by a series of numbers and letters. This information helps ensure you follow instructions specific to your device.
Battery Comparison Across Models
Most Vivobook models use similar battery designs, but there can be differences. Understanding these differences can affect how you approach battery removal. For example:
- Integrated vs. Removable Batteries
- Integrated batteries require disassembly for removal.
- Removable batteries can be accessed through designated compartments.
Knowing your model and battery type aids in the battery removal process. It reduces the risk of damaging the laptop and improves efficiency.
Tools Required for Battery Removal
Removing the battery from your Asus Vivobook requires specific tools to ensure a smooth process. Having these tools at hand makes the task easier and safer.
Recommended Products
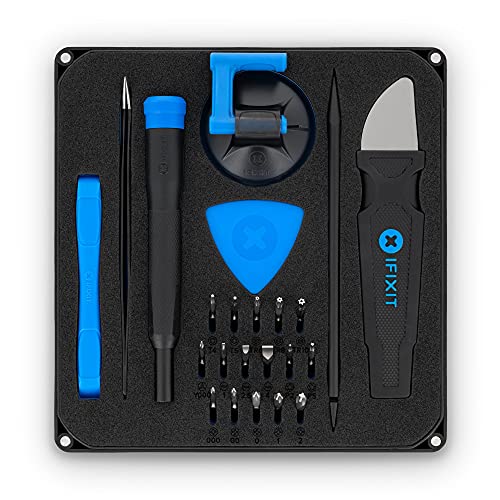
COMPLETE: This set contains a variety of tools - Besides various opening tools, it includes 16 precision bits (4 mm) and a precision screwdriver with a magnetic bit socket, knurled grip, and swivel top for easy operation.

LMQ 22 pcs opening pry tools kit for smart phone,laptop,computer tablet,electronics, apple watch, iPad, iPod, computer, LCD screen, battery and more disassembly and repair.

Full compatible with your original battery,brand new from Professional Manufacturer, CE RoHS certified,grade A cells ensure fast charges and low power consumption; Built-in circuit protection ensures both safety and stability
Essential Tools
- Screwdriver Set: A precision screwdriver set with Phillips and flathead options is necessary for removing the screws. Choose a set that fits the screws on your specific model.
- Plastic Pry Tool: A plastic pry tool helps open the laptop casing without causing damage. Metal tools can scratch or dent the surface, so prefer plastic.
- Tweezers: Tweezers assist in handling small components, especially when disconnecting battery connectors. Look for fine-tipped tweezers to improve grip.
- Anti-Static Wrist Strap: This strap protects your laptop from static electricity damage. Ground yourself by wearing it while working on internal components.
- Soft Cloth: A soft cloth can prevent scratches on the laptop’s surface. Place it on your work surface or under the laptop during the procedure.
Safety Precautions
- Power Off: Always power off your device completely before starting the removal process. Unplug the power adapter to eliminate any electrical risks.
- Discharge Static Electricity: Touch a grounded metal object or wear an anti-static wrist strap to discharge any static electricity before handling components.
- Handle with Care: Avoid applying excessive force when removing screws or connectors. Gentle movement prevents damage to internal parts.
- Keep Track of Screws: Use a magnetic tray or container to keep screws organized. This practice avoids losing parts during reassembly.
- Work in a Well-Lit Area: Ensure your workspace is well-lit so you can easily see screws and connectors, reducing the likelihood of errors.
By gathering these tools and following the safety precautions, you’ll set yourself up for a successful battery removal process for your Asus Vivobook.
Step-by-Step Guide on How to Remove Battery From Asus Vivobook
This section provides detailed steps to successfully remove the battery from your Asus Vivobook.
Recommended Products

【Customer First】24 x 7 email support. We specialize in providing quality power products. (Note: Amazon return windows will close after one month, If you have any problem with battery, please Contact us - in “YOUR ORDER” options click the “contact seller”.)

Specifications: Battery type: Li-Polymer; Color: Black. Voltage: 7.7V. Capacity: 37Wh. Cell: 2-Cell. New from Manufacturer

Specifications: Battery type: Li-ion. Color: Black. Voltage: 7.7V. Capacity: 37Wh. New from Manufacturer. Compatible Part Number: B21N1818-3 C21N1818-3 B21N1818-2
Powering Down Your Device
- Shut down your laptop. Click the Start button, then select “Shut down” to turn off the device fully.
- Unplug the charger. Disconnect the power adapter from your laptop to prevent any electrical shock.
- Wait a moment. Allow a few minutes for the device to discharge any residual electricity.
Removing the Back Cover
- Prepare your workspace. Place your laptop on a soft cloth to avoid scratches. Ensure good lighting for visibility.
- Locate the screws. Use a precision screwdriver to find the screws holding the back cover in place.
- Remove the screws. Carefully unscrew each one and place them in a small container for safekeeping.
- Pry open the back cover. Use a plastic pry tool to gently separate the back cover from the base. Work your way around the edges for even distribution of pressure.
Disconnecting the Battery
- Identify the battery connector. Locate the battery cable connected to the motherboard.
- Gently disconnect the cable. Use tweezers to pull up on the connector firmly without applying excessive force.
- Remove the battery screws. Identify and unscrew any screws securing the battery in place.
- Lift out the battery. Carefully take out the battery from its compartment, ensuring no other components are disturbed.
Replacing the Battery
- Position the new battery. Align the new battery with the connectors before placing it into the compartment.
- Secure the battery. Replace and tighten the screws to hold the battery in place.
- Reconnect the battery cable. Align the connector and press it firmly back into the motherboard socket.
- Reattach the back cover. Align it properly, press it down, and replace the screws securely to finalize the assembly.
Following these steps allows you to safely and effectively remove and replace the battery in your Asus Vivobook model.
Troubleshooting Common Issues
When removing the battery from your Asus Vivobook, you might encounter a few common issues. Here’s how to troubleshoot them effectively:
The Laptop Doesn’t Turn On
- Check Connections: Ensure the battery is connected properly. A loose connection can prevent the laptop from powering on.
- Try a Power Reset: Unplug the laptop, remove the battery, and hold the power button for 15 seconds. This clears residual power and might solve the issue.
- Test with Another Charger: If the charger doesn’t seem to work, try a different one compatible with your model.
Battery Doesn’t Seem to Charge
- Inspect the Charger: Look for any visible damage on the charger or the charging port. If the port’s dirty, clean it gently.
- Check battery health: Use Asus diagnostic tools to assess the battery’s health. A failing battery often doesn’t hold a charge.
- Reinsert the Battery: Sometimes, reseating the battery can restore charging functionality.
Screws Won’t Come Out
- Use the Correct Tools: Ensure you’re using the right size screwdriver. Using a mismatched tool can strip screws.
- Apply Gentle Pressure: Use a steady, firm pressure while turning the screw. If it’s stuck, use a little lubricant to ease the process.
- Try Different Angles: Adjust the angle of your screwdriver for a better grip, especially on difficult screws.
Laptop Overheating
- Check for Dust: Dust accumulation can block ventilation. Clean the fans and vents regularly.
- Replace Thermal Paste: Over time, thermal paste can dry out. If you’re comfortable, consider applying new thermal paste to improve cooling efficiency.
- Avoid Soft Surfaces: Always use your laptop on hard, flat surfaces to allow proper airflow.
Keyboard or Trackpad Issues After Removal
- Reseat Connections: Ensure all internal connections are secured after battery removal. A loose cable can affect keyboard or trackpad performance.
- Check for Damage: Inspect the trackpad and keyboard connectors for any signs of damage during battery removal.
By recognizing and addressing these common issues, you can enhance the battery removal experience and keep your Asus Vivobook running smoothly.
Conclusion
You’ve now got the know-how to tackle battery removal on your Asus Vivobook. With the right tools and a little patience, you can confidently manage this task. Remember to take your time and follow each step carefully.
By understanding your specific model and its battery type, you’re better equipped to avoid common pitfalls. If you run into any issues, don’t hesitate to refer back to the troubleshooting tips provided.
Taking care of your laptop’s battery not only enhances its performance but also prolongs its lifespan. Happy tinkering and enjoy your refreshed Asus Vivobook!
Frequently Asked Questions
How can I troubleshoot my Asus Vivobook laptop if it won’t turn on?
If your Asus Vivobook won’t turn on, first check if it’s charged by connecting it to a power source. If it’s still unresponsive, try holding the power button for 10-15 seconds to reset it. You may also need to check for any loose connections or consider removing and inspecting the battery. Refer to the article for detailed troubleshooting steps.
What tools do I need to remove the battery from my Asus Vivobook?
To safely remove the battery from your Asus Vivobook, you’ll need a precision screwdriver set, a plastic pry tool, tweezers, an anti-static wrist strap, and a soft cloth. Having these tools handy will make the process smoother and safer.
How do I know which Asus Vivobook model I have?
You can identify your Asus Vivobook model by checking the label on the bottom of the laptop or the original packaging. Additionally, you can look in the system settings under “About” for model information. The article provides further details to help differentiate between the models.
Are all Asus Vivobook batteries removable?
No, not all Asus Vivobook models have removable batteries. Some models feature integrated batteries that require different procedures for replacement. It’s essential to check your specific model’s design as outlined in the article for appropriate battery removal instructions.
What should I do if screws won’t come out during battery removal?
If screws won’t budge when removing your Asus Vivobook battery, try using a bit of penetrating oil on the screws and allow it to sit for a few minutes. Ensure you’re using the correct screwdriver size and apply firm, even pressure. Gentle rocking can sometimes help to loosen stubborn screws.
How can I replace the battery after removing it?
To replace the battery, position the new battery into the compartment, ensuring that the connectors align properly. Secure it by replacing the screws you removed earlier, then reattach the back cover of your Asus Vivobook, ensuring everything is fully secured before turning it on.
What are some common issues after battery replacement?
After replacing the battery, some common issues include the laptop not turning on, problems with charging, or peripherals like the keyboard and trackpad not responding. The article offers troubleshooting steps for each of these issues to help you resolve them effectively.