

Key Takeaways
- Safety First: Always wear safety glasses and gloves to protect yourself while removing the battery from your Android phone.
- Gather the Right Tools: Essential tools include precision screwdrivers, plastic pry tools, tweezers, a flashlight, and an anti-static mat to ensure a smooth removal process.
- Follow Step-by-Step Instructions: Carefully follow the outlined steps for removing the back cover, disconnecting the battery, and lifting it out to avoid damaging any components.
- Handle Batteries with Care: Avoid using metal tools to prevent puncturing the battery and store it properly if removed. Dispose of any damaged batteries responsibly.
- Know When to Get Help: Seek professional assistance if the battery is swollen, your phone has severe damage, or you lack the tools and experience necessary for safe removal.
Have you ever faced a situation where your Android phone just won’t charge or holds a charge for barely any time? It can be frustrating, especially when you rely on your device for everything. Sometimes, the solution lies in the battery itself, and knowing how to remove it can make a world of difference.
In this article, you’ll learn the simple steps to safely remove your Android phone’s battery. Whether you’re looking to replace a faulty battery or just want to reset your device, this guide will walk you through the process. With clear instructions, you’ll be able to tackle this task with confidence and get your phone back in working order.
Tools You Will Need
To safely and effectively remove the battery from your Android phone, gather the following tools and safety gear. Being prepared enhances the process and protects your device.
Recommended Products

Kaisi 20 pcs opening pry tools kit for smart phone,laptop,computer tablet,electronics, apple watch, iPad, iPod, Macbook, computer, LCD screen, battery and more disassembly and repair
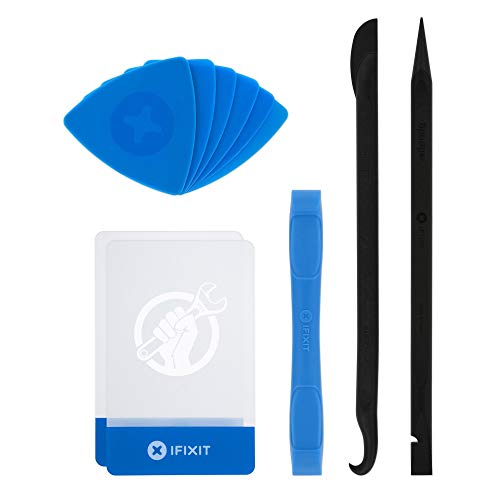
EFFECTIVE: Open your tech device and safely remove components with ease. Essential for DIY repairs like displays, batteries, motherboards, headphone jacks, joysticks, and more.

【Universal】These spudger kit and pry tools professional designed for disassembling a variety of electronics - iPhone, android phone, laptop, tablet, apple watch, iPad, iPod, Macbook, computer, LCD screen, battery and more
Safety Gear
- Safety Glasses: Protect your eyes from any small debris or accidental slips during the removal process.
- Gloves: Wear non-static gloves to safeguard your hands and prevent static electricity from damaging electronic components.
Essential Tools
- Screwdrivers: Use a precision screwdriver set, including Phillips and flathead types, for various screws.
- Plastic Pry Tools: These tools help gently pry open the phone casing without causing damage.
- Tweezers: Employ tweezers for handling small screws or components, ensuring a steady grip.
- Flashlight: Having good visibility aids in locating screws and connectors inside the phone.
- Anti-static Mat: Working on an anti-static mat reduces the risk of static charge affecting your phone’s internal parts.
Gathering these tools makes the battery removal process smoother and more efficient.
Step-By-Step Guide
Follow these steps to safely remove the battery from your Android phone. Ensure you have your tools ready before starting.
Recommended Products

Professional Tools: Showpin's 3-in-1 iopener includes LCD and double-headed screen opening tool plus a cleaning cloth. Suitable for mobile phones, iPads, and other mobile devices, facilitating the easy removal or replacement of the LCD screen and battery.

Powerful Function: This 2 in 1 opening repair tool kit is professtional tool that compatible with repairing moble devices, iPhone, iPads, iPods or any other smart phones.Good helper to remove screen when you need repair your phone.

Start the First Gap on Glued Screens: Suction cup, ultra-thin metal pry tool, and curved screen opener help create entry on tight seams when opening iPhone, Android phones, iPad, and other tablets.
Removing the Back Cover
- Put on safety gear. Wear gloves and safety glasses to protect yourself from any sharp edges or battery leakage.
- Locate the back cover. Look for any visible screws or clips that secure the back cover of your phone.
- Use a plastic pry tool. Slide the pry tool into the seam between the back cover and the phone’s body, gently working your way around the edges to release the clips.
- Lift the back cover. Once all clips are released, carefully lift off the back cover and set it aside.
Disconnecting the Battery
- Identify the battery connector. Find the battery connector, usually located near the bottom of the battery.
- Use tweezers for precision. If necessary, use tweezers to grasp the connector. Ensure not to pull on the wires directly.
- Disconnect the connector. Gently pull the connector upward to free it from its socket. Make sure you do this slowly to avoid damage.
Taking Out the Battery
- Check for any adhesive. Some batteries may have adhesive strips. If yours does, locate those and peel them back carefully.
- Lift out the battery. Find an edge of the battery that’s slightly raised, or gently wiggle it to loosen. Lift the battery vertically out of the compartment.
- Inspect the battery. Examine the battery for any signs of damage. If it looks swollen or cracked, dispose of it according to local regulations.
By following these steps, you can safely remove the battery from your Android phone, making it easier to troubleshoot or replace it.
Tips and Precautions
Follow these tips and precautions to ensure a safe and effective battery removal process for your Android phone.
Recommended Products
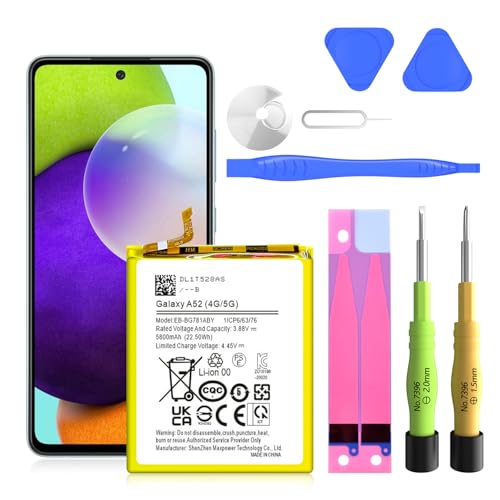
✅SHENMZ Galaxy A52 Battery Replacement ONLY Work For Model Samsung Galaxy A52/A52S (4G/5G) SM-A526 SM-A526B/DS SM-A5260 EB-BG781ABY. Note: Galaxy A52 Battery ,NOT for Other Samsung Model. Please Confirm Your Phone Model From Phone Back Cover to Avoid Wrong Order.[Not for Galaxy other Phone Models.]
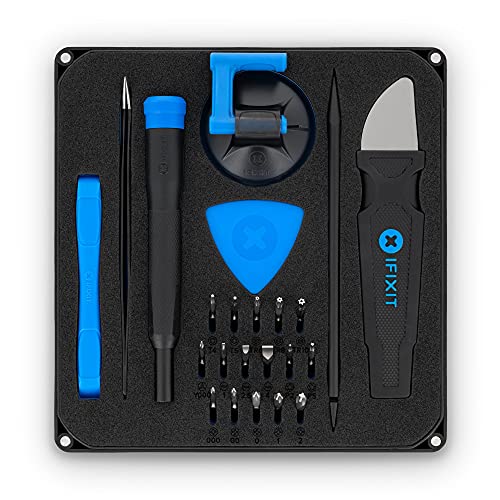
COMPLETE: This set contains a variety of tools - Besides various opening tools, it includes 16 precision bits (4 mm) and a precision screwdriver with a magnetic bit socket, knurled grip, and swivel top for easy operation.

HIGH CAPACITY --- This replacement battery for Samsung Galaxy S10E is 3900mAh high capacity, with more power than original battery.You can use your phone for a longer time!
Avoiding Common Mistakes
- Confirm Compatibility: Always verify that your phone model supports battery removal. Some models have sealed batteries that require specialized tools.
- Check Power Status: Make sure your phone is powered off completely. Removing a battery while the phone is on may cause damage to internal components.
- Inspect Connections: Before pulling out the battery, take a moment to check for any screws or clips holding it in place. Forcing out a battery can damage connectors.
- Use the Right Tools: Using improper tools can lead to scratches or breaks on your phone. Stick to non-conductive tools like plastic prying devices.
Handling the Battery Safely
- Wear Safety Gear: Protect your hands and eyes with gloves and safety glasses to mitigate risks associated with sharp edges or battery leakage.
- Avoid Puncturing the Battery: Never use metal tools to pry or poke the battery. Punctured batteries can leak, catch fire, or cause explosions.
- Store Properly: After removal, place the battery in a safe area away from direct sunlight or heat sources. Extreme conditions can lead to swelling or leakage.
- Dispose Responsibly: If you determine that the battery is faulty or damaged, dispose of it according to local regulations. Use designated drop-off points for hazardous waste to avoid environmental harm.
By following these tips, you ensure a safer and more efficient battery removal process, allowing you to troubleshoot or replace your Android phone’s battery effectively.
When to Seek Professional Help
Recognizing when to seek professional help for battery issues on your Android phone is essential. Some situations indicate that you shouldn’t attempt repairs yourself.
- Severe Damage: If your phone shows signs of significant damage, like cracks or liquid exposure, professional assessment is necessary. Extreme damage can lead to further complications.
- Swollen Battery: A swollen battery poses safety risks, including potential leaks or explosions. If you notice swelling, don’t attempt to remove it. Seek expert assistance immediately.
- Persistent Charging Problems: If your phone consistently fails to charge, despite trying multiple chargers, a professional’s diagnostic might reveal deeper electrical issues.
- Incompatibility Issues: Attempting to replace a battery with an incompatible one can damage your device. If you’re unsure about compatibility, consult a technician.
- Lack of Experience: If you’re not comfortable working with electronic components, it’s best to leave the task to a professional. Mistakes can cause irreversible damage.
- Warranty Concerns: If your device is still under warranty, opening it might void that warranty. Seek service from authorized centers to maintain your warranty coverage.
- Unfamiliar Tools: If you lack the proper tools or knowledge to safely remove a battery, don’t risk damaging your phone. Professionals are equipped with the right tools and expertise.
By identifying these situations early, you can prevent costly repairs and ensure the safety of your device. Always prioritize your safety and the integrity of your phone—professional help is often the best solution.
Conclusion
Removing the battery from your Android phone can be a straightforward way to tackle charging issues or to replace a faulty battery. With the right tools and safety precautions in place you can confidently handle the process.
Remember to always check for any signs of damage and dispose of batteries responsibly. If you ever feel uncertain about the removal process or encounter serious problems don’t hesitate to seek professional help. Your phone deserves the best care and attention so you can keep it running smoothly for years to come.
Frequently Asked Questions
What should I do if my Android phone is not charging properly?
If your Android phone is not charging, first check the charging cable, adapter, and port for damage or dust. Ensure the outlet works and try a different charger. If problems persist, you may need to remove the battery for further inspection or replacement.
How can I safely remove the battery from my Android phone?
To safely remove your Android phone’s battery, first gather the necessary tools: safety glasses, gloves, and screwdrivers. Power off your phone, wear safety gear, remove the back cover, disconnect the battery connector, and gently take out the battery, checking for adhesive.
What tools do I need for battery removal?
For battery removal, you’ll need safety glasses, gloves, a screwdriver set, plastic pry tools, tweezers, a flashlight, and an anti-static mat. These tools help protect you and your device during the removal process.
When should I consider professional help for battery issues?
You should seek professional help if you notice severe damage, a swollen battery, persistent charging issues, or if you’re unfamiliar with battery handling. Warranty concerns and battery incompatibility can also be indicators for professional assistance.
How should I dispose of a faulty battery?
Faulty batteries should be disposed of responsibly following local regulations. Many areas have designated recycling programs for batteries. Avoid throwing them in regular trash to prevent environmental harm and safety hazards.
