

Have you ever thought about harnessing solar energy but felt overwhelmed by the setup process? You’re not alone. Many people want to make the switch to solar power but aren’t sure how to connect their solar panels to an inverter and battery.
Key Takeaways
- Understand Key Components: Familiarize yourself with the essential parts of a solar energy system: solar panels, inverter, battery, charge controller, and mounting system, to navigate the setup process effectively.
- Selecting Compatible Equipment: Choose appropriate solar panels, inverters, and batteries that work well together in terms of type, capacity, and voltage to ensure optimal performance and efficiency.
- Follow Step-by-Step Guide: Adhere to a structured approach for connecting solar panels to the inverter and battery, ensuring secure wiring, proper terminal connections, and thorough system checks.
- Safety First: Implement electrical safety precautions, including using insulated tools, wearing protective gear, and disconnecting power before making connections to minimize risks.
- Regular Maintenance: Conduct periodic inspections and maintain the solar system by cleaning panels, checking connections, and monitoring battery levels to enhance longevity and performance.
Understanding Solar Energy Systems
Solar energy systems harness sunlight to generate electricity. Understanding the components and functionality helps simplify the process of connecting solar panels to an inverter and battery.
Components of a Solar Energy System
A solar energy system consists of the following key components:
- Solar Panels: These capture sunlight and convert it into direct current (DC) electricity. Panels vary in efficiency and size, with popular options including monocrystalline and polycrystalline types.
- Inverter: This device converts the DC electricity generated by solar panels into alternating current (AC) electricity, suitable for home use. Inverters can be string inverters or microinverters, each serving different system configurations.
- Battery: Batteries store excess energy produced during sunny periods for later use, ensuring a steady power supply even during cloudy days or at night. Lithium-ion batteries are commonly preferred for their longevity and efficiency.
- Charge Controller: This component regulates the voltage and current flowing from the solar panels to the battery, preventing overcharging and ensuring optimal performance.
- Mounting System: A mounting system holds the solar panels in place, either on roofs or ground mounts. Proper installation is crucial for maximizing sunlight exposure.
How Solar Panels Work
Solar panels operate through a process called the photovoltaic effect. Here’s how it works:
- Light Absorption: When sunlight hits the solar cells in the panels, it excites electrons, creating an electric field.
- Direct Current Generation: The excited electrons flow through the solar cells, generating DC electricity.
- Conversion by Inverter: The generated DC electricity is sent to the inverter. The inverter converts DC into AC electricity for use in your home or business.
- Excess Energy Storage: Any surplus electricity that isn’t used can be directed to the battery for storage or combined with the grid if connected.
- Power Utilization: When sunlight is insufficient, the system draws energy from the battery, providing a reliable power source.
By understanding these components and functions, you’re better equipped to hook up solar panels to an inverter and battery efficiently.
Selecting the Right Equipment
Choosing the right equipment is essential for connecting solar panels to an inverter and battery. Focus on finding components that work well together for optimal performance.
Recommended Products

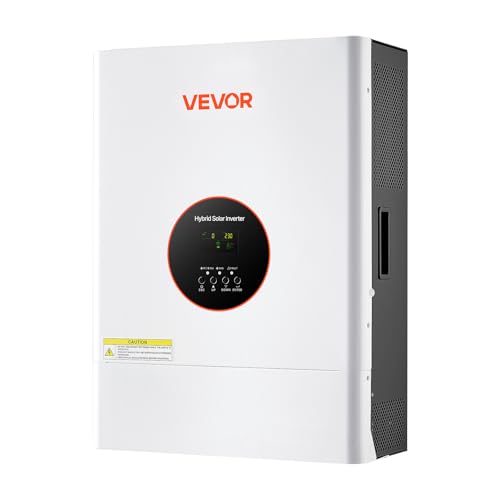
2-in-1 Low-Frequency Inverter: Seamlessly integrates inverter and controller in one unit. Built with industrial-grade low-frequency technology, it delivers 6400W high output with dual-voltage 110–120V/220–240V split-phase support for heavy-duty equipment
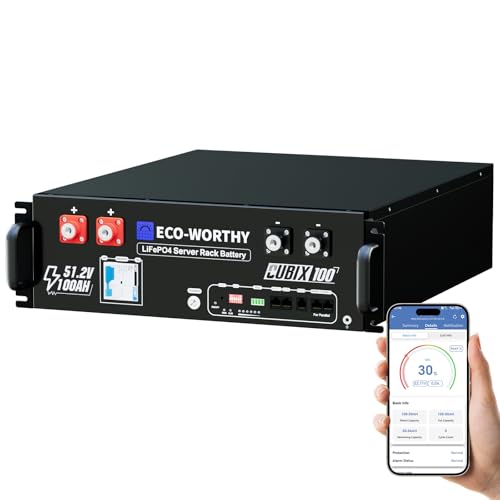
UL9540 | UL1973 | CEC LISTED - Completed comprehensive testing by Intertek and has officially earned three key North American safety certifications.And has met the standards set by the California Energy Commission.The outstanding performance in design, electrical safety, and thermal runaway management,providing users with greater quality assurance.
Choosing the Right Inverter
Select an inverter that matches your solar system’s needs. Consider these factors:
- Type of Inverter: Choose between string inverters, microinverters, or power optimizers based on your installation type. String inverters suit most home setups, while microinverters excel in shaded areas.
- Power Rating: Ensure the inverter can handle the combined wattage of your solar panels. For example, if you have four 300W panels, look for an inverter with at least 1200W capacity.
- Efficiency: Look for inverters with an efficiency rating of 95% or higher. Higher efficiency means less energy loss.
- Grid-Tie or Off-Grid: Determine whether you need a grid-tied inverter for connecting to the grid or an off-grid inverter for standalone systems.
- Type of Battery: Select between lead-acid and lithium-ion batteries. Lithium-ion batteries offer a longer lifespan and greater depth of discharge, but lead-acid models are more affordable initially.
- Capacity: Look for batteries with a sufficient capacity to meet your energy needs. For example, if you need to store 12 kWh daily, consider batteries with a total capacity of at least 15-20 kWh to account for efficiency losses.
- Voltage Compatibility: Ensure the battery voltage matches your inverter’s voltage. Common voltages include 12V, 24V, and 48V.
- Cycle Life: Check the cycle life rating, which indicates how many charge and discharge cycles the battery can endure. Aim for a minimum of 2,000 cycles for longer-lasting performance.
Step-by-Step Guide to Hooking Up Solar Panel to Inverter and Battery
Follow these steps to connect your solar panel to the inverter and battery, ensuring an efficient solar energy system.
Recommended Products

Quick Parallel 2 Solar Panels: BougeRV 1 to 2 Y branch cable can parallel 2 solar panels. The kit includes 1 male to 2 female (M/FF) and 1 female to 2 male (F/MM) solar connectors
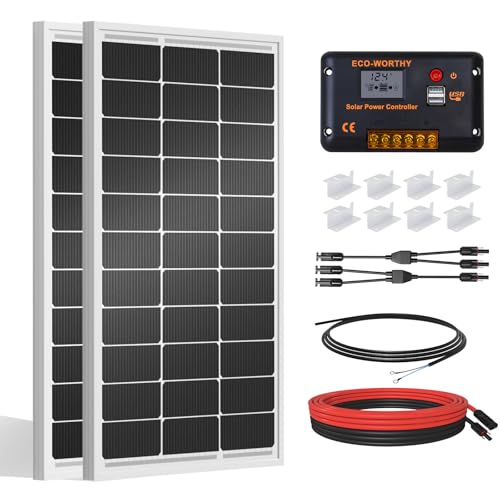
[Wide Application]: Daily Output 800wh/day under 4 hours full sunshine condition. Perfect for RV, Caravan, Marine, Camper, Electric scooter, Golf Carts, Power wheels, Trolling motor, Tool trailer, Backup power supply for cabin shed home etc.

Y Branch Parallel Connector: 1 male to 2 female and 1 female to 2 male solar connectors can connect two solar panels in parallel to provide greater power usage
Preparing Your Equipment
- Gather Tools and Materials: Collect essential tools and materials such as a wrench, wire cutters, and electrical tape. Ensure you have all required components, including solar panels, an inverter, a battery, and wiring.
- Read Manuals: Familiarize yourself with the manuals that come with your solar panel, inverter, and battery. Understanding the specifications and safety warnings is crucial for a successful installation.
- Choose a Suitable Location: Select a well-ventilated area for your battery and inverter. Avoid placing them near water or flammable materials.
Connecting the Solar Panel to the Inverter
- Identify Terminals: Locate the positive and negative terminals on both the solar panel and inverter. This step is crucial to avoid any mishaps when connecting.
- Connect Wires: Use the appropriate gauge wire to connect the positive terminal of the solar panel to the positive terminal of the inverter, and connect the negative terminal of the solar panel to the negative terminal of the inverter.
- Secure Connections: Ensure all connections are tight and properly insulated with electrical tape, minimizing any risk of short circuits.
- Locate Battery Terminals: Identify the positive and negative terminals on your battery. Safety is paramount here, so verify the battery type and voltage specifications.
- Make Connections: Connect the positive terminal of the inverter to the positive terminal of the battery, then do the same for the negative terminals.
- Double-Check Connections: Before powering on, recheck all connections. Ensure that every wire is correctly placed to prevent potential damage or hazards.
- Power Up: After confirming that everything is secure, turn on the inverter. Monitor your system to ensure it functions properly.
By adhering to these steps, you can successfully set up your solar panel, inverter, and battery for an efficient solar energy solution.
Safety Tips and Best Practices
Safety is crucial when connecting solar panels to an inverter and battery. Following some essential precautions and best practices ensures a successful installation.
Recommended Products

FUNCTIONS: Used to protect 48~500VDC OR 90~480VAC circuit from overload and short circuit damage and 12~48VDC from overload damage, and can also be used for control and isolation. Size: 54MM x 80MM x 75MM, Fit for 35mm DIN rail.

FUNCTIONS: Used to protect 48~500VDC OR 90~480VAC circuit from overload and short circuit damage and 12~48VDC from overload damage, and can also be used for control and isolation. Size: 54MM x 80MM x 75MM, Fit for 35mm DIN rail.

Heavy Duty: ABS plastic housing, durable made for safety use, rear cover insulates terminals against any short of circuits, equipped with 4 sets of bolts.
Electrical Safety Precautions
- Read Manuals: Always read the manuals that come with your solar panel, inverter, and battery. Manuals contain vital safety information and specific instructions for your equipment.
- Wear Protective Gear: Use insulated gloves and safety goggles while working with electrical components. These reduce risks of electric shock or injury.
- Check Voltage: Confirm that the voltage of your solar panels matches the inverter specifications. Mismatched voltage can cause damage to equipment.
- Use Proper Tools: Only use insulated tools when working on electrical connections. This prevents accidental shorts.
- Disconnect Power: Before making any connections, disconnect all power sources. This step minimizes the risk of electric shock.
- Avoid Wet Conditions: Ensure the installation area is dry. Working with electrical components in wet conditions increases shock hazards.
- Check Connections: Regularly inspect all connections for wear or corrosion. Loose or corroded connections can lead to system failures or safety hazards.
- Regular Inspections: Schedule periodic inspections of the solar panels, inverter, and battery. Look for dirt, damage, or signs of wear.
- Clean Solar Panels: Clean panels at least twice a year to remove debris, dirt, or snow. Clean panels operate more efficiently.
- Monitor Battery Levels: Keep an eye on battery charge levels. Ensure they maintain optimal levels to maximize battery life.
- Check Connections: Periodically examine all electrical connections to ensure they remain tight and secure. Loose connections can lead to overheating.
- Test the System: Regularly test the entire solar system, including inverters and monitors, to confirm everything operates correctly.
- Schedule Professional Maintenance: Engage a professional to perform thorough system checks annually. They can identify issues that may not be visible during regular inspections.
- Update Software: If your inverter has software, keep it updated to ensure optimal performance and efficiency.
By prioritizing safety and conducting regular maintenance, you enhance the performance and lifespan of your solar energy system.
Conclusion
Setting up your solar energy system doesn’t have to be overwhelming. By understanding the components and following the steps outlined, you’re well on your way to harnessing the power of the sun.
Remember to choose the right equipment that suits your needs and always prioritize safety during the installation process. Regular maintenance will keep your system running smoothly and efficiently.
With a bit of patience and care, you’ll enjoy the benefits of solar energy, reducing your reliance on traditional power sources while contributing to a greener planet. Happy solar powering!
Frequently Asked Questions
What are the main components of a solar energy system?
A solar energy system primarily includes solar panels, inverters, batteries, charge controllers, and mounting systems. Solar panels capture sunlight and convert it into electricity, while inverters convert this electricity into a usable form. Batteries store excess energy for later use, and charge controllers manage the flow of electricity to protect the components. Mounting systems support the panels in place, ensuring they receive maximum sunlight.
How do solar panels work?
Solar panels work through the photovoltaic effect, where they absorb sunlight and convert it into direct current (DC) electricity. This process involves semiconductor materials in the panels, which generate electrons when exposed to sunlight. The DC electricity is then converted to alternating current (AC) by inverters for use in homes and businesses.
How do I choose the right inverter for my solar system?
To choose the right inverter, consider factors such as type (string inverters, microinverters, or power optimizers), power rating, efficiency, and whether you need a grid-tied or off-grid inverter. Assess your energy needs and consult with a professional if necessary.
What type of batteries should I use for my solar energy system?
When selecting batteries, compare lead-acid and lithium-ion options. Key considerations include capacity, voltage compatibility, cycle life, and maintenance requirements. Lithium-ion batteries generally offer longer life and efficiency but may have a higher upfront cost.
Can I install solar panels, inverters, and batteries myself?
Yes, you can install solar panels and components yourself if you have the necessary tools and knowledge. However, it’s essential to carefully follow instructions, prioritize safety, and understand local regulations. For complex setups, hiring a professional is advised.
What precautions should I take when connecting solar panels?
Ensure safety by reading all manuals, wearing protective gear, and checking voltage compatibility. Always disconnect power before making connections and avoid working in wet conditions. Regular maintenance and inspections are also crucial for safe operation.
How often should I maintain my solar energy system?
Regular maintenance is recommended at least twice a year. This includes cleaning solar panels, checking connections, monitoring battery levels, and testing the entire system. Consider professional inspections yearly to ensure optimal performance and longevity of your solar energy system.
