

Have you ever thought about harnessing the sun’s energy to power your devices? Connecting a solar panel to a 12-volt battery can be a game-changer for your energy needs, whether you’re off-grid camping or simply looking to cut down on electricity bills.
Key Takeaways
- Understand Key Components: Familiarize yourself with essential elements like solar panels, charge controllers, 12-volt batteries, and inverters to create an efficient system.
- Choose the Right System Configuration: Decide between off-grid, grid-tied, or hybrid systems based on your energy needs and how you plan to use solar power.
- Follow Step-by-Step Connection Process: Ensure a proper connection by checking compatibility, securing all terminals, and attaching the charge controller before the solar panel.
- Address Insufficient Charging and Overcharging: Monitor solar panel placement, connection integrity, and battery condition to prevent insufficient charging, while using a charge controller to avoid overcharging.
- Prioritize Regular Maintenance: Clean solar panels regularly, inspect wiring for wear, monitor battery health, and adjust configurations seasonally to optimize performance and longevity.
- Gather Necessary Materials: Ensure you have the correct solar panel specifications, battery types, charge controllers, and appropriate gauge wires before starting your installation.
Overview of Solar Panel Systems
Solar panel systems consist of several key components that work together to convert sunlight into usable electrical energy. Understanding these components helps you effectively connect a solar panel to a 12-volt battery.
Key Components
- Solar Panels
Solar panels capture sunlight and convert it into electricity. They come in various sizes and wattage ratings, typically ranging from 100 to 300 watts for small systems. - Charge Controller
A charge controller regulates the flow of electricity from the solar panel to the battery. It prevents overcharging, which can damage the battery. Depending on your solar panel output, you might require a PWM (Pulse Width Modulation) or MPPT (Maximum Power Point Tracking) charge controller. - 12-Volt Battery
A 12-volt battery stores energy generated by the solar panels for later use. Lead-acid and lithium-ion batteries are common options. Each type has specific charging requirements and discharge characteristics, affecting system efficiency. - Inverter
An inverter converts direct current (DC) from the battery to alternating current (AC) for household appliances. Depending on your needs, you might opt for a pure sine wave inverter or a modified sine wave inverter.
Understanding System Configurations
You’ll encounter various system configurations when connecting solar panels to batteries. Here are a few common setups:
- Off-Grid Systems: These systems operate independently from the utility grid. They rely entirely on solar energy and battery storage.
- Grid-Tied Systems: In grid-tied installations, excess energy generated feeds back into the grid, often allowing for credits against your electric bill. These systems typically do not use batteries.
- Hybrid Systems: Combining both grid-tied and off-grid systems, hybrid setups use batteries for storage while remaining connected to the utility grid.
Practical Installation Tips
To connect a solar panel to a 12-volt battery, follow these steps:
- Check Compatibility: Ensure the solar panel’s voltage matches the battery’s ratings.
- Gather Materials: Have an appropriate charge controller, wires, and connectors ready.
- Connect the Charge Controller: Connect the battery terminals to the charge controller before attaching the solar panel. This prevents damage to the system.
- Attach the Solar Panel: Connect the solar panel to the charge controller, following the manufacturer’s instructions.
- Monitor Performance: Regularly check the charge controller display or indicator lights to ensure the system operates correctly.
Important Considerations
When setting up your solar panel system, factor in location and seasonal changes. Shade from trees or buildings can significantly reduce efficiency. Assess your energy needs beforehand to size your solar panel and battery capacity appropriately.
By understanding solar panel systems, you can optimize your setup to maximize solar energy usage and reduce dependence on traditional energy sources.
Required Materials for Connection
Connecting a solar panel to a 12-volt battery requires specific components and tools. Gathering the right materials ensures a smooth and efficient installation process.
Recommended Products

SMART SOLAR CHARGE CONTROLLER: Solar charge the smart way with the Victron Energy SmartSolar MPPT charge controller, to ensure that every ray of available sunlight is converted into usable energy, while optimizing battery longevity.

SMART SOLAR CHARGE CONTROLLER: Solar charge the smart way with the Victron Energy SmartSolar MPPT charge controller, to ensure that every ray of available sunlight is converted into usable energy, while optimizing battery longevity.

99% Tracking Technology: LiTime 30A MPPT Solar Charge Controller with advanced Maximum Power Point Tracking technology can continuously track array’s maximum power point so as to get the maximum amount of power to charge the battery. The tracking efficiency is not less than 99% and peak conversion efficiency is up to 98%.
Solar Panel Specifications
- Wattage: Ensure the solar panel has sufficient wattage. Common sizes include 100W to 300W panels, suitable for various applications.
- Voltage: Use a panel with a maximum voltage compatible with your battery. Most 12-volt systems use panels rated around 18V to account for charging.
- Type: Choose between monocrystalline or polycrystalline panels. Monocrystalline panels are typically more efficient but higher in cost.
Battery Specifications
- Type: Select a deep-cycle battery, like lead-acid or lithium-ion. Deep-cycle batteries provide a steady flow of energy and endure multiple discharge cycles.
- Capacity: Choose a battery size rated in amp-hours (Ah). A common size is 100Ah, adequate for basic off-grid applications.
- Voltage: Confirm the battery is a 12-volt unit to match the solar panel’s output capacity.
- Charge Controller: Use a charge controller to regulate voltage and current, preventing battery overcharging. A PWM or MPPT controller is ideal based on your needs.
- Cables: Obtain appropriate gauge wires for connecting the panel to the battery. Typically, 10 to 14 gauge wire is suitable for most setups.
- Connectors: Utilize MC4 connectors for solar panels and ring terminals for battery connections, ensuring secure and weatherproof links.
- Safety Gear: Have gloves and safety glasses ready to protect yourself during installation.
Gather these materials before starting the connection process for a successful solar setup.
Step-by-Step Guide
Follow these steps to successfully connect a solar panel to a 12-volt battery.
Recommended Products

✔️【Waterproof Solar Charge Controller】IP67 waterproof, suitable for outdoor use. Automatically identify voltage, 12V Max power: 150W, 24V Max power: 300W. The maximum current is 10A. Compatible with various 12V/24V deep-cycle batteries, such as AGM, GEL, Flooded. Adopting brand MCU chips to realize fast intelligent control and ultra-low standby power consumption.

【100% Efficient MPPT Charging】SOLPERK 12V MPPT solar charge controller automatically monitors the 12V DC system voltage and is 30% more efficient compared to PWM controllers, which will get your batteries fully charged faster

[100% Waterproof] The solar charge controller is built to last in any weather. It has a waterproof seal that keeps it safe from rain, snow, and dust. It’s perfect for outdoor use.
Preparing the Solar Panel
Gather all necessary materials before starting. Ensure your solar panel is clean and free of debris. Check the output voltage of the solar panel; it should match or exceed the 12 volts of your battery. Place the panel in a sunny location to maximize energy capture during installation.
Connecting Wires
Use appropriate gauge wires for connections to ensure efficiency. Typically, 10 to 14-gauge wires work well for solar setups. Connect the positive wire from the solar panel to the positive terminal of the battery. Connect the negative wire from the panel to the negative terminal. Ensure all connections are tight and secure to prevent voltage loss.
Attach the Solar Charge Controller
Attach the charge controller following the manufacturer’s instructions. Connect the positive wire from the solar panel to the positive terminal of the controller. Next, connect the negative wire from the panel to the negative terminal on the controller. Then, connect the positive and negative wires from the battery to the corresponding terminals on the controller. This device prevents overcharging and prolongs battery life.
Finalizing the Connections
Double-check all your connections. Make sure there are no exposed wires, which can lead to shorts or hazards. Once confirmed, secure the connections with electrical tape to ensure safety. Position the solar panel to optimize sunlight exposure, and your setup is ready to harness solar energy efficiently.
Troubleshooting Common Issues
Even with careful installation, issues may arise when connecting a solar panel to a 12-volt battery. Here are solutions to common problems you might encounter.
Recommended Products

【High Conversion Rate】This 20W solar panel with monocrystalline A+ solar cell has an excellent cell efficiency of 21%-30%. Designed to charge and maintain 12V rechargeable batteries like LiFePO₄, Lithium Ion, AGM, SLA, GEL, EFB, MF, etc. Keep batteries in charged for trailer, tractor, truck, boat, motorcycle, RV, car, lawn mower, water pump, gate opener, electric fence, etc
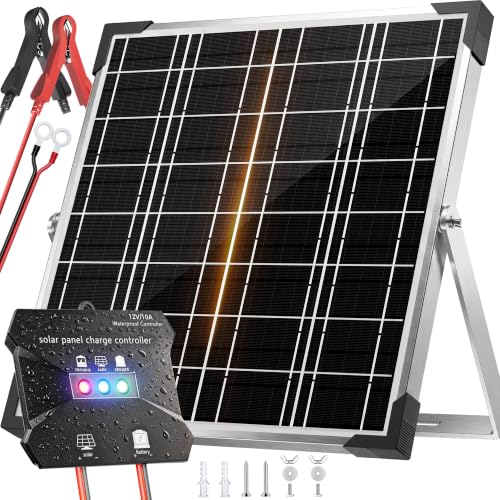
High-Efficiency MPPT Solar Charger - Advanced tracking technology delivers 20-30% faster charging for 12V batteries. A+ monocrystalline panels maximize power conversion. Perfect 20W solar trickle charger for cars, RVs, boats, and trailers. More sun captured, less time waiting.
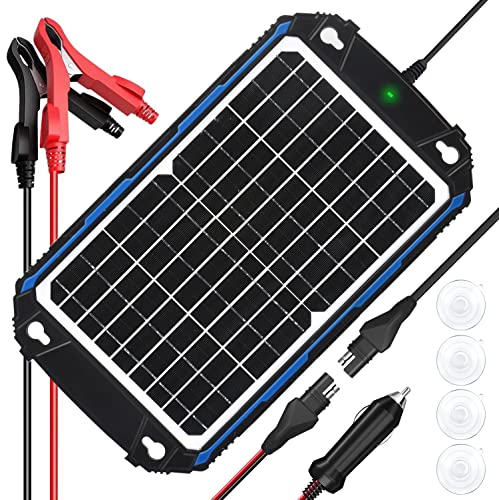
【Ultra-Smart MPPT Technology】This 12v solar panel battery charger is crafted with SUNER POWER's unique Ultra-Smart MPPT( Max Power Point Tracking) technology, the innovative MPPT allows to deliver high tracking efficiency of up to 99% and peak conversion efficiency of 98%, improving approximately 20%-30% utilization rate than other competitors
Insufficient Charging
Insufficient charging can stem from various factors. Check the following:
- Solar Panel Placement: Ensure your panel has direct sunlight for most of the day. Shade from trees, buildings, or debris can reduce output.
- Wiring Connections: Inspect all connections for tightness and proper contact. Loose or corroded connections impede current flow.
- Panel Specifications: Verify that the solar panel’s wattage meets or exceeds the battery’s charging requirements. Check the voltage rating to ensure compatibility.
- Battery Condition: Test your battery’s health. A battery with a damaged cell may not charge properly, affecting overall performance.
Overcharging Concerns
Overcharging can damage your 12-volt battery, leading to reduced lifespan or even failure. To prevent this, pay attention to these aspects:
- Charge Controller Use: Always include a charge controller in your setup. It prevents overcharging by regulating current flow to the battery and disconnects the solar panel when the battery reaches full charge.
- Monitor Voltage Levels: Regularly check the battery voltage with a multimeter. A voltage reading above 14.4 volts typically indicates overcharging.
- Battery Type Considerations: Know the type of battery you’re using. Some batteries, such as lithium, require specific charging profiles. Ensure your charge controller matches these requirements.
By addressing these common issues promptly, you’ll maintain a healthy solar setup and maximize the efficiency of your system.
Maintenance Tips for Longevity
Maintaining your solar panel system ensures efficiency and longevity. Follow these essential tips for optimal performance.
Regular Cleaning
- Clean solar panels: Dust, dirt, and debris can block sunlight. Use a soft cloth or sponge with water to clean them.
- Check for shade: Trim nearby trees or plants that cast shadows on the panels. More sunlight means better output.
Inspect Connections
- Check wiring regularly: Look for signs of wear or damage on cables and connectors. Replace any frayed wires immediately to avoid complications.
- Ensure tight connections: Loose connections can lead to power loss. Tighten connections at both the battery and solar panel ends.
Monitor Battery Health
- Inspect battery fluid levels: If using a flooded lead-acid battery, check the electrolyte levels. Top up with distilled water if necessary.
- Test battery voltage: Use a multimeter to check voltage. A fully charged 12-volt battery should read between 12.6 to 12.8 volts.
Optimize Charge Controller Settings
- Set correct battery type: Ensure your charge controller matches your battery type (e.g., lithium or AGM). This prevents overcharging and extends battery life.
- Monitor settings regularly: Check settings monthly to ensure they remain accurate for your system’s needs.
Seasonal Adjustments
- Adjust panel angle: In winter, tilt panels towards the sun to maximize exposure. In summer, a flatter angle may be more efficient.
- Store during extreme weather: If facing severe storms or heavy snowfall, consider temporarily removing the solar panel.
- Keep a maintenance log: Track cleaning dates, inspections, and performance readings. This helps identify patterns and potential issues early.
- Review energy output: Regularly compare expected output with actual performance. Significant differences may indicate a problem.
Incorporating these maintenance tips enhances the efficiency and lifespan of your solar panel system, ensuring you get the most from your investment.
Conclusion
Connecting a solar panel to a 12-volt battery can be a rewarding experience that opens up a world of energy independence. With the right components and a little know-how you can harness the sun’s power for your off-grid adventures or to cut down on energy costs at home.
Remember to keep safety in mind during installation and maintenance. Regular checks and adjustments will help you get the most out of your solar setup. So go ahead and enjoy the benefits of clean energy while contributing to a sustainable future. Your journey into solar power starts now!
Frequently Asked Questions
What are the benefits of using solar energy for powering devices?
Solar energy is renewable, reduces electricity costs, and is particularly useful for off-grid situations like camping. By connecting a solar panel to a 12-volt battery, you can harness sunlight to power various devices without relying on traditional energy sources.
What components are needed to connect a solar panel to a 12-volt battery?
You will need a solar panel, a charge controller, a 12-volt deep-cycle battery, appropriate gauge cables (10 to 14-gauge), and secure connectors. Additionally, having safety gear for installation is crucial to protect yourself during the setup process.
How do I install a solar panel to a 12-volt battery?
Begin by positioning the solar panel in a sunny location and ensuring it’s clean. Check voltage compatibility, connect wires securely to the battery and charge controller, and double-check all connections for safety. Use electrical tape to secure connections if needed.
What troubleshooting steps should I take if my solar panel isn’t charging my battery?
First, verify that the solar panel is positioned correctly and receiving adequate sunlight. Check all wiring connections for any loose or damaged wires. Also, ensure the panel specifications match the battery requirements and assess the battery’s overall condition.
How can I maintain my solar panel system for long-term efficiency?
Regularly clean the solar panels to remove dust, inspect wiring for wear, and monitor the battery’s health. Adjust charge controller settings based on battery type and seasonally optimize panel angles for maximum sunlight. Keeping a maintenance log can help track performance.
