
Ever found yourself in the middle of a thrilling movie night, only to have your Samsung smart remote suddenly run out of juice? Frustrating, right? Well, worry no more! In this article, we’ll show you the quick and easy steps to change the batteries on your Samsung smart remote.
Imagine effortlessly swapping out those old batteries with fresh ones in a matter of minutes, all without missing a single moment of your favorite show. With our simple guide, you’ll be back to controlling your TV with ease in no time.
Gather the Necessary Tools
To successfully change the batteries on your Samsung smart remote, you’ll need a few key tools to make the process quick and hassle-free:
- Fresh batteries: Ensure you have the correct type and size required for your Samsung smart remote.
- A small screwdriver: This will be essential for accessing the battery compartment securely.
- A clean cloth or tissue: Helpful for any unexpected dirt or debris when handling the remote.
Remember to have these tools ready before you begin the battery replacement process, so you can complete the task smoothly.
Identify the Battery Compartment
When changing batteries on your Samsung smart remote, the first step is to locate the battery compartment. Here’s how to identify it:
- Look for a small panel on the back of the remote.
- Some remotes have a slide-out compartment, while others might have a flip-open cover.
- The battery compartment is usually located at the bottom or back of the remote.
Once you’ve found the battery compartment, you’re ready to proceed with replacing the batteries in your Samsung smart remote.
Remove the Old Batteries
When it’s time to change the batteries on your Samsung smart remote, replacing the old batteries correctly is essential for the remote to work efficiently. Here’s a simple guide on how to remove the old batteries:
- Locate the battery compartment on the back of your Samsung smart remote.
- Open the compartment cover. This may involve sliding the cover off or flipping it open, depending on the remote model.
- Identify the old batteries inside the compartment. They are usually AA or AAA batteries.
- Remove the Old Batteries from their slots by gently pushing them out or by using a small tool if needed.
Remember to handle the old batteries with care and dispose of them properly according to local regulations.
Insert the New Batteries
Now that you’ve removed the old batteries from your Samsung smart remote, it’s time to Insert the New Batteries. Follow these simple steps to power up your remote again:
- Grab the fresh AA or AAA batteries you’ve prepared for the replacement.
- Check for the polarity markings (usually plus and minus signs) inside the battery compartment.
- Align the new batteries according to the polarity indicators and insert them into the compartment.
- Ensure the batteries are firmly seated and then close the cover securely.
Remember, proper installation of the new batteries is crucial for your remote to function effectively.
Recommended Products


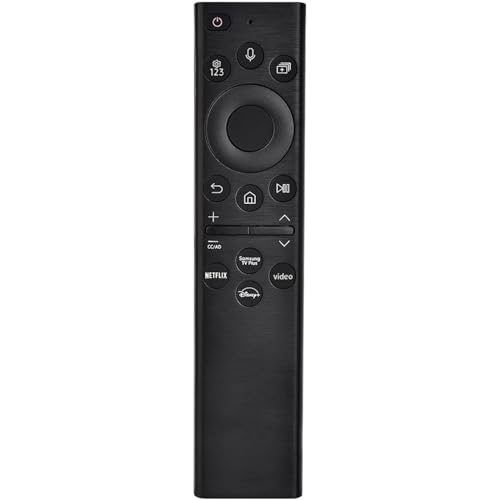
New AA59-00443A Replaced Remote, No programming required; Just need install new battery to use;

Compatible with: UN65TU7000FXZA UN75TU7000FXZA UN55TU700DFXZA UN55TU7000FXZA UN70TU7000FXZA UN82TU700DFXZA UN58TU7000FXZA UN75TU700DFXZA UN50TU7000FXZA UN43TU7000FXZA UN82TU7000FXZA UN70TU6985FXZA UN60TU7000FXZA UN70TU7000BXZA UN85TU7000FXZA UN65TU7000BXZA UN50TU7000BXZA UN43TU7000BXZA UN55TU7000BXZA
Test the Remote
After inserting new batteries into your Samsung smart remote, it’s essential to test if it’s functioning properly. Here are a few steps to ensure everything is in working order:
- Check Functionality: Press various buttons on the remote to see if they are responsive.
- Test Range: Move around the room and test the remote’s range to ensure it’s working from different positions.
- Verify Settings: Ensure that the remote is properly synced with your TV and that it’s controlling all intended functions.
If you encounter any issues during testing, try the following troubleshooting tips:
- Recheck Battery Orientation: Make sure the batteries are correctly inserted following the polarity markings.
- Clean Battery Contacts: Wipe the battery contacts and the compartment with a dry cloth to remove any dust or dirt.
- Replace Batteries: If problems persist, try replacing the batteries with a new set to rule out any power-related issues.
Recommended Products

【Universal Remote for Samsung TVs】Compatible with Samsung Crystal UHD, CU7000/DU7200, Neo QLED, QLED, OLED, Curved, Frame Smart TV Models — A replacement remote for all original Samsung TV remotes (Note: The Disney+ button on this remote may not function with TV models manufactured before 2022.)
【Broad Compatibility】 This premium remote is designed for all 2019–2026 Samsung TVs that support voice control. If your Samsung TV does not support voice control, that feature on this remote may not work.

【Package lncluded】 Pack of 2 remote. Two-pack remote control can solve your home backup remote control needs. Infrared remote no pairing or programming needed. Just Insert 2 Pcs*AAA batteries to get it work(Batteries and manual are not included)
Conclusion
That’s it! Remember to test your Samsung smart remote after changing the batteries. Try different buttons, check the range, and verify settings for proper synchronization with your TV. If you encounter any issues, double-check the battery orientation, clean the contacts, and replace the batteries if needed. Testing the remote’s performance is key to ensuring it works smoothly. Enjoy using your Samsung smart remote hassle-free!
Frequently Asked Questions
Why is it important to test the Samsung smart remote after inserting new batteries?
It is crucial to test the Samsung smart remote after inserting new batteries to ensure proper functionality. Testing helps verify that the remote operates correctly, the battery installation is correct, and the settings are synchronized with the TV.
What should I do to test the Samsung smart remote after replacing batteries?
To test the Samsung smart remote after replacing batteries, press various buttons to check responsiveness, test the range from different positions in the room, and verify that the remote settings are synchronized with the TV settings.
How can I troubleshoot if the Samsung smart remote is not working after inserting new batteries?
If the Samsung smart remote is not working after inserting new batteries, troubleshoot by rechecking the battery orientation, cleaning battery contacts and compartment, and replacing batteries to rule out power-related issues. Testing the remote’s performance is essential for troubleshooting.