

Key Takeaways
- Understand Battery Types: Familiarize yourself with the different Sony Handycam batteries, including Lithium-Ion (Li-ion), Nickel-Metal Hydride (NiMH), and integrated batteries, to optimize performance.
- Check Compatibility: Always verify the compatibility of the battery model with your camcorder, taking into account specifications like voltage and capacity for optimal usage.
- Charging Methods: Learn the two primary charging methods—using an AC adapter and USB charging—each with straightforward steps to ensure a hassle-free process.
- Follow Step-by-Step Instructions: Use the provided step-by-step guide for charging your Sony Handycam battery, ensuring correct procedures to prevent damage and enhance battery life.
- Troubleshoot Common Issues: Recognize and address common charging problems, such as connection issues or battery health, to maintain reliable performance.
- Ensure Safe Charging Practices: Monitor charging duration and provide adequate ventilation to avoid overheating, ensuring both the battery and camcorder remain functional and safe during use.
Ever found yourself with a dead Sony Handycam battery just when you’re about to capture that perfect moment? You’re not alone. Many people struggle with charging their camcorder batteries efficiently, often feeling frustrated when they can’t figure it out.
This article will guide you through the simple steps to charge your Sony Handycam battery properly. You’ll learn the best practices to ensure your battery lasts longer, so you can focus on what really matters—making memories. Whether you’re a seasoned videographer or a casual user, you’ll find valuable tips that make the charging process a breeze.
Understanding Sony Handycam Batteries
Sony Handycam batteries come in various types and formats. Understanding their characteristics helps ensure optimal performance while capturing your memories.
Types of Sony Handycam Batteries
- Lithium-Ion (Li-ion): Common in most Handycam models. Li-ion batteries offer long-lasting power and quick charging capabilities.
- Nickel-Metal Hydride (NiMH): Found in some older models. While less common today, these batteries work well but have a shorter lifespan and longer charging times.
- Integrated Batteries: Some Modern Handycam models feature integrated batteries. They charge directly through the device and eliminate the need for separate battery management.
Battery Specifications and Compatibility
- Voltage: Most Sony Handycam batteries operate between 7.2V and 8.4V. Using compatible voltages ensures optimal performance.
- Capacity (mAh): Measured in milliamp hours (mAh), indicating the battery’s energy storage. Higher capacity means longer recording time. For example, a 2000mAh battery may provide more recording time than a 1500mAh battery.
- Model Compatibility: Always check your camcorder’s required battery model. Using the wrong battery can lead to performance issues. Refer to your user manual for specific battery requirements.
Charging Methods for Sony Handycam Batteries
Charging your Sony Handycam battery is straightforward, thanks to several methods available. Each method has unique steps and benefits to consider.
Recommended Products

Battery Type: Lithium-Ion; Battery Voltage: 7.4V; Battery Capacity: 1200mAh.

★【Wide Compatiblility】Fully Compatible with Sony CCD-TRV106 CCD-TRV108 CCD-TRV116 CCD-TRV118 CCD-TRV126 CCD-TRV128 CCD-TRV138 CCD-TRV150 CCD-TRV208 CCD-TRV218 CCD-TRV228 CCD-TRV250 CCD-TRV308 CCD-TRV318 CCD-TRV328 CCD-TRV338 CCD-TRV350 CCD-TRV408 CCD-TRV418 CCD-TRV428 CCD-TRV438 CCD-TRV608 CCD-TRV730 CCD-TRV740 CCD-TRV748

[AC-L200 USB Charger Cord: ] The compact AC-L200 USB Cord ac dc power supply adapter replacement to original Sony handycam Charger AC-L200 AC-L200C L200D AC-L25 AC-L25A AC-L25B AC-L25C adapter. Provides continuous power for extended video shoots,Ideal for use while transferring video footage to a computer.
Using the AC Adapter
- Locate the AC adapter compatible with your Handycam model.
- Connect the adapter to a wall outlet. Make sure it’s securely plugged in for optimal power supply.
- Insert the battery into the camcorder. Ensure it clicks into place.
- Plug the adapter into the camcorder. A light indicator on the camcorder may illuminate, signaling that charging has started.
- Wait for the indicator light to change to green or turn off once charging completes. This process typically takes 1 to 5 hours, depending on battery size.
Charging via USB
- Use a USB cable compatible with your Handycam model. A standard USB cable usually fits this purpose.
- Connect the USB cable to your camcorder and plug the other end into a USB port on a laptop, desktop, or compatible power bank.
- Verify that the USB connection provides power. Check for a charging indicator on the Handycam.
- Monitor the charging status. It can take several hours, similar to using an AC adapter, depending on battery capacity and device specifications.
By following these methods, you can efficiently charge your Sony Handycam battery and ensure it’s ready for use.
Step-by-Step Guide: How Do You Charge a Sony Handycam Battery?
Charging a Sony Handycam battery involves simple, effective steps. Follow these instructions to ensure your battery is ready for use.
Preparing the Battery for Charging
- Power Off the Handycam: Always turn off your camcorder before removing the battery. This prevents potential damage and ensures accurate charging.
- Remove the Battery: Locate the battery latch on the camcorder. Press or slide the latch to release the battery and carefully take it out.
- Inspect the Battery: Check the battery’s contacts for dirt or corrosion. Clean with a soft cloth if necessary to ensure a good connection during charging.
Connecting and Starting the Charge
- Use the Correct Charger: Identify if you’re using an AC adapter or USB cable. Match the charger to your battery type.
- Connect the Charger: For an AC adapter, plug it into a wall outlet. If using a USB cable, connect it to a USB power source like a computer or a wall adapter.
- Insert the Battery: For the AC adapter method, insert the battery back into the Handycam. For USB charging, you may need to keep the battery in the charging case, depending on the model.
- Check the Indicator Light: Look for the charging indicator light on the Handycam or charger. A blinking light often signals charging, while a steady light indicates a full charge.
- Monitor the Charging Time: Charging typically takes 2 to 4 hours, depending on the battery’s capacity. Refer to your camcorder’s manual for specific time recommendations.
By following these steps, you can ensure your Sony Handycam battery is charged correctly and ready for use.
Common Issues and Troubleshooting
Charging a Sony Handycam battery can sometimes lead to common issues. Understanding these problems allows you to resolve them quickly and ensure your camcorder is ready to capture moments.
Recommended Products

Battery Type: Lithium-Ion; Battery Voltage: 7.4V; Battery Capacity: 1200mAh

[AC-L200 Charger for Sony Handycam Camcorder Replaces: ] This compact AC-L200 charger power adapter is the perfect replacement for original Sony charger models: AC-L200 AC-L200B AC-L200C AC-L200D AC-L20A AC-L20B AC-L25 AC-L25A AC-L25B AC-L25C. It provides continuous, stable power, making it ideal for extended video recording sessions or transferring footage to your computer without draining the battery.
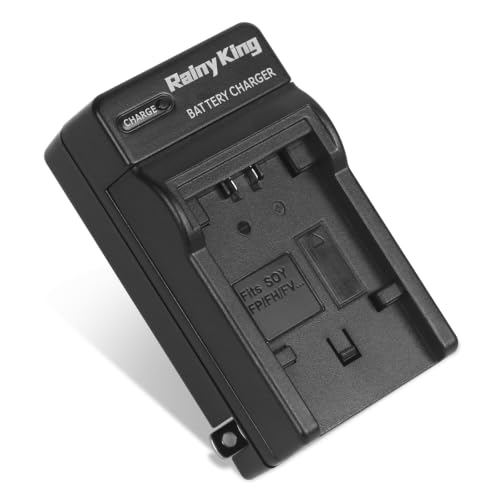
[Important:]Please check the label on your battery to make sure your battery code (not camera model) is one of these models: NP-FH50, NP-FP30, NP-FP40, NP-FP50, NP-FP60, NP-FP70, NP-FP90, NP-FH30, NP-FH40, NP-FH60, NP-FH70, NP-FH100, NP-FV30, NP-FV40, NP-FV50, NP-FV60, NP-FV70, NP-FV100, NP-FV120. If it is, this charger can charge your battery. If not, please contact us to confirm before purchasing.
Battery Not Charging
If your Handycam battery isn’t charging, check the following:
- Connection Issues: Ensure the charger connects firmly to both the camcorder and power source. Look for any signs of wear or damage.
- Battery Placement: Make sure the battery fits correctly in the camcorder or charging dock. Misalignment can prevent charging.
- Charger Compatibility: Confirm you’re using the correct charger for your battery model. Using an incompatible charger might block the charging process.
- Battery Health: Check if the battery is old or damaged. Batteries degrade over time, impacting their ability to hold a charge. If your battery is more than a few years old, consider replacing it.
- Indicator Light: Pay attention to the charging indicator light. A solid or blinking light usually indicates a charging issue.
Overheating Problems
Overheating can occur while charging or using your Handycam. To manage this issue:
- Ventilation: Ensure proper airflow around the camcorder. Charge your Handycam in a well-ventilated area to avoid heat buildup.
- Charging Duration: Avoid overcharging the battery. Once fully charged, disconnect it from the power source to prevent excess heat.
- Usage Period: Limit extended recording sessions, as long usage can heat up both the battery and the camcorder. Rest the device periodically to cool down.
- Room Temperature: Charge the battery at room temperature, ideally between 50°F and 86°F (10°C and 30°C). Extreme temperatures can affect battery performance.
By addressing these common issues, you can ensure your Sony Handycam battery charges effectively and operates smoothly during use.
Conclusion
Charging your Sony Handycam battery doesn’t have to be a hassle. By following the simple steps outlined and keeping an eye on those important details like battery placement and compatibility, you can ensure your camcorder is always ready for action.
Remember to check the charging indicator light and give your battery the time it needs to recharge fully. With a little care and attention, you’ll keep your Handycam running smoothly and capture those special moments without a hitch. Enjoy your filming adventures and happy shooting!
Frequently Asked Questions
How do I charge my Sony Handycam battery?
To charge your Sony Handycam battery, use either an AC adapter or a USB connection. For the AC adapter, connect it to a wall outlet, insert the battery into the camcorder, and check the charging indicator light. Alternatively, use a compatible USB cable, connect it to the Handycam, and monitor the charging status.
What types of batteries are used in Sony Handycams?
Sony Handycams typically use Lithium-Ion (Li-ion), Nickel-Metal Hydride (NiMH), and integrated batteries. Li-ion batteries are common for their lightweight design and long life, while NiMH has good capacity. Integrated batteries come built-in and offer limited options for replacement.
How long does it take to charge a Sony Handycam battery?
Charging a Sony Handycam battery usually takes between 2 to 4 hours, depending on the battery’s capacity and the charging method used. Always monitor the charging indicator light to know when your battery is fully charged.
What should I do if my battery isn’t charging?
If your battery isn’t charging, check for loose connections, ensure it’s placed correctly in the charger, and verify that the charger is compatible. Also, inspect the battery for health and check for dirt or corrosion that might obstruct charging.
How can I extend the life of my Sony Handycam battery?
To extend your Sony Handycam battery life, store it in a cool, dry place, avoid overcharging, and limit usage under extreme temperatures. Regularly practice charging and discharging the battery and keep the contacts clean to maximize performance.
What are some common battery issues with Sony Handycams?
Common issues include the battery not charging due to connection problems, overheating, and reduced performance over time. To troubleshoot, ensure proper ventilation during charging, avoid overuse, and routinely check for any signs of damage or wear.
