

Key Takeaways
- Understanding Battery Importance: Samsung phone batteries are crucial for performance; knowing how to manage them can help troubleshoot and extend their lifespan.
- Preparation is Key: Before removing the battery, gather necessary tools like screwdrivers and a plastic pry tool, and follow safety precautions to protect your device.
- Follow a Step-by-Step Process: Power off your device, remove the back cover carefully, and gently lift out the battery to ensure a safe removal.
- Handle Common Issues: Be aware of potential issues like a reluctant battery removal, swelling, or overheating which may indicate the need for a replacement.
- Maintain Your Battery: Regular maintenance, including avoiding extreme temperatures and wise charging practices, can significantly enhance battery health and longevity.
Have you ever found yourself in a situation where your Samsung phone just won’t turn on or runs out of juice too quickly? You’re not alone. Many people face issues that can often be resolved by simply removing and reinserting the battery.
In this article, you’ll learn the step-by-step process to safely remove the battery from your Samsung phone. Whether you’re looking to troubleshoot a problem or replace an old battery, this guide will make it easy for you. By the end, you’ll feel confident tackling this task and getting your phone back in working order.
Understanding Your Samsung Phone Battery
Samsung phone batteries play a vital role in maintaining your device’s performance. Knowing their features and functionalities helps you manage battery issues effectively.
Battery Types
Samsung phones typically use lithium-ion cells. These batteries offer:
- Higher Energy Density: They store more energy, allowing for longer use between charges.
- Low Self-Discharge Rates: They retain charges better when not in use.
Battery Life
Battery life depends on various factors, including usage patterns, apps running in the background, and brightness settings. Monitoring these aspects can extend your battery’s lifespan.
Common Battery Troubles
You may encounter common issues such as:
- Fast Drain: Usage of high-demand apps drains the battery quickly.
- Overheating: Continuous charging or heavy usage can lead to overheating.
Maintenance Tips
To keep your battery in good condition, consider these maintenance tips:
- Avoid Extreme Temperatures: Keep your phone in a moderate environment.
- Charge Wisely: Use the recommended charger and avoid overcharging.
Recognizing When to Replace
You might need a replacement if you notice:
- Swelling: A swollen battery can be dangerous.
- Frequent Shutdowns: If your phone turns off despite having a charge.
Being aware of your Samsung phone battery’s features and potential issues enables you to handle problems proactively and efficiently.
Preparing to Remove the Battery
Before removing the battery from your Samsung phone, ensure you’re fully prepared. Gathering the necessary tools and following safety precautions makes the process smoother.
Recommended Products
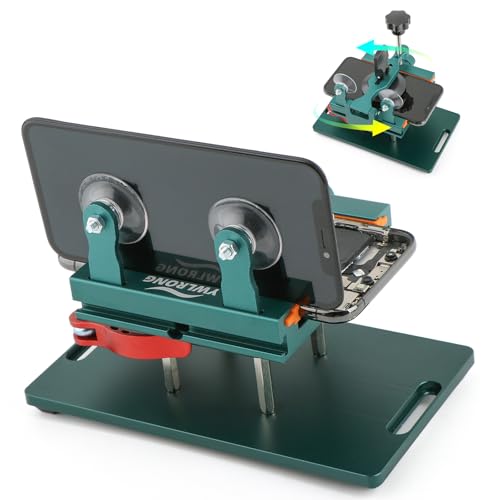
Compatible Model: Please check the product video to confirm how to use. The fixing clamp of phone screen removal tools, which compatible with iPhone 12, for iPhone 12 Pro, for iPhone 12 Pro Max, for iPhone 11, for iPhone 11 Pro, for iPhone 11 Pro Max, for iPhone 13/13 Pro/13 Pro Max, for iPhone 14,for iPhone 8, 8 Plus, SE, X, XS, XS MAX for Samsung S21/S21 Ultra/S21 Plus/S21,/S20 Plus/Samsung S20 Ultra. etc.

HIGH QUALITY: Thin flexible steel blade easily slips between the tightest gaps and corners.

✔ Compatible With: Samsung Galaxy S7 S8 S8 Plus S9 S9 Plus S10,S10 Plus,S20,S20+,S20 Ultra ,S21,S21 Plus,S21 Ultra,Galaxy S22,S22 Plus,S22 Ultra,S23,S23 Ultra,Galaxy S24 Ultra,Galaxy S25 S25 Ultra,S25 Edge,Note8, Note 9,Note 10,Note 10 Plus,Note 20,Note 20 Ultra,Galaxy Z Flip 2 3 4 5 ,Galaxy Z Fold 2 3 4 5 6 7 Galaxy Tab S7 S8 S9 S10 S11Series and other Samsung Galaxy Models
Necessary Tools
- Screwdriver Set: A small Phillips screwdriver to open the phone casing.
- Plastic Pry Tool: This helps separate the screen from the back cover without causing damage.
- Tweezers: Useful for handling small components.
- Small Container: Keeps screws and small parts organized.
Gather these tools to streamline the battery removal process.
Safety Precautions
- Turn Off the Phone: Always power down your device before starting.
- Discharge the Battery: If possible, let the battery drain below 25% to reduce the risk of short-circuiting.
- Work in a Clean Area: Clear your workspace of clutter to avoid misplacing components.
- Avoid Static Electricity: Ground yourself to prevent damage to the phone’s internals from static shock.
Following these precautions protects both you and your device during the battery removal process.
Step-by-Step Guide to Remove the Battery
Removing the battery from your Samsung phone can seem daunting, but following these steps makes the process straightforward and safe.
Recommended Products
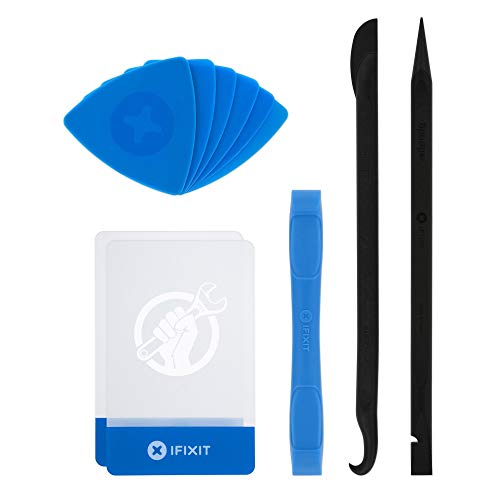
EFFECTIVE: Open your tech device and safely remove components with ease. Essential for DIY repairs like displays, batteries, motherboards, headphone jacks, joysticks, and more.

Professional Tools: Showpin's 3-in-1 iopener includes LCD and double-headed screen opening tool plus a cleaning cloth. Suitable for mobile phones, iPads, and other mobile devices, facilitating the easy removal or replacement of the LCD screen and battery.

High Quality & Super Suction-- Screen suction cup is made of durable ABS and natural rubber materials, and has a long service life. The suction cup has a lifting capacity of 1-2 kg , which can help you open the phone screen.
Powering Off Your Device
First, ensure you power off your device. Press and hold the power button until you see the options appear on the screen. Tap “Power off” and confirm your choice. This step prevents any damage during battery removal.
Accessing the Battery Compartment
Next, prepare to access the battery compartment. Use a small screwdriver, usually a Phillips head, to remove the screws around the back cover. Place the screws in a small container to avoid losing them. Then, insert a plastic pry tool or your fingernail into the gap and gently slide it along the edge to lift the cover. Avoid using excessive force, which could break the clips.
Removing the Battery
It’s time to remove the battery. If the battery has a pull tab, gently pull it to lift the battery from its compartment. If not, carefully use tweezers to grasp the edge of the battery. Lift straight up without twisting to prevent damage. Once removed, store the battery in a safe place if you’re not replacing it immediately.
Following these steps ensures a successful battery removal, allowing you to address any issues your device may have.
Troubleshooting Common Issues
When facing battery removal problems, understanding common issues can help you resolve them swiftly.
Battery Not Coming Out
If the battery doesn’t come out easily, check for any attached pull tabs. These tabs aid in removal and must be handled gently. Clean the battery area with a dry cloth to remove dust or debris that could hinder removal. If necessary, use a plastic pry tool to gently push against the edges of the battery. Avoid metal tools to prevent damage. If the battery still doesn’t budge, apply slight heat to the back of the phone using a hairdryer on a low setting to soften the adhesive. Always ensure the phone is completely powered off before attempting these steps.
Other Related Problems
You may encounter various issues related to battery removal. If the phone shows signs of swelling, remove the battery immediately and discontinue use of the device. For frequent shutdowns, it could indicate a faulty battery rather than a removal issue. Ensure your device is clean to prevent interference with battery contacts. If experiencing excessive heat, allow your phone to cool down and avoid using it until it reaches a safer temperature. Troubleshooting these common problems can help maintain your phone’s functionality and prolong battery life.
Conclusion
Removing the battery from your Samsung phone can seem daunting but with the right steps you can tackle it confidently. Whether you’re troubleshooting issues or planning a battery replacement knowing how to do it safely is key.
By following the guide you’ve learned about the tools needed and the precautions to take. Remember to keep an eye on your battery’s health and recognize when it’s time for a change.
With this knowledge you’re now equipped to handle battery-related challenges and keep your device running smoothly. Happy troubleshooting!
Frequently Asked Questions
What should I do if my Samsung phone won’t turn on?
If your Samsung phone won’t turn on, try a soft reset by holding the power button for about 10 seconds. If that doesn’t work, ensure the battery is charged. If the issue persists, consider removing and reinserting the battery, following proper safety precautions as outlined in the guide.
How can I troubleshoot battery drainage issues on my Samsung phone?
To troubleshoot battery drainage, first examine your usage patterns and close any background apps. Check if any apps are consuming excessive power in your settings. Regular maintenance, like avoiding extreme temperatures and charging wisely, can also help extend battery life.
What are the signs that I need to replace my Samsung phone battery?
Signs you need to replace your Samsung phone battery are frequent shutdowns, battery swelling, or the phone overheating. Also, if your phone struggles to hold a charge or takes an unusually long time to charge, it may be time for a new battery.
What tools do I need to remove the battery safely?
To safely remove the battery from your Samsung phone, gather a screwdriver set, plastic pry tool, tweezers, and a small container for screws. These tools will help you access the battery compartment without damaging your device.
How do I remove and reinsert my Samsung phone battery?
To remove and reinsert the battery, first power off your device. Use a screwdriver to remove screws from the back cover, then gently pry it open. Locate the battery and, if there’s a pull tab, use it to lift the battery out. To reinsert, align the battery properly and press it back into place before replacing the cover.
