
Close Menu
Battery Spotlight
    Battery Spotlight
    • Home
    • Phone Batteries
    • Laptop Batteries
    • Car Batteries
      • Golf Cart Batteries
    • Battery Info
      • Battery Chargers
      • Battery Life
      • Battery Maintenance
      • Marine Batteries
      • Rechargeable Batteries
      • Solar Batteries
    • About Us
      • Contact
    Battery Spotlight
    Navigation: Home » Laptop Batteries » How to Remove and Reassemble Your Laptop Battery Correctly
    Laptop Batteries

    How to Remove and Reassemble Your Laptop Battery Correctly

    Jackson DoyleBy Jackson DoyleMay 15, 20245 Mins Read
    Share Facebook Twitter Pinterest LinkedIn Tumblr Email WhatsApp Copy Link
    Share
    Facebook Twitter LinkedIn Pinterest Email Copy Link

    Ever found yourself struggling to remove your laptop battery when it’s time for a replacement or a quick reset? It’s a common dilemma that many laptop users face. But fret not, as in this article, you’ll discover the simple steps to safely and easily take off your laptop battery.

    Table of Contents

    Toggle
    • Prepare Your Workspace
    • Power Down Your Laptop
    • Locate the Battery Release Latch
    • Remove the Battery
    • Reassemble Your Laptop
    • 1. Insert the Battery:
    • 2. Secure the Battery:
    • 3. Close the Battery Compartment:
    • Conclusion
    • Frequently Asked Questions
    • Why is it important to reassemble a laptop carefully after removing the battery?
    • What are the key steps to reassembling a laptop after removing the battery?
    • What should you do if you encounter any issues during the reassembly process?

    Imagine the convenience of being able to swiftly swap out your laptop battery without any hassle. No more wrestling with your device or worrying about damaging it in the process. By learning the proper technique for removing your laptop battery, you’ll save time and effort while ensuring the longevity of your device.

    Prepare Your Workspace

    Setting the right workspace can make removing your laptop battery a breeze. Here’s how you can get started:

    • Turn off your laptop: Ensure your laptop is powered off before proceeding.
    • Find a clean, flat surface: Pick a stable surface with ample lighting.
    • Gather the necessary tools: You’ll typically need a screwdriver or a simple tool kit.
    • Static-free environment: Avoid static-prone areas to prevent damaging sensitive components.

    Remember, a well-prepared workspace sets the stage for a successful battery removal process.

    Power Down Your Laptop

    When it’s time to remove your laptop battery, the first step is powering down your device properly. Here’s how to do it effectively:

    • Save Your Work: Ensure all your files are saved to prevent any data loss.
    • Close Applications: Shut down all open programs to avoid any potential conflicts during the power-down process.
    • Shut Down Properly: Click on the “Shut Down” option in your operating system to turn off your laptop safely.
    • Disconnect Power Sources: Unplug your laptop from any power source to avoid electric shocks during the battery removal process.
    • Wait a Few Minutes: Allow your laptop to cool down for a few minutes before proceeding to remove the battery.
    SEE ALSO  How Long Do Sony Headphones' Batteries Last? A Complete Guide

    Adequately shutting down your laptop is crucial to prevent any damage to your device and ensure a smooth battery removal process.

    Locate the Battery Release Latch

    When removing a laptop battery, the first step is to find the battery release latch. This latch is typically located on the bottom of the laptop. Look for a switch or sliding mechanism that secures the battery in place.

    Here are a few tips to help you locate the battery release latch with ease:

    • Check the bottom of your laptop for a compartment specifically designed to house the battery.
    • Look for any icons or markings that indicate the location of the battery release latch.
    • Refer to your laptop’s user manual for detailed instructions on identifying the battery release latch.

    Once you have located the battery release latch, you’re ready to proceed with the next steps in removing the laptop battery.

    Remove the Battery

    When it’s time to remove the battery from your laptop, follow these simple steps:

    • Find the Battery Release Latch: Look for a small switch or button usually located on the bottom of your laptop. It might be marked with icons like a battery or lock symbol.
    • Slide or Press the Latch: Use your fingers to slide or press the latch in the unlock position. Some laptops have a designated compartment for the battery release.
    • Remove the Battery: After releasing the latch, gently lift the battery out of its slot. Be sure to handle it carefully and avoid pulling forcefully.
    • Check the User Manual: If you’re unsure about the battery removal process for your specific laptop model, refer to the user manual for detailed instructions.
    • Safety First: Remember to power off your laptop and disconnect it from any power source before removing the battery. This simple precaution can prevent damage to both the device and yourself.

    Important Note
    Always handle the battery with care to avoid damaging it. If you encounter any resistance during the removal process, stop and seek professional assistance to prevent any potential harm.
    SEE ALSO  How to Calibrate and Update Your Laptop Battery for Longevity and Accuracy

    Recommended Products

    iFixit Jimmy - Ultimate Electronics Prying & Opening Tool
    iFixit Jimmy - Ultimate Electronics Prying & Opening Tool

    HIGH QUALITY: Thin flexible steel blade easily slips between the tightest gaps and corners.

    VIEW LATEST PRICE

    As an affiliate, we earn on qualifying purchases.

    HowFixit 15-in-1 Electronics Opening Tool Kit, Professional Anti-Static Spudger Set & Pry Tools with Suction Cup for iPhone, iPad, MacBook, Laptop, Tablet, Phone Repair
    HowFixit 15-in-1 Electronics Opening Tool Kit, Professional Anti-Static Spudger Set & Pry Tools with Suction Cup for iPhone, iPad, MacBook, Laptop, Tablet, Phone Repair

    Start the First Gap on Glued Screens: Suction cup, ultra-thin metal pry tool, and curved screen opener help create entry on tight seams when opening iPhone, Android phones, iPad, and other tablets.

    VIEW LATEST PRICE

    As an affiliate, we earn on qualifying purchases.

    JOREST Watch Battery Replacement Kit, Watch Back Remover for Rotate Open Watch Cover, Watch Opening Tool, Watch Strap Removal, Watch Case Opener with Anti-scratch film, Spring Bar, Instruction Manual
    JOREST Watch Battery Replacement Kit, Watch Back Remover for Rotate Open Watch Cover, Watch Opening Tool, Watch Strap Removal, Watch Case Opener with Anti-scratch film, Spring Bar, Instruction Manual

    【JOREST Watch Battery Replacement Kit】-- This kit consists of a watch back case opener, a spring bar tool, anti-scratch films*4 and a cleaning cloth. It can help you open the watch cover to replace the watch battery and change the watch strap.

    VIEW LATEST PRICE

    As an affiliate, we earn on qualifying purchases.

    Reassemble Your Laptop

    Once you’ve successfully removed your laptop battery, it’s time to reassemble everything. Follow these steps to put it all back together smoothly:

    • 1. Insert the Battery:

    • Line up the battery with the compartment, ensuring the contacts align correctly.
    • Gently slide the battery back into place until it clicks or locks securely.
    • 2. Secure the Battery:

    • Make sure the battery is sitting flush and secure in its compartment.
    • Double-check that it’s properly connected and won’t wiggle or come loose.
    • 3. Close the Battery Compartment:

    • Carefully slide the compartment cover back into position.
    • Secure any screws or locks to keep the battery in place.
    • Reattach the power adapter or plug in the battery if it was removed.
    • Power on your laptop to ensure everything is working correctly.
    SEE ALSO  Optimize Samsung A13 Battery Life: Debunking Common Myths

    Remember, reassembling your laptop after removing the battery requires the same care and attention as when you took it apart. If you encounter any issues or something doesn’t seem right, don’t hesitate to seek help from a professional.

    By following these steps, you should have no trouble safely and effectively reassembling your laptop after removing the battery.

    Recommended Products
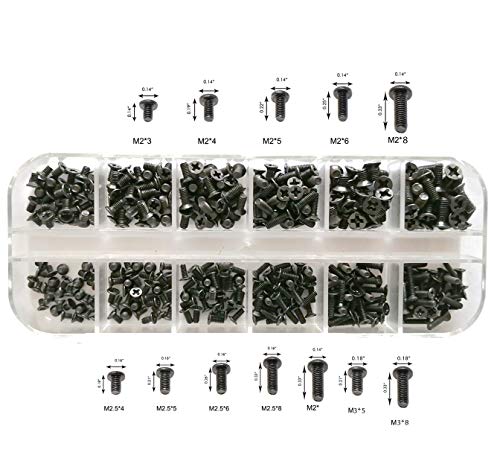
    Persberg 360pcs 12sizes Laptop Notebook Tiny Computer Replacement electronic Screws Assortment Kit Black,M2 M2.5 M3,for Lenovo Toshiba Gateway Samsung HP IBM Dell Sony Acer Asus Hard Disk SATA SSD M.2
    Persberg 360pcs 12sizes Laptop Notebook Tiny Computer Replacement electronic Screws Assortment Kit Black,M2 M2.5 M3,for Lenovo Toshiba Gateway Samsung HP IBM Dell Sony Acer Asus Hard Disk SATA SSD M.2

    Perfect for SSD M.2, PC case, power supply, motherboard, hard drives, fan and floppy/CD-ROM/DVD-ROM drives fixed installation, they are placed in a box, easy to find and use!
    VIEW LATEST PRICE

    As an affiliate, we earn on qualifying purchases.

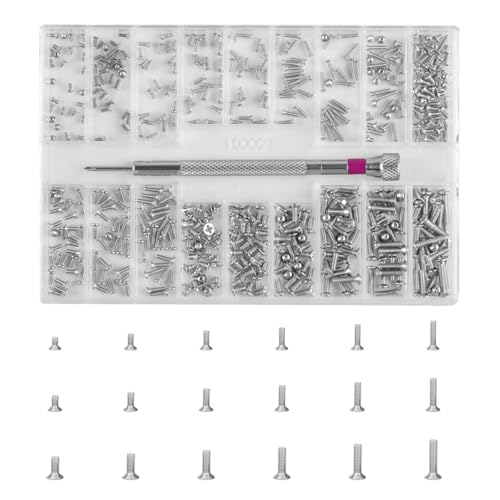
    500 Pcs Micro Screw Repair Kit M1.2 M1.4 M2 Self Tapping Tiny Screws
    500 Pcs Micro Screw Repair Kit M1.2 M1.4 M2 Self Tapping Tiny Screws

    Exquisite Materials: Small glasses screws are made of high-quality stainless steel material, which is corrosion-resistant, strong, hard, and maintains excellent performance after long-term use, with lasting stability

    VIEW LATEST PRICE

    As an affiliate, we earn on qualifying purchases.

    Easycargo 240pcs 12 Sizes Laptop Screws Kit, Notebook Computer Replacement Screws Assortment Kit,M2 M2.5 M3, for Lenovo Toshiba Gateway Samsung HP IBM Dell Sony Acer Asus SSD Hard Disk SATA SSD M.2
    Easycargo 240pcs 12 Sizes Laptop Screws Kit, Notebook Computer Replacement Screws Assortment Kit,M2 M2.5 M3, for Lenovo Toshiba Gateway Samsung HP IBM Dell Sony Acer Asus SSD Hard Disk SATA SSD M.2

    Laptop screws kit

    VIEW LATEST PRICE

    As an affiliate, we earn on qualifying purchases.

    Conclusion

    You’ve now learned the essential steps for reassembling your laptop post battery removal. By carefully inserting the battery, ensuring its security, closing the compartment, and checking the connection, you can successfully put your laptop back together. Remember, handling this process with attention is key. If you encounter any difficulties, don’t hesitate to seek professional assistance. Following these guidelines will help you safely and efficiently reassemble your laptop after removing the battery.

    Frequently Asked Questions

    Why is it important to reassemble a laptop carefully after removing the battery?

    It is crucial to handle the reassembly process carefully to avoid damage to the components and ensure proper functioning of the laptop.

    What are the key steps to reassembling a laptop after removing the battery?

    Insert the battery securely into the compartment, close the battery compartment properly, and check for a correct connection.

    What should you do if you encounter any issues during the reassembly process?

    If any problems arise during reassembly, it is recommended to seek assistance from a professional to avoid causing further damage.

    Share. Facebook Twitter Pinterest LinkedIn Tumblr Email WhatsApp Copy Link
    Jackson-Doyle
    Jackson Doyle

      Battery industry professional with 5+ years of experience. Bachelor of Science in Electrical Engineering from Georgia Tech. Specializes in power systems and renewable energy.

      Related Posts

      Laptop Batteries

      Maximize Your Laptop Battery Life: Effective Tips You Need to Know

      January 6, 2025
      Laptop Batteries

      Unlocking the Power: Does MSI Battery Calibration Really Work?

      January 2, 2025
      Laptop Batteries

      Does the Samsung S7 Have a Removable Battery? Understanding the Implications

      December 31, 2024
      Laptop Batteries

      Ultimate Guide: Where to Buy Authentic Laptop Batteries Directly from Manufacturers

      December 28, 2024
      Laptop Batteries

      5 Signs Your Laptop Battery Is Dead: Tips to Extend Battery Life

      December 27, 2024
      Laptop Batteries

      Should You Replace Your Laptop Battery? Signs, Tips & Lifespan Facts

      December 26, 2024
      Add A Comment
      Leave A Reply Cancel Reply

      Search
      Affiliate Disclaimer

      As an Amazon Associate I earn from qualifying purchases.

      Latest Articles

      23 Practical Low Ceiling Lighting Ideas for Open-Concept Rooms With Defined Zones

      Low Ceiling Lighting

      19 Mid-Century Modern Low Ceiling Lighting Ideas With Low-Profile Fixtures

      Low Ceiling Lighting

      23 Cozy Low Ceiling Lighting Ideas Using Warm Layered Illumination

      Low Ceiling Lighting

      18 Renter-Friendly Low Ceiling Lighting Ideas Without Hardwired Changes

      Low Ceiling Lighting

      22 Compact Small Room Lighting Ideas for Low Ceilings Using Wall Sconces

      Low Ceiling Lighting

      20 Contemporary Track Lighting Ideas for Low Ceilings With Adjustable Heads

      Low Ceiling Lighting
      Battery Spotlight

      Battery Spotlight is a website dedicated to helping you solve common battery problems.

      Read more about us here

      Affiliate Disclaimer
      As an Amazon Associate I earn from qualifying purchases.

      Site Navigation
      • Above Mirror Bathroom Lighting
      • Accent Lighting
      • Android Batteries
      • Bathroom Pendant Lighting
      • Battery Chargers
      • Battery Life
      • Battery Maintenance
      • Car Batteries
      • Ceiling Lighting Ideas
      • Entryway Lighting
      • Foyer Lighting Fixtures
      • Golf Cart Batteries
      • Japandi Lighting
      • Laptop Batteries
      • Laundry Room Lighting
      • Low Ceiling Lighting
      • Marine Batteries
      • Mood Lighting Living Room
      • Phone Batteries
      • Rechargeable Batteries
      • Reviews
      • Solar Batteries
      • Uncategorized
      • Vaulted Ceiling Lighting
      Latest Articles

      23 Practical Low Ceiling Lighting Ideas for Open-Concept Rooms With Defined Zones

      19 Mid-Century Modern Low Ceiling Lighting Ideas With Low-Profile Fixtures

      23 Cozy Low Ceiling Lighting Ideas Using Warm Layered Illumination

      18 Renter-Friendly Low Ceiling Lighting Ideas Without Hardwired Changes

      22 Compact Small Room Lighting Ideas for Low Ceilings Using Wall Sconces

      • Home
      • About
      • Contact
      • Privacy Policy
      • Editorial Policy
      • Disclaimer
      • Terms and Conditions
      • Affiliate Disclosure
      © 2026 Battery Spotlight

      Type above and press Enter to search. Press Esc to cancel.