
Ever found yourself in a pinch, needing to replace the battery in your Dell laptop but unsure where to start? Picture this: you’re on the go, and your laptop’s battery is on its last legs. What do you do? Fear not, as we’ve got you covered! In this article, we’ll walk you through the simple steps to safely remove the battery from your Dell laptop.
Have you ever struggled with the thought of damaging your laptop while trying to swap out the battery? You’re not alone. By the end of this read, you’ll gain the confidence and know-how to smoothly remove your Dell laptop’s battery without any hassle. Say goodbye to the worry of potential mishaps and hello to a seamless battery replacement process.
Checking the Model and Series of Your Dell Laptop
To check the model and series of your Dell laptop, follow these steps:
- Look for a label on the bottom of your laptop with the service tag or express service code.
- Visit the Dell website and enter the service tag or express service code.
- Note down the model and series information displayed on the website.
Understanding your Dell laptop’s model and series is crucial for finding the correct battery replacement.
Powering Down the Laptop and Disconnecting External Devices
When it’s time to take out the battery from your Dell laptop, the first step is ensuring your device is powered down and disconnected from any external devices. Here’s how you can do it:
- Save any ongoing work and close all open applications.
- Disconnect the laptop from the charger and turn it off by clicking on the Start menu and selecting Shut Down.
Next, disconnect any external devices such as a mouse, keyboard, or USB drives to avoid accidentally damaging them during the battery removal process.
Make sure to handle all external devices with care when removing them from your laptop.
Pro Tip: Using gentle movements and taking your time is key to avoid any accidental damage while disconnecting external devices.
Removing the Battery Cover and Securing Necessary Tools
When removing the battery from your Dell laptop, the first step is to locate and remove the battery cover. This cover is usually situated on the underside of your laptop and is secured by screws or clips. Here’s how you can proceed:
- Find a flat surface to work on to prevent any components from rolling away.
- Power off your laptop and unplug it from any external devices.
- Close any open applications and save your work to avoid data loss.
Next, you’ll need a few basic tools to complete this task efficiently:
| Tools Needed |
|---|
| Small screwdriver |
| Anti-static wrist strap (optional) |
Once you’re ready with the necessary tools, you can move on to the next steps in the battery removal process.
Recommended Products
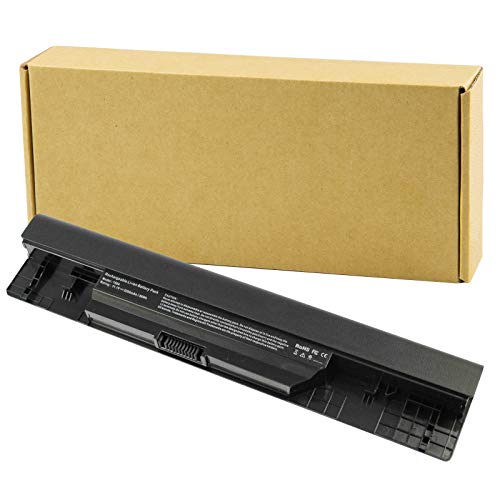
Specifications: 6 Cell, Li-ion battery, Rated at 11.1V(10.8V Compatible) 5200mAh

【4GVMP Battery gives new life to your laptop】68Wh standard rechargeable battery type 4GVMP 7.6V is made of A-grade battery cells, high-quality components, flame-retardant casings, and high-quality materials for intelligent control chips, making the overall battery life more than 1000 cycles. It has give your laptop a great battery life. It stays charged for a good amount of time when not plugged in. for dell Latitude 5400 battery also include 2 free screwdrivers
![Futurebatt New Replacement Battery for Dell DJ1J0 451-BBZL PGFX4 ONFOH DJ1JO,for Dell Latitude 12 7000 7280 7480 Series [42Wh 11.4V]](https://m.media-amazon.com/images/I/41NFIVRGSiL._SL500_.jpg)
BRAND NEW Replacement Battery 451-BBZL PGFX4 ONFOH DJ1JO,Safe and reliable.
Taking Out the Battery Carefully
When removing the battery from your Dell laptop, it’s crucial to handle it with care to avoid any damage. Here’s how you can safely take out the battery:
- Locate the Battery: Depending on your Dell laptop model, the battery is usually found on the underside. It’s a rectangular or square unit that can be easily identified.
- Release the Latch: Look for the release latch or switch near the battery. Slide or press it in the designated direction to unlock the battery.
- Lift the Battery: Once the latch is released, gently lift the battery from its compartment. Be mindful not to force it out to prevent any breakage.
- Disconnect the Cable (If Applicable): Some Dell laptops may have a cable connecting the battery to the motherboard. If so, carefully detach the cable from its connector.
- Set the Battery Aside: Place the removed battery in a safe and dry location away from heat or direct sunlight.
- Inspect for Damage: Before reinserting the battery, inspect it for any signs of damage, such as leaks or bulges. If you notice any issues, refrain from using the battery.
- Proceed with Caution: Handle the battery delicately and avoid bending or dropping it to maintain its functionality.
Remember, ensuring the safe removal of the battery not only prolongs its lifespan but also prevents any potential mishaps.
Recommended Products

Specifications: Replacement Battery for Dell laptop Replacement Battery; Our 3HWPP Battery Replacement for Dell 68wh Standard Rechargeable battery Type 3HWPP 15.2V; Voltage: 15.2V; Capacity:68Wh; Cells:4 cells; Color: Black;Condition: New; Battery lasts: 3-6 hours, Packages includes: 1x 3HWPP Battery,2 x Free Screwdrivers,1x Instruction for Laptop battery

Rome Tech Dell Inspiron CMOS Battery Replacement – This dell inspiron cmos battery is a CR2032 3V BIOS RTC coin cell designed to restore motherboard clock and BIOS settings in compatible Dell Inspiron laptops. Please verify your exact model before purchasing.

Specification - Dell laptop WDXOR Replacement Battery Type: Li-ion; Voltage: 11.4V; Capacity: 42WH; Cells:3-Cell; Model: WDX0R. !!! Notice!!! Not compatible with 33YDH(56Wh 4-Cell) or YYRD6(42Wh 3-Cell), please check the original battery before purchasing to make sure it is compatible
Safely Storing the Battery and Final Checks
After successfully removing the battery from your Dell laptop, it’s crucial to store it properly to maintain its condition. Here’s how to do it:
- Store the battery in a cool, dry place away from direct sunlight or extreme temperatures.
- Avoid leaving the battery unused for long periods; aim to use it at least once every few weeks to keep it in good shape.
- If you’re storing the battery for an extended period, make sure to charge it to around 50% before storage to prevent deep discharge.
Recommended Products

OceanCycle Certified Ocean-bound Plastic: The exterior main fabric is made with 100% ocean-bound plastic from approximately 8 recycled plastic bottles collected from ocean coastline or major waterways

This organizer bag is made of durable nylon with zipper closure,and hand strap is attached for convenient carry. Mesh see-through net give you a clear vision for inside accessories.

Made of nylon with smooth zippers,breathable mesh, and a see-through design for easy visibility. Includes a convenient carrying loop.
Final Checks
Before concluding the battery removal process, perform these final checks to ensure everything is in order:
- Inspect the battery for any signs of damage, such as leaks or swelling.
- Check the battery contacts for any debris or dirt that may affect connectivity.
- Verify that all cables are securely disconnected from the battery compartment.
- Do a final check of the laptop to ensure no components were damaged during the removal process.
Remember, proper storage and maintenance of your laptop battery are essential to prolong its lifespan and maintain its efficiency.
Conclusion
That’s it for safely removing the battery from your Dell laptop. Remember to store it properly in a cool, dry place and perform necessary checks before storage. Taking these steps will help prolong your battery’s lifespan and keep it running efficiently. Happy computing!
Frequently Asked Questions
How should I store my Dell laptop battery after removal?
After removing your Dell laptop battery, store it in a cool, dry place and avoid extended periods of non-use. It is recommended to charge the battery to around 50% before storing it long-term. Additionally, make sure to inspect for any damage, clean the battery contacts, disconnect cables, and check your laptop for potential damage post-removal. Proper storage and maintenance are key to extending the battery’s lifespan and efficiency.