
Ever wondered why your Asus laptop seems to be losing battery life faster than you can say “tech trouble”? Picture this: you’re in the middle of an important project and your laptop dies on you. Frustrating, right? But fret not, because we’ve got your back with a simple solution that’ll have you back up and running in no time.
Checking compatibility of replacement battery
To ensure a seamless replacement process, it’s crucial to check the compatibility of the new battery with your Asus laptop model. Here’s how you can do it:
- Consult the Manual: Refer to your laptop’s manual to find the specific battery model compatible with your device.
- Visit the Manufacturer’s Website: Head to Asus’s official website and look for a compatibility list or tool that helps you identify suitable replacement batteries.
- Check Battery Specifications: Match the voltage and capacity of the replacement battery with the original one to avoid any issues with compatibility.
- Reach Out to Customer Support: If you’re unsure or need further guidance, don’t hesitate to contact Asus customer support for assistance in choosing the right replacement battery for your laptop.
- Consider Third-Party Sellers Carefully: If purchasing from a third-party seller, ensure they provide batteries specifically designed for your Asus model to prevent compatibility issues.
By following these steps, you can ensure that the replacement battery you choose is fully compatible with your Asus laptop model.
Gathering necessary tools
When it comes to replacing your Asus laptop battery, having the right tools on hand is essential. Here’s what you’ll need:
- Compatible Replacement Battery: Ensure you purchase a battery that is specifically designed for your Asus laptop model. Check the manual or the manufacturer’s website for specifications.
- Screwdriver Set: Prepare a small screwdriver set with the appropriate heads for opening your laptop’s case.
- Anti-static Wrist Strap: To prevent damage from static electricity, consider using an anti-static wrist strap.
- Plastic Spudger or Opening Tool: This tool is handy for prying open the laptop casing without causing damage.
- Clean Cloth: Have a clean cloth on hand to wipe down any components as you work.
Remember, having these tools ready will make the battery replacement process smoother and more efficient.
| Tools Needed |
|---|
| Compatible Replacement Battery |
| Screwdriver Set |
| Anti-static Wrist Strap |
| Plastic Spudger or Opening Tool |
| Clean Cloth |
Removing the old battery
When it comes to Removing the old battery from your Asus laptop, it’s essential to proceed with caution to avoid any damage to the device. Here’s a guide to help you through this stage:
- Power Off Your Laptop: Before beginning, make sure your laptop is turned off to prevent any electrical mishaps.
- Prepare Your Workspace: Find a clean, well-lit area with ample space to work comfortably.
- Locate the Battery: The battery is typically located on the underside of your laptop. Use your screwdriver set to carefully remove the screws securing the battery panel.
Now that you have located and accessed the battery compartment, it’s time to remove the old battery:
- Unplug the Battery: Slowly and gently unplug the connector that attaches the battery to the laptop.
- Release any Latches: Some laptop models may have additional latches securing the battery in place. Ensure these are released before attempting to remove the battery.
- Carefully Lift Out the Battery: Using both hands, carefully lift the old battery out of its compartment. Be mindful of any delicate wires or components that may be attached.
Congratulations! You’ve successfully removed the old battery from your Asus laptop. Stay tuned for the next steps in the battery replacement process.
Installing the new battery
To install the new battery in your Asus laptop, follow these simple steps:
- Step 1: Make sure the laptop is powered off and unplugged.
- Step 2: Locate the battery compartment on your laptop.
- Step 3: Insert the new battery into the compartment, ensuring it’s properly aligned.
- Step 4: Secure the battery in place by reconnecting any latches or fasteners.
- Step 5: Plug in the battery connector to the appropriate slot.
Remember, proper installation is key to ensuring your Asus laptop functions optimally.
Recommended Products

Battery Type: Polymer. Voltage: 11.55V Capacity: 42Wh ; Cells: 3-cell; Color: Black, Packages includes: 1x B31N1912 battery , with auxiliary installation tool and user manual.
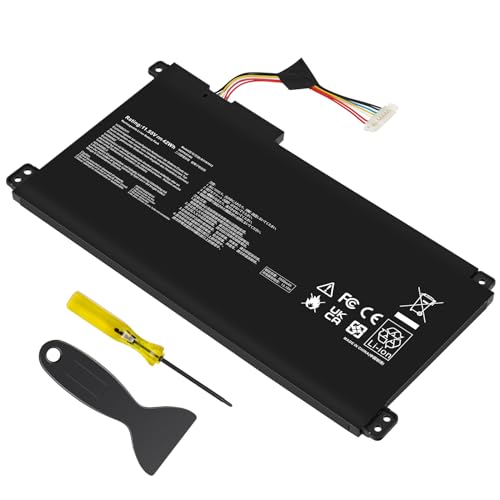
【Capacity】42Wh/3550MAH Cell: 3-Cell Voltage: 11.55V Battery type: Li-ion

Battery Model:A32N1405, Voltage: 10.8V Capacity: 56WH ; Cells: 6-cell; Color: Black
Calibrating the new battery
When you install a new battery in your Asus laptop, calibrating it is essential to ensure optimal performance and battery life. Calibration involves syncing the software with the new hardware to provide accurate readings on battery status and capacity.
Why Calibrate?
- Calibrating your new battery helps the system accurately determine the remaining battery life.
- It extends the overall battery longevity by maintaining accurate charge levels.
- Improper calibration can lead to inaccurate battery readings and affect the laptop’s performance over time.
How to Calibrate:
- Charge your laptop battery to full capacity by plugging it in and allowing it to charge uninterrupted until it reaches 100%.
- Once fully charged, disconnect the power source and use the laptop until the battery is completely drained.
- Allow your laptop to shut down due to low battery. It’s important to let it sit for a few hours in this state.
- Plug in your laptop and charge it back to 100% without interruption.
- Repeat the calibration process every few months to maintain accurate battery readings.
- Avoid interrupting the charging or discharging process to prevent calibration errors.
- Calibrate your battery when you notice significant discrepancies in the indicated battery life.
Calibrating your new battery is a simple yet crucial step to ensure your Asus laptop performs optimally and prolong its battery lifespan.
Conclusion
You’ve now mastered the art of replacing your Asus laptop battery with finesse. Remember, caution is key to prevent any mishaps. Following the step-by-step guide ensures a smooth battery replacement process. Don’t forget the crucial step of calibrating your new battery for optimal performance. Calibration syncs the software with the new hardware, providing accurate battery status. By periodically repeating the calibration process, you’ll maintain precise readings and extend your laptop’s battery life. Enjoy your newly replaced battery and the enhanced performance it brings to your Asus laptop!
Frequently Asked Questions
Q: Why is it important to be cautious when removing and installing a new battery in an Asus laptop?
A: Proceeding with caution is vital to avoid damaging the device during the battery replacement process. One wrong move can lead to potential harm to the laptop’s internal components.
Q: What is the significance of calibrating a new battery in an Asus laptop?
A: Calibrating the new battery is essential to ensure optimal performance and battery life. It helps in syncing the software with the new hardware for accurate readings on battery status and capacity.
Q: What are the benefits of calibrating the battery and how often should it be done?
A: Calibrating the battery maintains accurate readings and prolongs the laptop’s battery lifespan. It is recommended to repeat the calibration process periodically to ensure consistent and reliable battery performance.