
Have you ever faced a dead solar battery when you needed power the most? It’s frustrating, especially when you’re relying on renewable energy to keep your home running smoothly. Whether you’re dealing with a slow charge or a complete failure, knowing how to tackle these issues can save you time and money.
Key Takeaways
- Understanding Types of Solar Batteries: Familiarize yourself with the common types—lead-acid, lithium-ion, and saltwater batteries—to determine the best options for your needs and their maintenance requirements.
- Diagnosing Battery Issues: Learn key signs of battery problems, such as slow charging, overcharging, or extreme temperature sensitivity, and how to use a multimeter for voltage testing.
- Essential Repair Tools: Gather necessary tools including a multimeter, wrenches, screwdrivers, and safety gear (goggles, gloves) for efficient and safe repairs.
- Step-by-Step Repair Process: Follow a structured approach to identify issues, disassemble, repair, and test the battery to restore its functionality and enhance longevity.
- Perform Regular Maintenance: Conduct periodic check-ups and store batteries properly to ensure optimal performance and prevent future problems.
- Testing After Repairs: Implement thorough performance tests post-repair to confirm the battery’s efficiency and functionality, including voltage checks and load testing.
Understanding Solar Batteries
Solar batteries store energy generated by solar panels, ensuring power availability when it’s needed. Knowing how these batteries work helps in maintaining and repairing them effectively.
Types of Solar Batteries
- Lead-Acid Batteries:
- Commonly used for solar energy storage.
- Cost-effective and reliable.
- Require regular maintenance and have a shorter lifespan.
- Lithium-Ion Batteries:
- More efficient and longer-lasting than lead-acid options.
- Lightweight and have a higher energy density.
- Considered more expensive but offer better performance.
- Saltwater Batteries:
- Eco-friendly alternative.
- Use non-toxic materials and can last longer.
- Still relatively new, and availability may vary.
- Slow Charging:
- May result from insufficient sunlight or faulty connections.
- Check solar panel placement and wiring integrity to solve this.
- Battery Failure:
- Can occur due to overcharging or aging.
- Regularly monitor battery health with a voltage tester.
- Temperature Sensitivity:
- Extreme temperatures can impact battery performance.
- Store batteries in a climate-controlled environment.
- Self-Discharge:
- All batteries lose charge over time, but excessive loss indicates a problem.
- Inspect for leaks or damaged cells to address this issue effectively.
Tools and Equipment Needed
Repairing solar batteries requires specific tools and equipment to ensure safety and effectiveness. Gather these essentials before starting your project.
Essential Tools
- Multimeter – A multimeter measures voltage and current, helping you diagnose problems accurately.
- Wrenches – Adjustable wrenches assist in loosening and tightening battery connections.
- Screwdrivers – A set of screwdrivers provides various sizes to access different battery compartments.
- Battery Terminal Cleaner – A cleaner removes corrosion from terminals, ensuring a proper connection.
- Soldering Iron – Soldering irons are necessary for repairing damaged battery connections.
- Wire Stripper – Wire strippers facilitate the preparation of wires for connection or replacements.
- Safety Goggles – Wearing safety goggles protects your eyes from battery acid splashes or debris.
- Gloves – Protective gloves prevent skin contact with hazardous materials, such as acid or chemicals.
- Face Mask – A mask helps avoid inhalation of any harmful particles or fumes during repair.
- Fire Extinguisher – Keep a fire extinguisher nearby to manage any potential fires caused by sparks or battery issues.
- First Aid Kit – A first aid kit ensures quick response to any accidents, providing necessary supplies for minor injuries.
Step-by-Step Guide on How to Repair Solar Battery
Repairing a solar battery involves systematic steps. Follow these to restore optimal performance.
Identifying the Problem
- Check for Signs of Damage: Look for physical damage like swelling, leaks, or corrosion on terminals.
- Use a Multimeter: Measure voltage to determine if the battery is undercharging or fully discharged. A healthy lead-acid battery should read between 12.6V to 12.8V when fully charged, while lithium-ion batteries should show 3.6V to 4.2V.
- Observe Performance: Notice any irregularities in charging and discharging cycles. Slow charging rates or sudden drops in power output often indicate issues.
Disassembling the Battery
- Safety First: Wear goggles, gloves, and other protective gear. Ensure you have a fire extinguisher and a first aid kit nearby.
- Disconnect Power: Safely disconnect the battery from the solar system and remove any connected cables.
- Remove the Cover: Use the appropriate screwdriver or wrench to carefully unscrew and remove the battery cover. Keep screws organized for reassembly.
Repairing Faulty Components
- Inspect Internal Parts: Look for damaged components such as connectors, lead plates, or electrolyte levels in lead-acid batteries. For lithium-ion batteries, check for swollen cells.
- Clean Connections: Use a battery terminal cleaner to remove corrosion. Ensure connections are free of dirt and grime.
- Replace Defective Parts: For lead-acid batteries, replace damaged plates or add distilled water to restore electrolyte levels. For lithium-ion batteries, replace swollen cells as necessary. Use a soldering iron for any electrical repairs.
- Reinstall Internal Components: Place all repaired parts back in their original positions, ensuring everything fits snugly and securely.
- Secure the Cover: Align the cover with the body of the battery and screw it back into place.
- Reconnect the Battery: Reconnect it to your solar system, ensuring all connections are solid to avoid future issues.
Following these steps can extend the life of your solar battery.
Testing the Repaired Solar Battery
After completing the repair process, testing the solar battery ensures it functions properly. Conducting thorough tests verifies that your efforts were successful.
Recommended Products
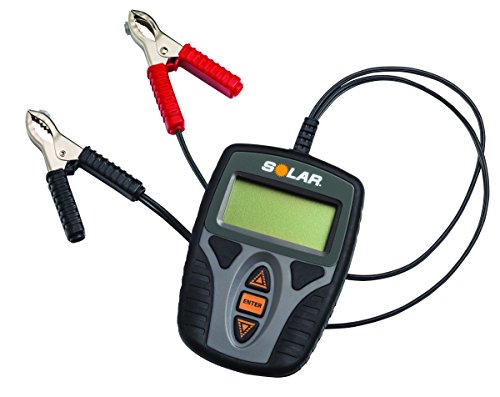
12 Volt battery and system testing
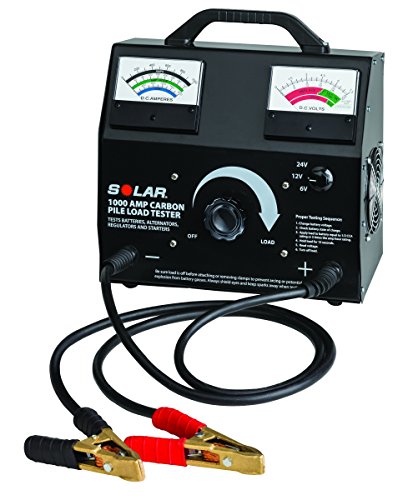
Variable load capability to 1000 Amps

✅【Car Battery Tester】 BR502 can test all 6V/12V/24V 100-2000CCA batteries including regular flooded, AGM flat plate, AGM spiral, or gel batteries, compatible with cars, SUVs, Pickups, Boats, Motorcycles and etc. Provide overall analysis of batteries’ health and help you know its status in advance before it dies.
Conducting Performance Tests
- Use a Multimeter: Measure the voltage output of the solar battery. Ensure it meets the expected voltage range for its type.
- Check Charging Efficiency: Connect the battery to a solar panel or charger. Note the time taken for the battery to reach full charge. Compare this with previous charging times.
- Load Testing: Connect devices that draw power from the battery. Observe if the battery supplies power consistently without overheating or dropping voltage.
- Monitor Discharge Rates: After charging, disconnect the battery and allow it to discharge over time. Track how long it lasts compared to before the repair.
- Visual Inspection: Check the battery for any unusual signs like swelling, leakage, or corrosion. Address any issues immediately if spotted.
- Temperature Checks: Ensure the battery stays within its temperature range during operation. Excessive heat can indicate problems.
- Periodic Testing: Schedule regular performance tests every few weeks. This process helps detect any performance drop early.
- Listen for Sounds: While under load, listen for unusual noises such as hissing or popping. Any unfamiliar sounds could signal a problem.
Following these steps ensures your repaired solar battery operates effectively and safely, enhancing its lifespan and performance.
Preventive Measures and Maintenance Tips
Maintaining your solar battery ensures efficiency and longevity. Implementing preventive measures reduces the likelihood of issues arising.
Regular Check-Ups
Conduct regular check-ups to keep your solar battery in optimal condition. Every 1 to 3 months, inspect the battery’s terminals for corrosion. Clean any buildup with a battery terminal cleaner to ensure good connectivity. Additionally, check the voltage using a multimeter. If the voltage is significantly lower than the manufacturer’s specified range, further investigation may be necessary.
Perform a full visual inspection of the casing for cracks or leaks. Address any signs of damage immediately to prevent further complications. Keeping a routine schedule for these check-ups helps catch potential problems early, allowing for timely repairs.
Proper Storage Practices
Implement proper storage practices for when the solar battery isn’t in use. Store batteries in a cool, dry environment away from direct sunlight. Aim for a temperature range of 32°F to 77°F (0°C to 25°C) for optimal performance. If you’re storing lead-acid batteries, maintain a full charge to prevent sulfation, which can impair battery capacity.
Ensure that lithium-ion batteries are stored with a charge level of around 40% to 60%. This practice helps preserve battery health over extended storage periods. Also, consider covering the battery with a protective casing to shield it from dust and debris. Following these storage tips protects your battery from deterioration and extends its life.
Conclusion
Repairing your solar battery can seem daunting but with the right knowledge and tools you can tackle it confidently. By understanding the common issues and following the step-by-step guide you can not only save money but also extend the life of your battery.
Remember to prioritize safety throughout the process and keep up with regular maintenance to prevent future problems. With a little effort you’ll ensure your solar system runs smoothly and efficiently. Enjoy the benefits of renewable energy knowing you’ve got your battery in top shape!
Frequently Asked Questions
What are the common problems with solar batteries?
Common problems with solar batteries include slow charging, complete failure, temperature sensitivity, and self-discharge. These issues can arise due to age, poor maintenance, or environmental factors. Regular checks and maintenance can help identify and mitigate these problems early.
How do I maintain my solar batteries?
To maintain solar batteries, conduct regular inspections every 1 to 3 months. Check terminals for corrosion, monitor voltage levels, and look for any signs of damage. Additionally, store batteries in a cool, dry place and keep them at the proper charge levels to avoid deterioration.
What tools do I need to repair solar batteries?
Key tools for repairing solar batteries include a multimeter, wrenches, screwdrivers, a battery terminal cleaner, a soldering iron, and wire strippers. Don’t forget to have safety gear such as goggles, gloves, and a fire extinguisher to ensure a safe repair process.
How can I test a solar battery after repair?
Test a solar battery post-repair by measuring voltage output with a multimeter, checking charging efficiency, conducting load tests, and monitoring discharge rates. Visual inspections for damage and temperature checks during operation are also essential to ensure proper functionality.
What types of solar batteries are there?
The main types of solar batteries are lead-acid, lithium-ion, and saltwater batteries. Each type has its advantages and disadvantages, such as cost, lifespan, and energy density. Understanding these characteristics can help users choose the best option for their energy needs.