
Have you ever found yourself struggling with a dead battery in your Beats Solo 3 headphones? You’re not alone. Many users face this frustrating situation, especially when they’re ready to enjoy their favorite tunes on the go.
Key Takeaways
- Understand Headphone Features: Beats Solo 3 headphones offer up to 40 hours of battery life, quick charging, and dual beam-forming microphones for enhanced call quality.
- Essential Tools for Battery Removal: Have a Phillips head screwdriver, plastic pry tool, tweezers, suction cup tool, and anti-static wrist strap ready for a seamless battery replacement.
- Step-by-Step Process: Follow a clear process: power off headphones, remove ear cushions, unscrew ear cups, disconnect the old battery, and install the new one carefully.
- Troubleshoot Common Issues: Address common challenges, such as difficulty opening ear cups, loose connections, and charging problems with practical tips to ensure optimal performance.
- Battery Maintenance Tips: To extend battery life, avoid overcharging and use recommended charging accessories for best results.
Overview of Beats Solo 3 Headphones
Beats Solo 3 headphones combine style and performance, making them a popular choice for music lovers. Their sleek design offers a comfortable fit for long listening sessions. Equipped with Apple’s W1 chip, these headphones provide seamless pairing with Apple devices. You can enjoy wireless connectivity with a solid range.
The battery life stands out, with up to 40 hours of listening time on a single charge. Quick charging also allows you to get three hours of playback from just a five-minute charge. Dual beam-forming microphones enhance call quality, ensuring clear conversations.
Noise isolation enhances the listening experience by blocking out environmental sounds. You’re in control of your audio with power buttons and volume controls located on the ear cups. The headphones feature adjustable fit and foldable design for easy storage and portability.
Maintaining the Beats Solo 3 includes understanding how to address battery issues, particularly when performance declines or the device won’t charge. Proper care extends the life of the battery, allowing you to enjoy uninterrupted music.
Tools Needed for Battery Removal
Removing the battery from your Beats Solo 3 headphones requires specific tools to ensure a smooth and effective process. Here’s a list of the essential items you’ll need:
- Phillips Head Screwdriver: Use a small Phillips head screwdriver to remove the screws on the ear cups.
- Plastic Pry Tool: Employ a plastic pry tool to gently separate the ear cup from the headset without damaging the casing.
- Tweezers: Keep tweezers handy for grasping and manipulating small components inside the headphones.
- Suction Cup Tool: Consider using a suction cup tool to help pull apart the earpiece if it’s particularly tight.
- Anti-Static Wrist Strap: Wear an anti-static wrist strap to protect components from static electricity while you work.
Gather these tools before you start. Having everything ready simplifies the battery removal process and minimizes the risk of damaging your headphones.
Step-by-Step Guide
Follow this guide for successfully removing and replacing the battery on your Beats Solo 3 headphones. Each step provides clear instructions to make the process straightforward.
Preparing Your Headphones
Start by ensuring your headphones are powered off. Gather the necessary tools: a small Phillips head screwdriver, a plastic pry tool, tweezers, a suction cup tool, and an anti-static wrist strap. Having these items ready makes the removal process smoother and minimizes potential damage to your headphones.
Removing the Ear Cushions
Gently pull on the ear cushions to detach them from the ear cups. Use a plastic pry tool if needed, working around the edges to avoid tearing the fabric. Take your time to prevent damage, as the cushions connect securely.
Accessing the Battery Compartment
Locate the screws holding the ear cup together. Use the Phillips head screwdriver to remove the screws. Be careful to keep track of them, as you’ll need them for reassembly. Once the screws are out, use the plastic pry tool to lift the ear cup gently, exposing the interior components.
Disconnecting the Old Battery
Next, identify the battery connection. Carefully disconnect the battery by gently pulling the connector from its slot. Use tweezers if necessary to grip the connector securely. Avoid pulling on the wires to prevent damage.
Installing the New Battery
Position your new battery in place, ensuring it aligns correctly. Connect the battery by pushing the connector back into its slot until it clicks. Ensure the connection is secure to prevent future issues. Once the new battery is installed, reassemble the ear cup by aligning it with the casing and securing it with the screws you previously removed. Finally, reattach the ear cushions, ensuring they fit snugly.
Troubleshooting Common Issues
When dealing with battery removal in Beats Solo 3 headphones, you may encounter some common issues. Addressing these problems promptly can help avoid further complications.
Recommended Products
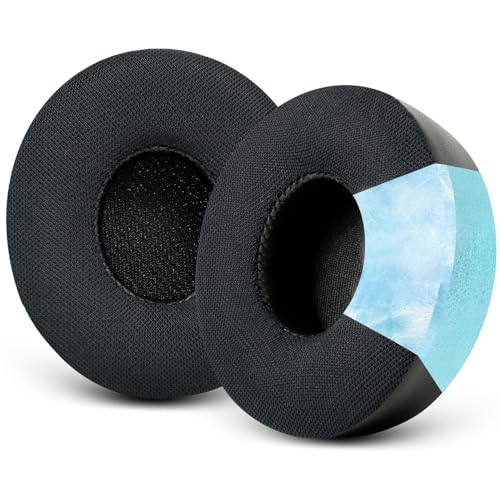
COMPATIBILITY: This earpad replacement is compatible with Beats Solo 2 & Solo 3 Wireless On-Ear Headphones. Cooling Gel design is soft and will reduces ear sweating, keep long time comfortable listening, let’s get your own Cooling Gel Ear Pads for Beats Solo, enjoy the cool feeling and comfort wearing sense.

🎧【COMPATIBLE WITH】 Earpads replacement are compatible with Beats Solo 2 & Solo 3 wireless Over-Ear headphones ear cushions(Model B0534 and Model A1796). DO NOT FIT FOR Beats Studio Over-Ear headphones and other brands headphones. (Please confirm the headphone model before purchasing)

𝗣𝗘𝗥𝗙𝗘𝗖𝗧 𝗙𝗜𝗧: Perfect Replacement earpad for Beats Solo 2 & Solo 3 Wireless on-ear headphones(Model B0534; Model A1796). DO NOT FIT FOR Beats Studio Over-Ear headphones and other brands' headphone. (PLS confirm the headphone model before purchasing)
Difficulty in Opening the Ear Cup
- Tip: Ensure you’re using the right tools. A plastic pry tool helps open the ear cup without damaging it.
- Tip: Apply gentle pressure when prying. Excessive force can crack the ear cup, leading to costly repairs.
Loose or Damaged Connections
- Tip: Check battery connections after installation. Loose connections can cause power issues.
- Tip: If wires appear frayed or damaged, consider replacing the entire battery. Faulty wiring can lead to malfunction.
Headphones Not Charging
- Tip: Verify the charging cable works with other devices. A faulty cable may be the culprit.
- Tip: Inspect the charging port for debris. Clean it gently using a soft, dry brush to ensure a good connection.
Ear Cushions Not Reattaching Properly
- Tip: Align the ear cushions with the provided slots before pressing them in place.
- Tip: Apply even pressure around the edges to secure them. This ensures a snug fit and preserves sound quality.
- Tip: If the battery drains quickly after replacement, check your charging habits. Avoid overcharging and let the battery discharge before recharging.
- Tip: Use only recommended charging accessories to maintain battery health.
By following these troubleshooting tips, you can effectively address common issues and keep your Beats Solo 3 headphones functioning smoothly.
Conclusion
Taking care of your Beats Solo 3 headphones is key to enjoying your music without interruptions. By following the steps outlined for battery removal and replacement, you can breathe new life into your headphones. Don’t forget to gather the right tools and be patient during the process.
If you run into any hiccups along the way, remember the troubleshooting tips to help you navigate those challenges. With a little effort, you’ll have your headphones back in action and ready for your next listening session. Enjoy the beats and keep the music flowing!
Frequently Asked Questions
What are the common issues with Beats Solo 3 headphones?
Many users face problems with dead batteries in Beats Solo 3 headphones, especially when they want to listen to music on the go. Other common issues include charging problems and difficulties with ear cushion attachments.
How long does the battery last on Beats Solo 3 headphones?
Beats Solo 3 headphones offer an impressive battery life of up to 40 hours on a single charge, allowing you to enjoy extended listening sessions without interruptions.
What tools do I need to replace the battery in Beats Solo 3?
To replace the battery in Beats Solo 3 headphones, you will need a small Phillips head screwdriver, a plastic pry tool, tweezers, a suction cup tool, and an anti-static wrist strap to protect against static electricity.
Can I fix the battery issue myself?
Yes, you can fix battery issues yourself by following a step-by-step guide for battery removal and replacement. This process involves careful handling and assembly to restore your headphones to working condition.
What should I do if my headphones won’t charge?
If your Beats Solo 3 headphones won’t charge, check your charging cables and inspect the charging port for debris. Also, ensure that the battery connections are secure after replacement and that the ear cushions are properly reattached.
How do I maintain my Beats Solo 3 headphones?
To maintain your Beats Solo 3 headphones, regularly clean the ear cushions, check the charging port for debris, and ensure the battery is functioning optimally. Following proper handling techniques will extend their lifespan and performance.