
Key Takeaways
- Understand Your Device: Familiarize yourself with the Lenovo ThinkPad X1 Carbon’s specifications to effectively troubleshoot and manage internal components, including the battery.
- Gather Necessary Tools: Ensure you have the right tools, such as a Torx T5 screwdriver and an antistatic wrist strap, to facilitate a smooth battery removal process.
- Power Down and Disconnect: Always turn off the laptop and unplug all devices before starting to prevent any electric shock or accidental activation.
- Follow Step-by-Step Guidelines: Carefully follow the outlined steps to remove the battery, including unscrewing the back cover and disconnecting the battery connector properly.
- Handle Components with Care: Take precautions to avoid damaging the battery and internal components. Handle parts gently and store batteries in suitable conditions if not immediately reinstalled.
- Dispose of Batteries Responsibly: When replacing batteries, ensure proper disposal by following local regulations and utilizing recycling programs for electronic waste.
Have you ever found yourself needing to remove the battery from your Lenovo ThinkPad X1 Carbon? Whether you’re troubleshooting issues or upgrading your laptop, knowing how to safely remove the battery can save you time and frustration.
Overview of Lenovo ThinkPad X1 Carbon
Lenovo ThinkPad X1 Carbon stands out as a premium business laptop known for durability and performance. The lightweight design contains high-end specifications, making it suitable for professionals and frequent travelers.
Key features include:
- Display: The X1 Carbon offers a 14-inch display with options for 4K resolution, providing vibrant colors and sharp images.
- Processor: It uses powerful Intel processors, ensuring smooth multitasking and fast performance for demanding applications.
- Battery Life: The laptop boasts impressive battery longevity, often exceeding 15 hours on a single charge, depending on usage.
- Build Quality: Constructed with carbon fiber and magnesium, this laptop maintains a robust structure while remaining portable.
Understanding the hardware is vital, especially if you need to access internal components like the battery. Knowing the features and specifications enhances your ability to troubleshoot and manage your device effectively.
Tools Required for Battery Removal
To remove the battery from your Lenovo ThinkPad X1 Carbon, gather the following tools. Having the right tools ensures a smooth process.
Recommended Products

Applications -- The kit includes a 6-pointed torx T5 screwdriver and a double-end crowbar. The set can be use for replacing battery of Kindle. Combining T5 with star screwdriver P5 (P5 pentalobe screwdriver), they can be used for replacing battery, SSD, hard disk, cooling fan and trackpad of Macbook air, Macbook pro and laptops. The double-end crowbar is used for opening the screen and back cover of electronic devices.

【Precision screwdriver set】-- 24Pcs precision screwdriver set includes 20Pcs CRV screwdriver bits which are phillips +1.5(PH000) +2.0(PH00) +3.0(PH0), flathead -1.0 -1.5 -2.0, torx T1 T2 T3 T4 T5, torx security TR6 TR8 TR9 TR10 TR15, triwing Y0.6(Y000) Y1.5(Y00), pentalobe 0.8(P2) 1.2 (P5), with a screwdriver handle, a double-ended spudger, a triangle spudger, and a SIM card thimble.

High Quality Material: The shaft of torx screwdriver is made of chrome-molybdenum steel, corrosion resistant and durable. And the handle is made of non-slip plastic handle, which improves comfort and control.
Screwdrivers
Use a Torx T5 screwdriver for removing the screws on the battery compartment. Some models may require a Phillips #0 screwdriver as well. Make sure your screwdriver fits snugly to avoid stripping the screws.
Antistatic Wrist Strap
Wearing an Antistatic Wrist Strap prevents static electricity from damaging internal components. Connect one end to your wrist and the other to a grounded surface. This practice safeguards your laptop during the battery removal process.
Step-by-Step Guide to Remove the Battery
Follow these steps carefully to remove the battery from your Lenovo ThinkPad X1 Carbon.
Recommended Products
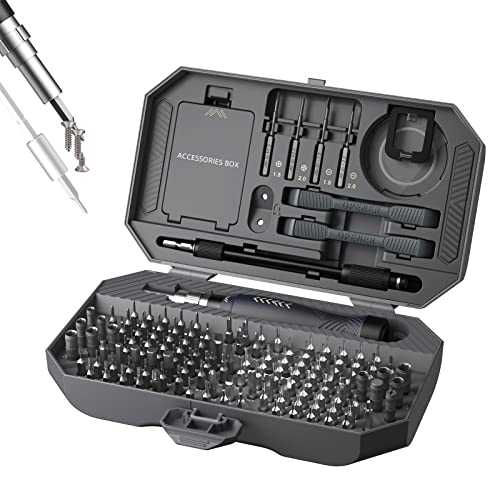
【MULTIPURPOSE TOOL】 This 164-in-1 compact screwdriver set with torx t5 screwdriver, whether you think of it as a laptop repair tool kit or a mobile phone repair kit, this versatile screwdriver set will be one of the most suitable electronics repair tool set for professional and hobbyist.

【Size】T5 torx tip, 3.15" (80mm) total length. Package include 2 pieces.

❤ 【Apple Macbook Repair Tool Kit】The Small Screwdriver tools kit for MacBook repair includes the MUST-HAVE P2 P5 T3 T5 Ph000 screwdriver for MacBook Air/ Pro and Retina. Pentaloble P5 screwdriver 1.2mm used for opening the back panel screws of MacBook, 5-pointed star screwdriver specially designed for Apple laptop disassembly and repair. Torx T5 for Macbook air & pro can remove fan screws, including SSD or hard disk replacement. PH000 +1.5mm Phillips work on these internal Phillips screws.
Preparing the Device
- Turn Off the Laptop: Ensure your device is powered down completely.
- Unplug All Devices: Disconnect the power adapter and any peripherals, such as USB drives or external monitors.
- Wear an Antistatic Wrist Strap: Protect the internal components from static damage by wearing an antistatic wrist strap.
Removing the Back Cover
- Locate the Screws: Identify the screws securing the back cover. Typically, these are Torx T5 screws.
- Unscrew the Back Cover: Use the Torx T5 screwdriver to carefully remove each screw. Keep them in a safe place.
- Pry Open the Back Cover: Gently use a plastic pry tool to lift and release the clips holding the cover in place. Avoid using metal tools to prevent damage.
Disconnecting the Battery
- Locate the Battery Connector: Find the battery connector on the motherboard.
- Release the Connector: Gently pull the battery connector upwards to disconnect it from the motherboard. Ensure that you do not pull on the wires.
Removing the Battery
- Identify the Battery Screws: Locate the screws securing the battery in place; these may also be Torx T5 screws.
- Unscrew the Battery: Remove the screws using the Torx T5 screwdriver. Again, ensure to keep these screws safe.
- Lift the Battery Out: Carefully lift the battery out of its compartment. Handle the battery with care to avoid any risk.
By following these steps, you can safely remove the battery from your Lenovo ThinkPad X1 Carbon.
Tips for Safe Battery Removal
- Power Down Your Device
Always ensure your Lenovo ThinkPad X1 Carbon is completely turned off before beginning the battery removal process. This minimizes the risk of electric shock.
- Unplug All Connections
Disconnect any peripherals, chargers, or cables from the laptop. This prevents accidental activation while working.
- Wear an Antistatic Wrist Strap
Use an antistatic wrist strap to prevent static electricity buildup. Attach the strap to a grounded surface to protect internal components.
- Choose the Right Tools
Keep a Torx T5 screwdriver and a Phillips #0 screwdriver handy, as these tools help you access the battery compartment easily.
- Work on a Soft Surface
Perform the battery removal on a soft surface, like a table with a cloth. This helps avoid scratches or damages to both the device and the workspace.
- Handle the Battery with Care
Remove the battery gently to avoid bending or damaging its connectors. Handle it by the edges to maintain stability.
- Avoid Touching Internal Components
During the process, avoid touching other internal components. This reduces the risk of damaging sensitive parts.
- Store the Battery Properly
If you’re not reinstalling the battery immediately, store it in a cool, dry place. Keep it away from direct sunlight or heat, which can affect its performance.
- Follow Manufacturer Guidelines
Always refer to the Lenovo user manual for your specific model. Guidelines can vary, so check for model-specific instructions.
- Dispose of Old Batteries Responsibly
When replacing batteries, dispose of old ones according to local regulations. Many retailers offer recycling programs for electronic waste.
Recommended Products

Rome Tech BIOS CMOS battery for PC motherboard best suits to replace your broken or non-working old 2016 battery - we provide premium quality only

Brand new and quality core battery is produced by the Japanese battery giant,which is the symbol of quality.

【Customer First】 24 x 7 email support. We specialize in providing quality power products and quality customer service. (Note: Amazon return windows will close after one month, If you have any problem with battery, please Contact us - in “YOUR ORDER” options click the “contact seller”.)
Conclusion
Removing the battery from your Lenovo ThinkPad X1 Carbon can be a straightforward process when you follow the right steps. By taking your time and using the proper tools you can ensure a smooth experience.
Remember to prioritize safety with precautions like wearing an antistatic wrist strap and handling the battery with care. Whether you’re troubleshooting or upgrading your device being well-prepared makes all the difference.
With a little patience and attention to detail you’ll have your laptop running optimally in no time. Happy tinkering!
Frequently Asked Questions
How do I safely remove the battery from my Lenovo ThinkPad X1 Carbon?
To safely remove the battery, power down your laptop, unplug all connections, and use an antistatic wrist strap. Remove the back cover by unscrewing the Torx T5 screws, disconnect the battery connector from the motherboard, then remove the screws holding the battery in place. Finally, gently lift out the battery.
What tools do I need to remove the battery?
You will need a Torx T5 screwdriver to remove the screws, and potentially a Phillips #0 screwdriver for some models. An antistatic wrist strap is also recommended to protect against electrostatic discharge.
Why is it important to remove the battery?
Removing the battery is crucial for troubleshooting issues and performing upgrades safely. It allows access to internal components while preventing electrical shorts or damage during maintenance.
How can I ensure I don’t damage internal components while removing the battery?
To prevent damage, always power down the laptop, unplug all connections, wear an antistatic wrist strap, and work on a soft surface. Avoid touching any internal components other than what you’re replacing.
What should I do with an old battery?
Dispose of your old battery properly by following local regulations or returning it to a recycling center. Do not throw it in the trash, as it can be hazardous to the environment.