

Ever found yourself in the dark, desperately trying to get your mini Maglite to shine bright, only to realize the battery’s given up on you? Frustrating, right? But fear not, because in this quick guide, you’ll learn all you need to know about changing the battery in your trusty mini Maglite.
Imagine having the power to bring light back into your life with just a simple battery swap. No more dim beams or flickering lights – just a reliable, bright mini Maglite ready to illuminate your way whenever you need it. Ready to say goodbye to those battery blues and hello to a well-lit path ahead?
In just a few easy steps, you’ll be a pro at changing the battery in your mini Maglite, ensuring you never get caught in the dark again. Say goodbye to dim lights and hello to a bright future with your mini Maglite by your side.
Gather the Necessary Tools
To change the battery in your mini Maglite, you’ll need a few essential tools. Here’s what you should gather before you begin:
- New Battery: Ensure you have a fresh, compatible battery for your mini Maglite.
- Flathead Screwdriver: This tool will help you access the battery compartment.
- Replacement Bulb (if needed): If your bulb is burnt out, it’s a good time to replace it too.
- Clean Cloth: Keep a cloth handy to wipe any dirt or residue inside the flashlight.
Having these tools ready will make the battery changing process smoother and more efficient.
Recommended Products

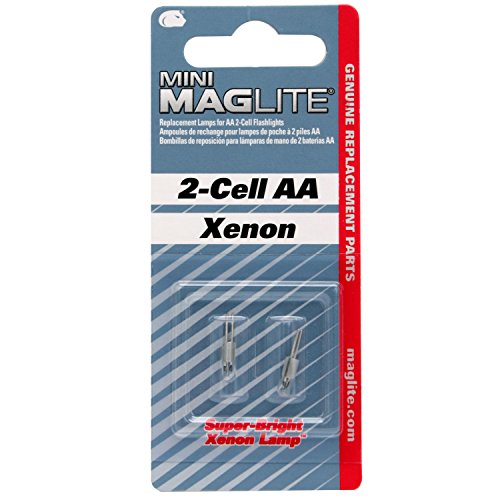
Maglite Replacement Lamps for 2-Cell AA Mini Flashlight, 2-Pack

Classic Incandescent Lighting – Xenon bulb delivers 14 lumens with a 96m beam distance.

Classic Incandescent Lighting – Xenon bulb delivers 9 lumens with a 31m beam distance.
Prepare Your Mini Maglite
When it’s time to change the battery in your mini Maglite, the first step is to ensure you have all the necessary tools handy. Here’s what you’ll need:
- New battery
- Flathead screwdriver
- Replacement bulb (if needed)
- Clean cloth
With these items ready, you’re set to tackle the battery replacement process efficiently and effectively. Keep them close at hand for a seamless experience when changing the battery in your mini Maglite.
Remove the Tail Cap
When changing the battery in your mini Maglite flashlight, the first step is to Remove the Tail Cap. This is where the battery compartment is located, and accessing it is crucial for replacing the old battery with a new one.
To do this, unscrew the tail cap of your mini Maglite flashlight by turning it counterclockwise. Keep in mind that the tail cap might be tightly secured, so you might need to apply a bit of pressure to loosen it.
Once the tail cap is removed, you can access the battery compartment of your mini Maglite flashlight. This is where you’ll find the old battery that needs to be replaced with a fresh one.
Remember, safely store the tail cap in a designated spot to avoid misplacing it during the battery replacement process. This will help ensure that you can easily reattach it once the new battery is in place.
Recommended Products

Replacement battery contact spring designed for compatibility with D cell Maglite flashlights. Ideal for replacing a worn, weak, stretched, or missing tail cap spring.

Classic Incandescent Lighting – Xenon bulb delivers 14 lumens with a 96m beam distance.

[Small yet Bright]: The portable I3T 2 delivers a maximum output of 200 lumens with 62-meter beam distance. It can be initially powered on in your preferred low or high mode depending on your needs
Replace the Battery
When it’s time to Replace the Battery in your mini Maglite flashlight, follow these steps to ensure a smooth process:
- Open the Tail Cap: Twist the tail cap counterclockwise until it comes off.
- Remove the Old Battery: Take out the old battery from the compartment.
- Insert the New Battery: Place the new battery carefully with the correct orientation.
- Close the Tail Cap: Secure the tail cap back in place by twisting it clockwise.
- Test the Flashlight: Turn on the flashlight to ensure the new battery is working properly.
For maintenance, remember to check and replace the battery regularly to keep your mini Maglite functioning at its best.
Recommended Products

Ultimate Replacement Bulb: This top-notch bi-pin base bulb is a perfect replacement for your Mini Mag-Lite, ensuring continued brightness and performance.

Reassemble Your Mini Maglite
Once you have successfully replaced the battery, it’s time to put your mini Maglite back together. Here are the steps to reassemble your flashlight:
- Step 1: Take the tail cap and screw it back onto the bottom of the flashlight body.
- Step 2: Tighten the tail cap securely to ensure it’s properly in place.
- Step 3: Test the flashlight by turning it on to check if the new battery is working correctly.
- Step 4: If the light is functioning, you have successfully reassembled your mini Maglite.
Conclusion
And there you have it – a simple guide on changing the battery in your mini Maglite flashlight. By following these steps, you can keep your flashlight shining bright whenever you need it. Remember to check and replace the battery regularly to ensure your mini Maglite is always ready to light up your way. Happy exploring!
Frequently Asked Questions
How do I replace the battery in my mini Maglite flashlight?
To replace the battery in your mini Maglite flashlight, follow these steps:
- Remove the tail cap to access the battery compartment.
- Take out the old battery.
- Insert the new battery correctly.
- Secure the tail cap back in place.
- Test the flashlight to ensure the new battery works.
What should I do after replacing the battery in my mini Maglite flashlight?
After replacing the battery in your mini Maglite flashlight, you should:
- Reassemble the flashlight by screwing the tail cap back on securely.
- Test the flashlight to confirm the new battery’s functionality.
- Ensure that the light is working properly.
How often should I check and replace the battery in my mini Maglite flashlight?
Regularly checking and replacing the battery in your mini Maglite flashlight is recommended for optimal functioning. It is suggested to replace the battery when the flashlight shows signs of weak performance or dimness.