
Key Takeaways
- Battery Life: The Google Nest Doorbell Battery lasts 1 to 6 months, depending on usage; monitor activity levels to optimize performance.
- High-Quality Video: It provides 1600 x 1200 HD video resolution for clear visuals, along with night vision for low-light conditions.
- Installation Steps: Ensure thorough preparation, such as charging the battery and selecting an optimal mounting location 4 to 5 feet from the ground.
- Wi-Fi Connection: Use the Google Home app for easy Wi-Fi setup, ensuring a strong signal in the chosen location to avoid connectivity issues.
- Regular Maintenance: Monthly checks on battery life and camera lens cleanliness will maintain video clarity and overall functionality.
- Common Troubleshooting: For connectivity or battery issues, verify Wi-Fi strength, restart the router, and adjust motion sensitivity settings to prolong battery life.
Have you ever wanted to enhance your home security but felt overwhelmed by the installation process? You’re not alone. Many people find themselves unsure about how to set up smart devices like the Google Nest Doorbell Battery.
Overview of Google Nest Doorbell Battery
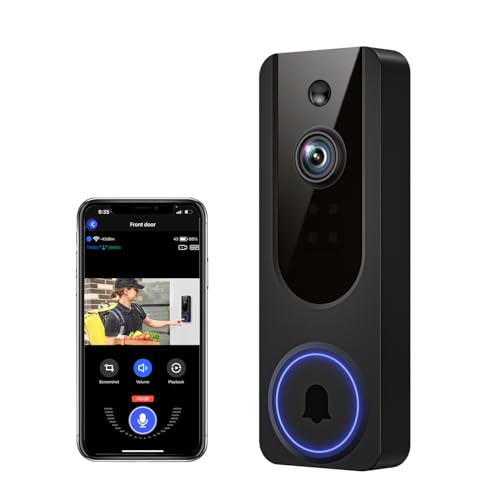
The Google Nest Doorbell Battery provides a convenient way to enhance home security. This device operates wirelessly, allowing for flexible placement without being tied to a power source.
Key Features
- Battery Life: The battery typically lasts 1 to 6 months, depending on usage and activity levels. High-traffic areas may drain the battery faster.
- Resolution: Offers 1600 x 1200 HD video resolution. This ensures clear visuals for identification.
- Night Vision: Features night vision capabilities, making it effective even in low-light conditions.
- Two-Way Audio: Enables real-time communication through the doorbell.
Installation Process
- Unbox the Doorbell: Open the packaging and verify that all components are included.
- Charge the Battery: Ensure the battery is fully charged before installation. This typically takes about 5 to 6 hours.
- Choose Location: Select a spot that captures a wide angle of your entrance.
- Mount the Doorbell: Use the provided mounting hardware. Follow the guidelines to ensure a secure fit.
- Connect to Wi-Fi: Download the Google Home app and follow the prompts to connect your doorbell to your home Wi-Fi network.
Tips for Optimal Use
- Adjust Motion Sensitivity: Fine-tune settings in the app to avoid false alerts from passing cars or pets.
- Regular Maintenance: Clean the camera lens and check battery levels monthly. This helps maintain video clarity and performance.
- Utilize Alerts: Enable notifications for real-time updates on activity, ensuring you’re always aware of who’s at your door.
By understanding your Google Nest Doorbell Battery and following these guidelines, you can enhance your home security effectively and effortlessly.
Preparing for Installation
Preparation is key for a smooth installation of your Google Nest Doorbell Battery. Follow these steps to ensure everything goes seamlessly.
Recommended Products

【Unique Design】This mounting bracket is specially designed for Google Nest Doorbell (Battery), made of high quality plastic housing which can protect your nest camera from most potential damage. (Note:The Nest Doorbell is NOT Included)
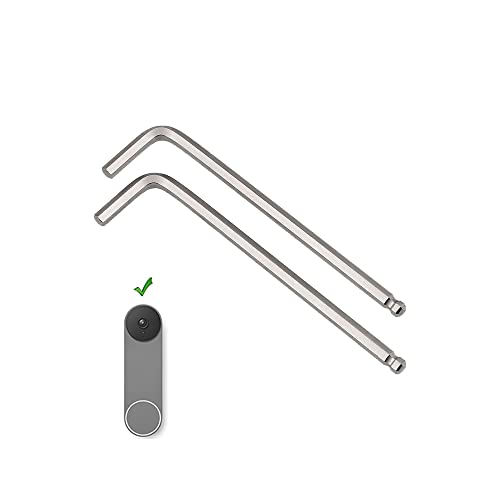
【L-Shaped Design】: Doorbell screwdriver that use L-Shape is easy to hold and rotate, very strong and durable, ergonomic handle, non-slip design

【Compatible Model】:This screwdriver replacement is designed for Google Nest Doorbell (Wired,3rd Gen),Google Nest (Wired) Doorbell 2nd Gen,these screws provide a perfect fit
Tools and Materials Needed
Gather the following tools and materials before starting:
- Screwdriver: A Phillips or flathead screwdriver will work depending on your mounting kit.
- Drill: A power drill helps create holes for anchors if you’re mounting on hard surfaces.
- Anchors and Screws: Usually included in your installation kit, these secure the doorbell to the wall.
- Level: Ensures the doorbell is straight and aligned correctly.
- Smartphone or Tablet: For using the Google Home app during setup.
Checking Compatibility
Confirm the suitability of your doorbell location by checking these factors:
- Wireless Network: Ensure your Wi-Fi signal is strong where you plan to place the doorbell. Weak signals may cause connectivity issues.
- Doorbell Height: Position the doorbell between 4 and 5 feet from the ground for optimal viewing.
- Obstructions: Look for any physical barriers, like walls or large plants, that could block the camera’s view.
By preparing adequately and ensuring compatibility, you set yourself up for an effective installation of your Google Nest Doorbell Battery.
Step-by-Step Installation Process
Follow these steps to install your Google Nest Doorbell Battery with ease.
Recommended Products
AI Detection Precision: Advanced AI intelligently identifies humans while filtering out unnecessary motion alerts.

Accurate AI Human Detection: Smart AI detection identifies people while filtering out animals and passing vehicles, ideal for a reliable security camera.

2K VIEW + 1:1 ASPECT RATIO + NIGHT VISION: With a combination of 4MP HD resolution and a unique 1:1 aspect ratio, Reolink Doorbell Battery provides an expansive head-to-toe view, offering super visibility of your front door and its surroundings. Day or night, it captures clear images without blurriness.
Step 1: Remove the Old Doorbell (if applicable)
- Turn off the power supply to the existing doorbell at your circuit breaker.
- Use a screwdriver to detach the doorbell from the wall.
- Disconnect the wires connected to the old doorbell and set them aside.
Step 2: Charge the Google Nest Doorbell Battery
- Locate the charging cable included in the box.
- Connect the USB cable to the doorbell’s power input.
- Plug the other end into a wall outlet and let it charge completely, which typically takes around 6 hours.
- Check the battery status indicator; it should show a solid green light when fully charged.
Step 3: Mount the Doorbell
- Choose a location for your doorbell, ideally 4 to 5 feet from the ground for optimal camera view.
- Use a level to mark where the doorbell will go.
- Pre-drill holes for the anchors, which will help secure the doorbell.
- Position the doorbell on the wall, ensuring it aligns with the marks, and insert screws to fasten it securely.
Step 4: Connect to Wi-Fi
- Download and open the Google Home app on your smartphone or tablet.
- Select “Add” and then “Set up device.”
- Follow the prompts to connect to your Wi-Fi network by selecting it and entering the password.
- Wait for the app to confirm that the doorbell is connected, and adjust any settings as needed.
By following these steps, you’ll efficiently install your Google Nest Doorbell Battery and enhance your home security.
Troubleshooting Common Issues
Encountering issues with your Google Nest Doorbell Battery can be frustrating. Here are some common problems and solutions to help you.
Recommended Products

【Lost Your Doorbell Key?】Are you often can't find your Dooerbell key when replacing the battery or resetting your doorbell. This key tool for google nest camera can replace the lost security key to remove your Doorbell from it's mount.

What you will receive: You will receive 2 doorbell key card pin tools compatible with Arlo, Nest and Eufy video doorbells and doorbells, the right quantity to be able to handle your daily use.(This doorbell key is compatible with Arlo, Nest and Eufy Video Doorbell. Please check your doorbell brand before purchasing and using it)
![NC5100US Battery, Upgraded [480mAh] Super High Capacity Li- Polyme Battery for Nest Hello NC5100US C1241290 Vido Doorbell Wired Replacement Batterien with Repair Tool Kits](https://m.media-amazon.com/images/I/412UzYxYcML._SL500_.jpg)
❤【High Quality Grade A Premium Battery】: This NC5100US Battery uses Grade A+ rated battery cells with CE and ROHS UL certification,ensure last over 2000+ charge cycles. This is Perfect Nest Hello NC5100US C1241290 Vido Doorbell Wired Battery replacement battery.
Connection Problems
Troubles with connecting your doorbell to Wi-Fi happen occasionally. If the doorbell won’t connect, check the following steps:
- Verify Wi-Fi Signal: Ensure your Wi-Fi signal is strong. If you’re too far from the router, the connection may drop.
- Restart the Router: Restart your router to reset the connection. This can resolve many connectivity issues.
- Check Google Home App: Ensure you’re using the latest version of the Google Home app. If not, update it from the app store.
- Reboot the Doorbell: If issues persist, press the reset button on the back of the doorbell for a few seconds to reboot it.
Battery Life Concerns
Worries about battery life can affect your experience. Here’s how to address battery-related issues:
- Monitor Usage: Check how often you receive alerts. High motion sensitivity settings can drain the battery quickly.
- Optimize Settings: Adjust settings in the Google Home app to limit unnecessary notifications.
- Regular Charging: Charge the doorbell every month or whenever the battery indicator shows low battery status (red light).
- Location Check: If positioned in a shaded area, consider relocating it to a spot that receives more sunlight for optimal battery performance.
By addressing these common issues effectively, you can ensure that your Google Nest Doorbell Battery functions correctly and helps secure your home.
Conclusion
Getting your Google Nest Doorbell Battery up and running is a great step towards enhancing your home security. By following the steps outlined in this guide you can ensure a smooth installation process.
Remember to keep an eye on the battery life and adjust settings for optimal performance. With regular maintenance and smart placement you’ll enjoy the peace of mind that comes with knowing your home is well-protected.
Now that you’ve got everything set up don’t hesitate to explore all the features your new doorbell offers. Happy monitoring!
Frequently Asked Questions
What is the Google Nest Doorbell Battery?
The Google Nest Doorbell Battery is a wireless smart doorbell that enhances home security. It offers features like HD video resolution (1600 x 1200), night vision, two-way audio, and a battery life ranging from 1 to 6 months, providing flexibility in placement without needing electrical wiring.
How do I install the Google Nest Doorbell Battery?
To install the Google Nest Doorbell Battery, first unbox and charge the battery using the USB cable. Next, choose a suitable location, mount the doorbell securely, and connect it to Wi-Fi using the Google Home app. Follow the app instructions for final setup.
What tools are needed for installation?
Essential tools for installing the Google Nest Doorbell Battery include a screwdriver, drill, anchors and screws, a level, and a smartphone or tablet for setup. Having these tools ready will ensure a smoother installation process.
How can I troubleshoot connection issues?
If you experience connection issues with your Google Nest Doorbell Battery, first check Wi-Fi signal strength. Restart your router, ensure the Google Home app is updated, and reboot the doorbell. These steps often resolve common connectivity problems.
How can I optimize battery life?
To optimize the battery life of your Google Nest Doorbell, monitor usage, adjust motion sensitivity settings, charge the device regularly, and consider relocating it to a sunnier spot if necessary. These tips help extend its operational time.