
Key Takeaways
- Understanding Your Device: The Samsung Galaxy Tab 3 offers versatile functionality, available in different sizes and equipped with decent performance specifications suited for casual use.
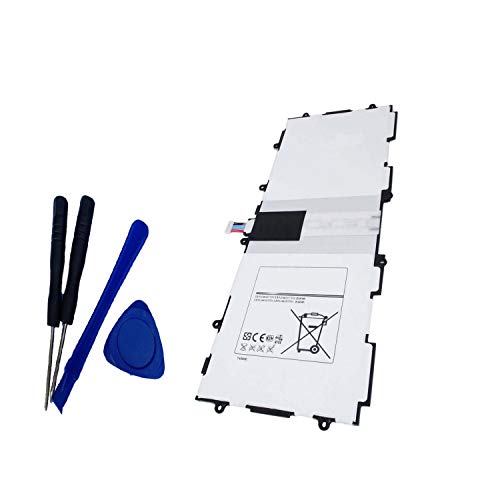
- Essential Tools: To safely remove the battery, gather necessary tools like a Phillips-head screwdriver, plastic spudger, tweezers, and an ESD-safe wrist strap.
- Safety Precautions: Always power off your device, use plastic tools, work in a static-free environment, and handle components with care to avoid damage.
- Step-by-Step Removal: Follow a careful process of powering down, opening the back cover, detaching the battery connector, and removing the battery for a hassle-free replacement.
- Compatibility Matters: Ensure the new battery is compatible with the Galaxy Tab 3, as using the wrong battery can cause performance issues.
- Post-Replacement Checks: After replacing the battery, test your device to confirm proper functionality, and ensure all connections are secure to avoid further problems.
Ever found yourself struggling with a device that just won’t charge or hold a battery life? If you own a Samsung Galaxy Tab 3, you might be facing this issue more often than you’d like. Sometimes, the best solution is to replace the battery, but getting to it can seem daunting.
Overview of Samsung Galaxy Tab 3
Samsung Galaxy Tab 3 represents a versatile tablet lineup designed for various user needs, from casual browsing to streaming videos. Released in 2013, it features a sleek design, lightweight body, and a vibrant display, providing an enjoyable experience.
The Galaxy Tab 3 is available in different sizes, including 7-inch, 8-inch, and 10.1-inch models. Each variant runs on Android operating systems, ensuring access to a plethora of apps through the Google Play Store. You can easily multitask and switch between applications thanks to its user-friendly interface.
In terms of specifications, the Galaxy Tab 3 features a dual-core processor, adequate RAM, and internal storage options that range from 8GB to 32GB, expandable via microSD cards. This flexibility allows for ample space to store photos, videos, and important documents.
Battery performance can be an essential consideration for users. With a battery life of up to 10 hours, the Galaxy Tab 3 allows for extended usage, provided the device is well-maintained. Regular software updates can also optimize battery performance, enhancing your overall experience.
The body is made from durable materials, built to withstand everyday use. However, issues with battery degradation may arise over time, prompting the need for replacement. Understanding the device’s layout and battery compartment can simplify the replacement process, making it accessible even for those without technical expertise.
Overall, the Samsung Galaxy Tab 3 is designed for user satisfaction, offering functionality and convenience. Knowing how to maintain and troubleshoot common issues, like battery removal, ensures you get the most from your device.
Tools Needed for Battery Removal
Removing the battery from your Samsung Galaxy Tab 3 requires specific tools to ensure a smooth process. Here’s what you need for the task:
Recommended Tools
- Small Phillips-head screwdriver: Use this for unscrewing any screws securing the back panel.
- Plastic spudger: This helps to safely pry open the device without damaging the casing.
- Tweezers: Ideal for handling small components inside the tablet.
- ESD-safe wrist strap: Helps prevent static discharge that can harm electronic components.
- Microfiber cloth: Use this to clean surfaces and avoid scratches.
Safety Precautions
- Power off the tablet: Always turn off your device before starting the battery removal process.
- Avoid metal tools: Stick to plastic tools to prevent shorts and damage inside the tablet.
- Work in a static-free environment: Consider using an ESD-safe mat for added protection.
- Handle components gently: Be cautious with delicate parts to avoid any accidental breakage.
- Wash hands: Keep your fingers clean to avoid oils and dirt on sensitive areas.
Gather these tools and follow the guidelines carefully for safe and efficient battery removal from your Galaxy Tab 3.
Step-by-Step Guide to Remove Battery
Follow these steps to safely remove the battery from your Samsung Galaxy Tab 3.
Powering Down the Device
Before starting, power off the tablet. Hold the power button until the shutdown menu appears. Tap “Power Off” and confirm. This step prevents any accidental damage during removal.
Opening the Back Cover
Use a plastic spudger to carefully pry open the back cover. Start at a corner, inserting the spudger gently between the cover and the device. Work your way along the edges, applying light pressure until the cover pops off. Be cautious to avoid damaging clips that hold the cover in place.
Detaching the Battery
Once the back cover is off, locate the battery connector. Use tweezers to lift the connector gently away from the motherboard. After detaching the connector, you can carefully lift the battery out of its compartment. Hold it by the edges to avoid damaging the contacts.
Tips for Replacing the Battery
Replacing the battery in your Samsung Galaxy Tab 3 involves careful preparation and consideration. Follow these tips to ensure a successful replacement.
Recommended Products


☪Compatible Models: This Galaxy Note 3 battery Compatible with Samsung Galaxy Note 3 N9000 N9005 N900A N900V N900P N900T.Please confirm your phone model before buying.
Choose the Right Battery
- Select a Compatible Battery: Use a battery that’s specifically designed for the Galaxy Tab 3 to ensure compatibility and performance. Third-party batteries might not meet your expectations.
Gather Your Tools
- Collect Essential Tools: Ensure you have all necessary tools ready before starting. A small Phillips-head screwdriver, plastic spudger, tweezers, and an ESD-safe wrist strap are vital for the process. A microfiber cloth helps keep everything clean.
Prepare for Safe Removal
- Power Off the Device: Before you begin, turn off your tablet completely. This prevents accidental shorts and protects your device.
- Work in a Static-Free Environment: Choose a clean, static-free area to minimize risks to your tablet’s components.
Handle Components with Care
- Use Plastic Tools: Stick to plastic tools like the spudger to avoid damaging internal components. Metal tools can scratch surfaces or create shorts.
- Be Gentle: Carefully pry components apart. If you encounter resistance, double-check connections instead of forcing parts apart.
Follow Replacement Steps
- Disconnect the Battery: Use tweezers to lift the battery connector away from the motherboard. Ensure it detaches cleanly without excessive force.
- Remove the Old Battery: Grasp the battery by the edges and lift it out. Avoid touching any exposed electronics directly.
Install the New Battery
- Attach the New Battery: Position the new battery carefully in place. Connect the battery to the motherboard, ensuring a snug fit without forcing it.
- Seal the Tablet: Once the new battery is in place, reattach the back cover. Press firmly to ensure the clips secure it properly.
Test the Device
- Power On: Turn the tablet on to check that the new battery is functioning. If the device powers up without issues, it confirms successful replacement.
Following these tips can streamline the battery replacement process, enhancing your experience with your Samsung Galaxy Tab 3.
Common Issues Encountered
Removing the battery from your Samsung Galaxy Tab 3 can present a few common issues. Understanding these challenges helps in effectively managing them.
Difficulty Opening the Device
You may find it hard to pry open the back cover. The adhesive used can be strong. Use a plastic spudger carefully to avoid damaging the casing. If resistance occurs, apply gentle pressure and work your way around the edges.
Battery Not Detaching Easily
Sometimes, the battery doesn’t detach easily after removing the back cover. The battery can stick due to adhesive. Use tweezers to carefully lift it away from the device’s internals, ensuring not to pull on any wires connected to the battery.
Disconnection Concerns
Disconnecting the battery connector becomes tricky if you aren’t cautious. You must ensure it’s completely detached before attempting to replace it. Gently lift the connector straight up, avoiding any twisting or bending that might break it.
Compatibility Issues
Installing a new battery that’s incompatible can lead to problems. Ensure you select a battery specifically designed for the Galaxy Tab 3. Check model numbers and specifications carefully, especially for devices with different screen sizes.
Post-Replacement Checks
After replacing the battery, you might experience charging issues or insufficient battery life. Ensure all connections are tight and double-check that you’ve reassembled everything properly. If problems persist, consider trying a different battery.
Handling Static Electricity
Working in a static-prone environment may damage internal components. Always wear an ESD-safe wrist strap to prevent static discharge. This ensures safe handling of sensitive parts during the process.
Avoiding Physical Damage
You risk damaging the internal components if you’re not careful while removing or replacing the battery. Keep all tools steady and avoid excessive force. A gentle touch goes a long way in preserving your device’s integrity.
Conclusion
Replacing the battery in your Samsung Galaxy Tab 3 might seem like a daunting task but it can be a rewarding experience. With the right tools and a bit of patience you can breathe new life into your tablet.
Remember to follow the safety precautions and the step-by-step guide to ensure everything goes smoothly. Taking the time to do this not only enhances your device’s performance but also extends its lifespan.
So go ahead and tackle that battery replacement with confidence. You’ll enjoy your Galaxy Tab 3 even more once it’s back in action. Happy tinkering!
Frequently Asked Questions
What are common issues with Samsung Galaxy Tab 3 battery life?
Battery life issues with the Samsung Galaxy Tab 3 can include rapid drainage, inability to hold a charge, or the tablet not turning on. Over time, battery degradation is normal, and replacing the battery may be necessary to restore optimal performance.
How do I know if I need to replace my Galaxy Tab 3 battery?
If your Galaxy Tab 3 frequently shuts down, takes a long time to charge, or doesn’t hold a charge at all, it’s likely time for a battery replacement. A decrease in usage time and swelling of the battery can also indicate the need for a new battery.
What tools do I need to replace the Galaxy Tab 3 battery?
To replace the battery, you’ll need a small Phillips-head screwdriver, a plastic spudger, tweezers, an ESD-safe wrist strap, and a microfiber cloth. Having these tools ready makes the process smoother and safer.
Are there any safety precautions I should take?
Yes, always power off your device before starting. Avoid using metal tools, work in a static-free area, and handle components gently to prevent damage. Keeping your hands clean will also help maintain device integrity during the replacement.
How do I access the battery in my Galaxy Tab 3?
To access the battery, start by turning off the tablet. Use a plastic spudger to carefully pry open the back cover, and then gently detach the battery from its connector. Follow the steps outlined in the article to do this safely.
Can I use any battery for replacement?
No, it’s crucial to use a battery specifically designed for the Samsung Galaxy Tab 3. Using an incompatible battery can lead to performance issues, damage the device, or pose safety risks.
What common challenges might I face during battery replacement?
Challenges can include difficulty prying open the device, the battery not detaching easily, or issues with the battery connector. Patience and careful handling are key to overcoming these obstacles.
How can I ensure the new battery works after replacement?
After installing the new battery, power on the tablet to confirm functionality. Perform post-replacement checks to ensure everything is reassembled correctly and that the device charges properly.