
Close Menu
Battery Spotlight
    Battery Spotlight
    • Home
    • Phone Batteries
    • Laptop Batteries
    • Car Batteries
      • Golf Cart Batteries
    • Battery Info
      • Battery Chargers
      • Battery Life
      • Battery Maintenance
      • Marine Batteries
      • Rechargeable Batteries
      • Solar Batteries
    • About Us
      • Contact
    Battery Spotlight
    Navigation: Home » Solar Batteries » How to Install Solar Panel to Battery for Efficient Energy Storage and Backup Power
    Solar Batteries

    How to Install Solar Panel to Battery for Efficient Energy Storage and Backup Power

    Jimmy LarsenBy Jimmy LarsenNovember 13, 20248 Mins Read
    Share Facebook Twitter Pinterest LinkedIn Tumblr Email WhatsApp Copy Link
    Share
    Facebook Twitter LinkedIn Pinterest Email Copy Link

    Have you ever thought about harnessing the sun’s energy to power your devices? Installing a solar panel to a battery can be a game-changer for your energy needs. Whether you want to reduce your electricity bills or create a backup power source, this setup can help you achieve your goals.

    Table of Contents

    Toggle
    • Key Takeaways
    • Understanding Solar Panels and Batteries
    • Components of a Solar Panel System
    • Preparing for Installation
    • Assessing Your Energy Needs
    • Choosing the Right Location for Solar Panels
    • Installation Steps
    • Tools and Materials Required
    • Mounting the Solar Panels
    • Safety Precautions
    • Electrical Safety Tips
    • Conclusion
    • Frequently Asked Questions
    • What are the main benefits of using solar panels with batteries?
    • How do solar panels work?
    • What types of batteries are best for solar applications?
    • How should I prepare for a solar panel installation?
    • What steps are involved in installing a solar panel system?
    • What safety precautions should I take during installation?

    Key Takeaways

    • Solar Panel Basics: Understanding the key componentsβ€”solar panels, charge controllers, batteries, inverters, wiring, and mountsβ€”is essential for a successful installation.
    • Battery Options: Choose between lead-acid, lithium-ion, gel, or flooded lead-acid batteries based on your energy needs, lifespan, and budget considerations.
    • Energy Assessment: Calculate your daily energy consumption and backup power requirements to size your system appropriately before installation.
    • Optimal Location: Select a site for your solar panels with adequate sunlight exposure, free from obstructions, and with proper angles for maximum efficiency.
    • Installation Steps: Follow detailed installation steps including securing panels, wiring connections, and testing the system to ensure functionality and safety.
    • Safety Precautions: Prioritize safety by turning off power sources, using protective gear, and ensuring dry and stable conditions during installation to avoid hazards.

    Understanding Solar Panels and Batteries

    Solar panels convert sunlight into electricity, and batteries store this energy for later use. This setup allows you to harness solar power efficiently, making it a reliable alternative energy source.

    Recommended Products
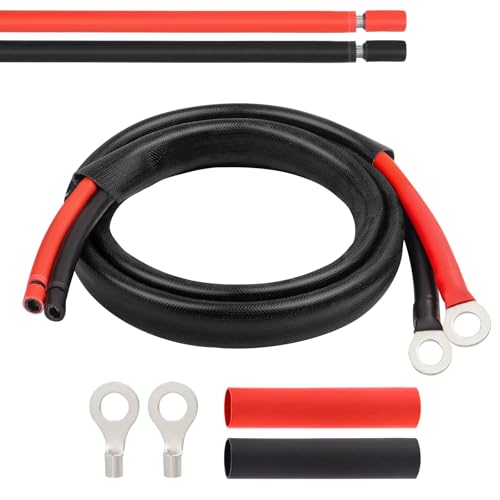
    Solar Battery Cables 10 Gauge Power Inverter Cables with 3/8" Ring Terminals 10AWG Wire Tinned Copper Tray Extension Cable for Solar,RV,Auto Car,Boat (1M)
    Solar Battery Cables 10 Gauge Power Inverter Cables with 3/8" Ring Terminals 10AWG Wire Tinned Copper Tray Extension Cable for Solar,RV,Auto Car,Boat (1M)

    10AWG Wire Tinned Copper Tray Extension Cable to connect the charge controller to the battery, also can be used as solar wires with tools to cut and crimp with new connectors.Widely used for solar panels, marine, automotive, RVs, Lawn mower,camper and inverter wiring.

    VIEW LATEST PRICE

    As an affiliate, we earn on qualifying purchases.

    MOOKEERF Solar Battery Cable - 10 Gauge 3FT Power Inverter Cable with PV Flame Retardant Protective Sleeving Connect Battery and Charge Controller for Solar Panel Automotive RV Motorcycle Marine
    MOOKEERF Solar Battery Cable - 10 Gauge 3FT Power Inverter Cable with PV Flame Retardant Protective Sleeving Connect Battery and Charge Controller for Solar Panel Automotive RV Motorcycle Marine

    10AWG Tinned Copper Wire -- MOOKEERF solar battery cable is made of larger diameter 10AWG tinned copper wire which is minimize power loss in solar panel systems, the inner conductor consists of 84 tin-plated copper, well constructed and good conductive.

    VIEW LATEST PRICE

    As an affiliate, we earn on qualifying purchases.

    30A PWM Solar Charge Controller, 12V 24V Dual USB Solar Panel Battery Intelligent Regulator with LCD Display, Auto Parameter Adjustable, Timer Setting, Multiple Load Control Modes
    30A PWM Solar Charge Controller, 12V 24V Dual USB Solar Panel Battery Intelligent Regulator with LCD Display, Auto Parameter Adjustable, Timer Setting, Multiple Load Control Modes

    UPGRADED SOLAR CONTROLLER: With the built-in industrial microcontroller, this PWM solar charge controller automatically helps you manage the working of solar panels and batteries in solar systems. When the battery runs out, it will memorize various parameters you set, so you don't need to reset it, which is easy and safe

    VIEW LATEST PRICE

    As an affiliate, we earn on qualifying purchases.

    Components of a Solar Panel System

    1. Solar Panels: These are the primary components that capture sunlight and convert it to electricity.
    2. Charge Controller: This regulates the voltage and current coming from the solar panels, preventing battery overcharging.
    3. Batteries: These store the electricity generated by the solar panels for later use.
    4. Inverter: This converts the stored DC electricity in the batteries to AC electricity for household appliances.
    5. Wiring and Mounts: These ensure proper electrical connections and securing your solar panels in place.
    SEE ALSO  Can You Use Rechargeable Batteries in Solar Lights: Best Practices for Optimal Performance
    1. Lead-Acid Batteries: Common in solar applications, these batteries are cost-effective and reliable, but they have a shorter lifespan than others.
    2. Lithium-Ion Batteries: These newer batteries offer longer lifespans and faster charging but come at a higher price point. They are also lighter and more efficient.
    3. Gel Batteries: A type of lead-acid battery that is sealed and maintenance-free, gel batteries are safer and suitable for deeper cycling.
    4. Flooded Lead-Acid Batteries: These require regular maintenance but are the least expensive option and can hold up to heavy usage.

    Each battery type has its pros and cons. Consider your energy needs and budget when making a choice.

    Preparing for Installation

    Preparation is crucial for a successful solar panel installation. Taking time to assess your energy needs and choose the right location ensures optimal system performance.

    Recommended Products

    Portable Solar Generator, 300W Portable Power Station with Foldable 60W Solar Panel,110V Pure Sine Wave 280Wh Battery Power Pack with USB DC AC Outlet for Camping Smart Devices RV Van Outdoor-Orange
    Portable Solar Generator, 300W Portable Power Station with Foldable 60W Solar Panel,110V Pure Sine Wave 280Wh Battery Power Pack with USB DC AC Outlet for Camping Smart Devices RV Van Outdoor-Orange

    Portable Generator with 60W Solar Panel Included: with a big battery pack, ZeroKor 300W power stations Generator are powerful enough to charge smartphones,tablets,laptops,headphones or other outdoor small camping supplies(Tips:Using electrical appliances over 300W may damage the portable solar generator, especially some devices that are prone to heat or built-in air compressor such as coffee maker,Hair dryer, water pump etc )

    VIEW LATEST PRICE

    As an affiliate, we earn on qualifying purchases.

    A SMALL SCALE HOME SOLAR/BATTERY BACKUP HACK: HOME HACK SERIES
    A SMALL SCALE HOME SOLAR/BATTERY BACKUP HACK: HOME HACK SERIES
    VIEW LATEST PRICE

    As an affiliate, we earn on qualifying purchases.

    Starlink Mini Power Supply, 12V/24V Starlink Mini 12V Adapter Power Cable DC Step Up Converter to 30V 3.5A, Compatible with Battery/RV/Generator/Yacht/Solar Panels Off-Grid Power Solution with Fuse
    Starlink Mini Power Supply, 12V/24V Starlink Mini 12V Adapter Power Cable DC Step Up Converter to 30V 3.5A, Compatible with Battery/RV/Generator/Yacht/Solar Panels Off-Grid Power Solution with Fuse

    Stable Starlink Mini battery boost converter: DC step up power cable 12V/24V to 30V3.5A converter, providing reliable power for your Starlink Mini off-grid satellite internet. Compatible for input DC 9V-28V to output 30V

    VIEW LATEST PRICE

    As an affiliate, we earn on qualifying purchases.

    Assessing Your Energy Needs

    Start by determining your daily energy consumption. Check your previous electricity bills to find out how much energy you use on average each month.

    1. Calculate watt-hours: Multiply the wattage of each device by the number of hours you use it daily.
    2. Add total watt-hours: Combine the watt-hours of all devices to get your daily energy requirement.
    3. Factor in storage: Decide how much backup power you need from the battery. Aim for a system that can provide power for at least a few days, especially during cloudy weather or in emergencies.

    Choosing the Right Location for Solar Panels

    Selecting a proper site for your solar panels is vital for maximizing their efficiency. Follow these steps:

    1. Identify sunlight exposure: Ensure the location receives direct sunlight for at least six hours per day.
    2. Avoid obstructions: Check for trees, buildings, or other barriers that could cast shadows on the panels throughout the day.
    3. Assess angle and orientation: Position panels to face south for optimal sunlight capture, and tilt them at an angle that matches your latitude to maximize energy absorption.
    4. Consider mounting options: Decide whether you’ll use a roof-mounted system or ground-mounted installation based on space, accessibility, and structural considerations.
    SEE ALSO  Can You Put Regular Batteries in Solar Lights: What You Need to Know for Optimal Performance

    By carefully assessing your energy needs and selecting the best location, you set the stage for a successful solar panel and battery installation.

    Installation Steps

    Follow these steps to install solar panels to a battery system effectively. Each step requires attention to detail to ensure a successful setup.

    Recommended Products

    Renogy 10 Amp 12V/24V PWM Negative Ground Solar Charge Controller Compact Design w/LCD Display for AGM, Gel, Flooded and Lithium Battery, Wanderer 10A
    Renogy 10 Amp 12V/24V PWM Negative Ground Solar Charge Controller Compact Design w/LCD Display for AGM, Gel, Flooded and Lithium Battery, Wanderer 10A

    π’π¦πšπ«π­ πŸ’-π’π­πšπ πž 12V/24V Solar Charge Controller: Renogy charge controller 𝐦𝐚𝐱𝐒𝐦𝐒𝐳𝐞𝐬 𝐁𝐚𝐭𝐭𝐞𝐫𝐲 π‹π’πŸπž & 𝐒𝐨π₯𝐚𝐫 π„πŸπŸπ’πœπ’πžπ§πœπ², this advanced pwm solar charge controller utilizes intelligent 4-stage charging (Bulk/Boost/ Float/Equalization) to optimize power delivery for AGM, Gel, Flooded and Lithium batteries. RV solar charge controller prevents overcharging and gas buildup while 𝐚𝐜𝐑𝐒𝐞𝐯𝐒𝐧𝐠 πŸ‘πŸŽ% π₯𝐨𝐧𝐠𝐞𝐫 π›πšπ­π­πžπ«π² π₯𝐒𝐟𝐞𝐬𝐩𝐚𝐧 compared to basic charge controllers.

    VIEW LATEST PRICE

    As an affiliate, we earn on qualifying purchases.

    10Amp 12 Volt MPPT Solar Charge Controller, Bateria Power Intelligent Portable Solar Panel Controller, Max PV 150W 30Voc Solar Regulator for Gel AGM Lead-Acid, Lithium LiFePO4 Battery (SunRock 10)
    10Amp 12 Volt MPPT Solar Charge Controller, Bateria Power Intelligent Portable Solar Panel Controller, Max PV 150W 30Voc Solar Regulator for Gel AGM Lead-Acid, Lithium LiFePO4 Battery (SunRock 10)

    Notes to buyers β‘ Designed for 12V batteries, please don't connect to higher voltage batteries. β‘‘The PV Voc needs to be higher than the battery voltage, the minimum is 15V, and the maximum should not exceed 30V. β‘’Connection sequence: first connect the battery, then connect the solar panel.

    VIEW LATEST PRICE

    As an affiliate, we earn on qualifying purchases.

    [Upgraded] 30A Solar Charge Controller, 12V/ 24V Solar Panel Regulator with Adjustable LCD Display Dual USB Port Timer Setting PWM Auto Parameter
    [Upgraded] 30A Solar Charge Controller, 12V/ 24V Solar Panel Regulator with Adjustable LCD Display Dual USB Port Timer Setting PWM Auto Parameter

    【UPGRADED SOLAR CONTROLLER】This solar charge controller helps you manage the working of solar panels and batteries in solar systems automatically with the build-in industrial microcontroller. You don't need to reset it when the battery runs out cause it will memorize various parameters set by the user

    VIEW LATEST PRICE

    As an affiliate, we earn on qualifying purchases.

    Tools and Materials Required

    Gather the following tools and materials before starting the installation:

    • Solar Panels: Ensure they meet your power needs.
    • Battery: Choose a compatible battery type, like lithium-ion or lead-acid.
    • Charge Controller: Select the appropriate controller for your system.
    • Inverter: A suitable inverter converts DC to AC if necessary.
    • Wiring: Use properly rated wire for your system’s voltage and current.
    • Mounting Hardware: Brackets and screws to secure the panels.
    • Tools: Include a screwdriver, wrench, multimeter, and level.

    Mounting the Solar Panels

    1. Choose Mounting Location: Identify a location that receives sunlight for at least six hours daily.
    2. Install Mounting Brackets: Attach the brackets to the mounting surface using screws. Ensure they’re straight using a level.
    3. Secure Solar Panels: Place the solar panels onto the mounted brackets and tighten them securely.
    4. Check Angles: Adjust the angle for maximum sun exposure based on your geographic location.
    1. Connect Solar Panel Wires: Connect the positive (+) wire from the solar panel to the positive terminal on the charge controller. Connect the negative (-) wire to the negative terminal.
    2. Wire the Charge Controller: Connect the positive and negative wires from the charge controller to the corresponding terminals on the battery.
    3. Install the Inverter (if required): Connect the inverter to the battery terminals, following the manufacturer’s guidelines.
    4. Test the System: Use a multimeter to check voltage levels and ensure proper connections before finalizing the setup.
    SEE ALSO  What is a Solar Battery System and How It Enhances Your Energy Independence

    By following these steps, you’ll create an efficient solar panel and battery system that provides a reliable energy source.

    Safety Precautions

    Safety is crucial when installing a solar panel to a battery system. Following safety precautions helps prevent accidents and ensures the system operates efficiently.

    Electrical Safety Tips

    • Turn Off Power Sources: Before starting, turn off all power sources. This includes disconnecting batteries and turning off related devices.
    • Use Protective Gear: Always wear gloves and safety goggles. These protect against electrical shocks and possible injuries from sharp edges or debris.
    • Check for Damaged Equipment: Inspect solar panels, wiring, and batteries for any damage. Damaged components can pose electrical hazards.
    • Follow Manufacturer Instructions: Read and understand all manufacturer instructions for the solar panel and battery. Specific guidelines can prevent installation mistakes.
    • Avoid Water Exposure: Ensure that all electrical connections are dry. Water can create dangerous short circuits.
    • Install During Clear Weather: Choose a clear day for installation. This avoids slipping on wet surfaces and ensures good outdoor conditions.
    • Avoid High Winds: Delay installation during strong winds. Wind can cause panels or equipment to shift, leading to accidents.
    • Watch for Sun Exposure: If installing during hot weather, take breaks to avoid heat exhaustion. Stay hydrated and work during cooler parts of the day.
    • Secure Equipment: Properly secure all materials during installation. This prevents wind from displacing panels or tools, reducing safety risks.

    Following these safety precautions enhances your solar panel installation experience while minimizing risks. Always prioritize your safety and those around you.

    Conclusion

    Installing solar panels to a battery can transform the way you power your devices. By following the steps outlined and keeping safety in mind you can create a reliable energy solution that meets your needs.

    Whether you’re looking to reduce your electricity bills or ensure backup power during outages this setup offers great benefits. Remember to choose the right components and location for optimal performance.

    With a little preparation and effort you’ll be on your way to enjoying the advantages of solar energy in no time. Happy installing!

    Frequently Asked Questions

    What are the main benefits of using solar panels with batteries?

    Using solar panels connected to batteries can significantly reduce electricity bills and provide a reliable backup power source. This setup allows for the storage of excess energy generated during the day, which can be used later when sunlight is not available, making it an efficient and sustainable energy solution for various needs.

    How do solar panels work?

    Solar panels convert sunlight into electricity through photovoltaic cells, which generate direct current (DC). This electricity can then be used to power devices, charge batteries, or be converted into alternating current (AC) using an inverter for household appliances.

    What types of batteries are best for solar applications?

    The best batteries for solar applications include lead-acid, lithium-ion, gel, and flooded lead-acid batteries. Each type has its own advantages and disadvantages regarding lifespan, cost, depth of discharge, and maintenance. Choosing the right battery depends on individual energy needs and budget.

    How should I prepare for a solar panel installation?

    To prepare for solar panel installation, assess your daily energy consumption by reviewing your electricity bills and calculating the watt-hours required for each device. Also, consider selecting an optimal location that receives at least six hours of direct sunlight daily, free from obstructions.

    What steps are involved in installing a solar panel system?

    Installing a solar panel system involves several steps: select a mounting location, secure the solar panels, connect the wiring, and ensure proper functionality through testing. Gather necessary tools and materials, including solar panels, charge controllers, batteries, inverters, and mounting hardware, before starting the process.

    What safety precautions should I take during installation?

    During installation, turn off all power sources, wear protective gear, and check for any damaged equipment. Avoid water exposure, install on clear days, and refrain from working during high winds to enhance safety and ensure efficient operation of your solar panel system.

    Share. Facebook Twitter Pinterest LinkedIn Tumblr Email WhatsApp Copy Link
    Jimmy-Larsen
    Jimmy Larsen
    • Website

    Battery industry professional with 5+ years of experience. Bachelor of Science in Electrical Engineering from Georgia Tech. Specializes in power systems and renewable energy.

    Related Posts

    Solar Batteries

    Can I Install a Solar Battery Myself: A Comprehensive DIY Guide for Homeowners

    January 6, 2025
    Solar Batteries

    How Much Is a Solar Battery for a House: Costs, Types, and Benefits Explained

    January 6, 2025
    Solar Batteries

    How Many Solar Panels Required to Charge 200Ah Battery for Optimal Energy Efficiency

    January 6, 2025
    Solar Batteries

    What Are Toyota Solid State Batteries Made Of: Key Materials Driving EV Innovation

    January 6, 2025
    Solar Batteries

    Can You Run Solar Panels Without Batteries: Exploring Your Options for Direct Solar Power Usage

    January 6, 2025
    Solar Batteries

    Is a 5kW Solar Battery Enough for Your Home’s Energy Needs and Independence?

    January 6, 2025
    Add A Comment
    Leave A Reply Cancel Reply

    Search
    Affiliate Disclaimer

    As an Amazon Associate I earn from qualifying purchases.

    Latest Articles

    How to Replace Battery in Samsung Phone: A Step-by-Step Guide for Easy Replacement

    Android Batteries

    How to Remove Battery from Samsung Smart TV Remote: A Step-by-Step Guide for Easy Replacement

    Android Batteries

    How to Check Your Battery Health on Samsung: Simple Methods to Extend Your Phone’s Lifespan

    Android Batteries

    How Much Is a Battery for a Samsung Galaxy S6: Pricing and Replacement Options Explained

    Android Batteries

    How to Remove Battery from Samsung Galaxy S7: A Step-by-Step Guide for Easy DIY Fixes

    Android Batteries

    Why is My Battery Going Down While Charging Android – Effective Solutions to Fix the Issue

    Android Batteries
    Battery Spotlight

    Battery Spotlight is a website dedicated to helping you solve common battery problems.

    Read more about us here

    Affiliate Disclaimer
    As an Amazon Associate I earn from qualifying purchases.

    Site Navigation
    • Above Mirror Bathroom Lighting
    • Android Batteries
    • Bathroom Pendant Lighting
    • Battery Chargers
    • Battery Life
    • Battery Maintenance
    • Car Batteries
    • Ceiling Lighting Ideas
    • Golf Cart Batteries
    • Japandi Lighting
    • Laptop Batteries
    • Marine Batteries
    • Mood Lighting Living Room
    • Phone Batteries
    • Rechargeable Batteries
    • Reviews
    • Solar Batteries
    • Uncategorized
    • Vaulted Ceiling Lighting
    Latest Articles

    How to Replace Battery in Samsung Phone: A Step-by-Step Guide for Easy Replacement

    How to Remove Battery from Samsung Smart TV Remote: A Step-by-Step Guide for Easy Replacement

    How to Check Your Battery Health on Samsung: Simple Methods to Extend Your Phone’s Lifespan

    How Much Is a Battery for a Samsung Galaxy S6: Pricing and Replacement Options Explained

    How to Remove Battery from Samsung Galaxy S7: A Step-by-Step Guide for Easy DIY Fixes

    • Home
    • About
    • Contact
    • Privacy Policy
    • Editorial Policy
    • Disclaimer
    • Terms and Conditions
    • Affiliate Disclosure
    © 2026 Battery Spotlight

    Type above and press Enter to search. Press Esc to cancel.