
Ever wondered why your kid’s toy car battery just won’t hold a charge? Picture this: your little one eagerly jumping into their favorite ride-on only to find it sputtering to a halt after a few minutes. Frustrating, right? Don’t worry, you’re not alone in this struggle.
Common Reasons for 12V Battery Not Holding Charge
Have you encountered issues with 12V battery not holding charge in your child’s toy car? Here are some common reasons why this might be happening:
- Overcharging: Leaving the battery plugged in for too long can lead to damage and a reduced ability to hold a charge.
- Age of the Battery: As batteries age, their capacity diminishes, causing them to hold less charge over time.
- Temperature Extremes: Exposure to extreme heat or cold can impact the battery’s performance and overall lifespan.
- Loose Connections: Poor connections between the battery and the toy car’s system can disrupt the charging process.
- Faulty Charger: Using a charger that is incompatible or faulty can affect the battery’s ability to retain a charge properly.
- Deep Discharging: Allowing the battery to fully discharge before recharging can strain its capacity and lead to issues with holding a charge.
Understanding these common reasons can help you pinpoint the issue and take necessary steps to address the 12V battery not holding charge in your child’s toy car.
Signs of a Failing Toy Car Battery
Spotting signs of a failing 12V toy car battery is crucial. Here are some indicators to watch for:
- Decreased Run Time: If the toy car is running out of juice quickly, it might be a sign that the battery is failing.
- Diminished Speed: If you notice a drop in the car’s speed, the battery could be struggling to hold a charge.
- Charging Troubles: Difficulty in getting the battery to charge fully can indicate an underlying issue.
- Bulging or Leaking: Physical changes like bulging or leaking in the battery are clear signals of a problem.
- Overheating: Excessive heat while charging or during use is a red flag for battery health.
Regularly monitor these signs to catch battery issues early and keep your child’s toy car running smoothly.
Tips for Extending the Lifespan of Your Toy Car Battery
Keeping your toy car battery in top condition is crucial for uninterrupted playtime sessions. Here are some practical tips to help you extend the lifespan of your battery:
- Regularly Charge: Ensure you charge the battery after each use to maintain optimal power levels.
- Avoid Overcharging: Overcharging can reduce the battery’s lifespan. Unplug it once fully charged.
- Store Indoors: Store your toy car indoors in a cool, dry place when not in use to prevent extreme temperature exposure.
- Clean Terminals: Periodically clean the battery terminals with a soft, dry cloth to remove dust and debris.
- Proper Use: Make sure you follow the manufacturer’s guidelines on usage and charging to prevent damage.
- Inspect Regularly: Check the battery for any signs of damage or wear and tear. Replace if necessary to avoid performance issues.
- Avoid Full Discharge: Try to avoid fully discharging the battery whenever possible to maintain its longevity.
| Key Points | Figures |
|---|---|
| Regular Charging | After Each Use |
| Indoor Storage | Cool, Dry Place |
| Terminal Cleaning | Periodically |
| Manufacturer Guidelines | Follow for Proper Use |
How to Test and Troubleshoot a 12V Toy Car Battery
To ensure your toy car battery is running smoothly, testing and troubleshooting are essential. Here are some steps to help you in this process:
- Step 1: Check the Connections
Make sure all terminals are clean and securely connected. Loose or dirty connections can prevent proper charging. - Step 2: Use a Multimeter
Grab a multimeter and set it to measure DC voltage. Connect the positive and negative leads to the corresponding terminals on the battery. - Step 3: Check the Voltage
A fully charged 12V toy car battery should read around 12.6 to 12.8 volts. If the reading is significantly lower, it may need recharging. - Step 4: Recharge the Battery
Connect the battery to a compatible charger according to the manufacturer’s instructions. Over time, rechargeable batteries can lose their capacity, so regular charging is essential. - Step 5: Test the Charger
If the battery still doesn’t take a charge, ensure the charger is working correctly. Test it on a different battery if possible. - Step 6: Consider Replacement
If you’ve tried troubleshooting and the battery still isn’t holding a charge, it might be time to replace it with a new one.
By following these steps, you can diagnose and address issues with your 12V toy car battery effectively.
Replacing the Battery: A Step-by-Step Guide
When your 12V toy car battery is not taking a charge, it may be time to consider replacing it. Here’s a simple guide to help you through the process:
- Step 1: Ensure Safety
Before starting, make sure the toy car is turned off and unplugged to prevent any accidents. - Step 2: Locate the Battery
Find the battery compartment in the toy car. It’s usually located under the seat or the hood, depending on the model. - Step 3: Remove the Old Battery
Carefully disconnect the wires attached to the old battery, making a note of their positions for reconnection later, and take out the old battery. - Step 4: Choose the Right Replacement
When purchasing a new 12V battery, ensure it matches the specifications of your toy car to avoid compatibility issues. - Step 5: Install the New Battery
Place the new battery in the compartment, reconnect the wires following your notes, and secure the battery in place as per the manufacturer’s instructions. - Step 6: Test the Battery
After installation, turn on the toy car to check if the new battery is working correctly.
Remember, safety first! If you encounter any difficulties during the replacement process, it’s best to consult a professional.
Recommended Products
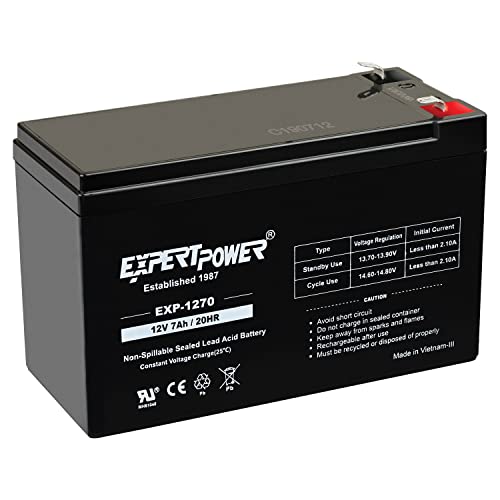
Universal Compatibility: Works with alarm systems, security devices, UPS, kids ride-on cars. 12V7Ah/20HR rechargeable battery replaces 1270 batteries, UB1270, RT1270, CA1270, 12FM7 and more.

IMPORTANT: RED 2-PIN CONNECTOR REQUIRED – This battery ONLY works with the red 2-pin connector shown in the product photos. Many ride-on toys use similar-looking connectors that are not compatible. Compare your connector carefully before purchasing.
Conclusion
You now have a better understanding of how to care for your toy car battery and ensure it stays in top condition. By following the tips provided in this article, you can prolong the lifespan of your 12V battery and keep your toy car running smoothly. Remember the importance of regular charging, proper storage, and maintenance to prevent issues with your battery. If you ever encounter difficulties or your battery is not taking charge, refer back to the step-by-step guide for replacing it. By taking the necessary precautions and matching the new battery’s specifications with your toy car’s requirements, you can enjoy hours of uninterrupted playtime with your toy car.
Frequently Asked Questions
How often should I charge my toy car battery?
Your toy car battery should be charged regularly, preferably after each use or every 2-3 weeks if not in use.
How should I store my toy car battery when not in use?
Store your toy car battery in a cool, dry place away from direct sunlight and extreme temperatures to prolong its lifespan.
Why is testing and troubleshooting important for 12V toy car batteries?
Testing and troubleshooting help identify issues early, preventing damage and ensuring optimal performance of your toy car battery.
What are the basic steps for replacing a 12V toy car battery?
Replacing a 12V toy car battery involves safety precautions, locating the battery, removing the old one, choosing the right replacement, installing it properly, and testing the new battery.
What should I do if I encounter difficulties during the battery replacement process?
If you face challenges while replacing the battery, consider seeking professional help to avoid any potential damage or safety hazards.