
Ever found yourself in the middle of your favorite show, only to realize your Sony Bravia TV remote has run out of batteries? Frustrating, isn’t it? Don’t worry, you’re not alone. Many face this common issue. But fear not, as we’ve got your back with a simple solution that’ll have you back to binge-watching in no time!
Step 1: Gather Necessary Tools
To get started with replacing the batteries in your Sony Bravia TV remote, you’ll need a few things handy. Here’s what you should gather before diving into the task:
- New batteries: Ensure you have the correct type of batteries required for your Sony Bravia TV remote.
- Screwdriver: You may need a small screwdriver to open the battery compartment.
- User manual: If you’re unsure about the type of batteries needed or how to open the remote, refer to the user manual for guidance.
By having these tools ready, you’ll be all set to smoothly transition into the battery replacement process.
Step 2: Locate the Battery Compartment
After gathering your tools, it’s time to find the battery compartment on your Sony Bravia TV remote. Here’s how:
- Look for a small latch or sliding cover on the back or bottom of the remote.
- Slide or press the latch to open the compartment.
- Check the user manual for specific instructions on where the battery compartment is located.
That’s it! Once you’ve found the battery compartment, you’re ready to move on to the next step.
Step 3: Remove the Old Batteries
So, it’s time to replace the old batteries in your Sony Bravia TV remote. Here’s what you need to do next:
- Locate the old batteries: Look for them in the battery compartment.
- Remove the old batteries: Take them out gently, ensuring not to damage the terminals.
- Dispose of the old batteries properly: Be environmentally conscious and recycle them at designated centers.
- Clean the battery contacts: Wipe them with a dry cloth to remove any dirt or residue.
Recommended Products
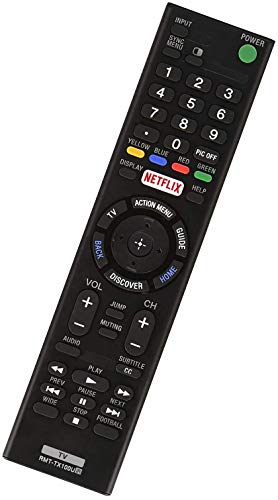
RMT-TX100U TV Remote Control Fit for Sony Smart Televisions (RMTTX100U)

【Broad Compatibility】this high-end remote is designed for All 2019-2026 SONY TVs. It serves as an excellent replacement for various SONY voice remote controls such as RMF-TX520U/500U, RMF-TX800U/810U/811U/820U, RMF-TX900U/910U/920U, RMF-TX300/310U, RMF-TX600U/611U/621U and others. 【Important Notice】 For TVs that do not support voice control or were released before 2018, the voice search functionality may not work. This remote requires two AAA batteries, and is NOT backlit.

【Applicable TV Types】Voice remote compatible with the Sony Bravia Google Smart TVs, it covers models such as BRAVIA 3, BRAVIA 7, BRAVIA 8, BRAVIA 9, X90L, X90CL, X93L, X93CL, X95L, A75L, A80L, A80CL, A95L etc
Step 4: Insert New Batteries
When it comes to inserting new batteries into your Sony Bravia TV remote, it’s essential to follow the correct steps to ensure optimal performance. Here’s how you can easily complete this task:
- Battery Orientation: Make sure to align the polarities (+ and – symbols) of the batteries correctly with the contacts inside the battery compartment.
- Proper Fit: Gently place the new batteries into the compartment, ensuring they fit snugly without forcing them.
- Check Alignment: Double-check that the batteries are securely in place and that the contacts are making good connections for smooth operation.
- Close the Compartment: Once the batteries are inserted correctly, close the battery compartment securely by sliding the cover back into place or pressing it until it clicks shut.
- Test Remote: To confirm that the new batteries are working as intended, test the functionality of your remote by pressing various buttons to control your TV.
Remember, proper battery insertion is crucial for your Sony Bravia TV remote to function correctly and avoid any interruptions in your viewing experience.
Step 5: Reassemble the Remote
Once you have inserted the new batteries, it’s time to reassemble your Sony Bravia TV remote. Follow these simple steps to ensure everything is in place:
- Check Alignment: Make sure the batteries are properly aligned in the compartment.
- Securely Close the Compartment: Gently push the compartment cover back into place until you hear a click.
- Test the Remote: Press various buttons to ensure that the remote is working correctly.
- If the remote is not responding, double-check the battery alignment and the compartment closure.
By carefully reassembling your remote control, you can enjoy uninterrupted viewing of your favorite shows without any interruptions.
Conclusion
You’ve now learned how to change the batteries in your Sony Bravia TV remote successfully. Remember to align the batteries properly, securely close the compartment, and test the remote to ensure it functions correctly. By following these steps, you can enjoy uninterrupted viewing without any issues. If your remote is unresponsive, double-check the battery alignment and compartment closure. With these simple tips, you can keep your Sony Bravia TV remote working smoothly for all your entertainment needs.
Frequently Asked Questions
How should I reassemble my Sony Bravia TV remote after replacing the batteries?
After inserting new batteries into your Sony Bravia TV remote, make sure to align them correctly following the diagram in the battery compartment. Securely close the compartment door and test the remote by pressing various buttons to confirm it functions correctly.
Why is it crucial to reassemble the remote correctly?
Proper reassembly of the Sony Bravia TV remote ensures uninterrupted viewing by guaranteeing the batteries are aligned correctly and the compartment is securely closed. If the remote remains unresponsive after battery replacement, double-checking these steps is essential for troubleshooting.