
Required tools
To open your Dell mouse and change the batteries, you’ll need a few tools to make the process smooth and hassle-free.
- Screwdriver: You’ll need a small screwdriver to remove any screws that hold the mouse together.
- New Batteries: Make sure you have the correct type of batteries needed for your Dell mouse.
- Anti-static Wrist Strap (Optional): It’s recommended to use an anti-static wrist strap to prevent damage from static electricity while handling electronic components.
Remember to gather these tools before you start opening your Dell mouse to change the batteries.
Recommended Products
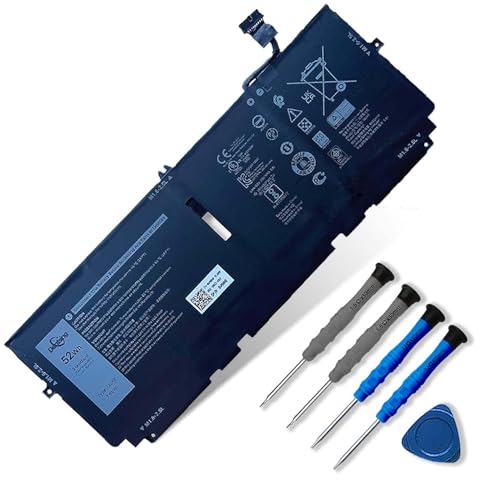
【Important Reminder: The following models are incompatible; please do not purchase】Not fit for Dell XPS 13 OLED 9310 2-in-1 (2021) Series, Dell XPS 13 9380 (2019) 13.3" Series.

【Specification】Voltage: 15.2V. Capacity: 56Wh 4-Cell. Battery Type: Li-ion. Condition: Brand new, from high quality materials, top circuit boards and smart chip.

♣Power Specs: Battery Type: Li-polymer Voltage: 7.6V Capacity: 60Wh; The battery is durable and has overcurrent protection, anti-overcharge, anti-overdischarge and temperature control functions.
Removing the battery cover
Unscrewing the back panel is the first step to access the batteries.
Ensure the screwdriver fits Dell mouse screws – typically Phillips-head or small flathead.
Keep screws in a safe place to avoid losing them.
Gently pry open the cover with a plastic tool or your fingernails.
Disconnect the battery connectors to replace them easily.
| Dell Mouse Screw Type | Compatible Tool |
|---|---|
| Phillips-head | Philips screwdriver |
| Small flathead | Flathead screwdriver |
Replacing the batteries
When it’s time to replace the batteries in your Dell mouse, here are the steps you need to follow:
- Step 1: Turn your mouse over and locate the battery compartment.
- Step 2: Open the battery compartment by sliding the cover in the direction indicated.
- Step 3: Take out the old batteries and dispose of them properly.
- Step 4: Insert fresh batteries, ensuring they are placed in the correct orientation.
- Step 5: Close the battery compartment by sliding the cover back into place until it clicks.
- Step 6: Turn your mouse over and test it to make sure it’s working properly.
Remember, using the correct battery type and inserting them properly is crucial for smooth functioning of your Dell mouse.
Recommended Products

Full product Specifications Click to view/ keyboard/keypad connectivity technology wireless/ keyboard/keypad wireless technology RF/ hot keys mute play/pause back forward...
Closing the mouse
When you have successfully replaced the batteries in your Dell mouse, it’s time to close it up. Here are the final steps to ensure everything is back in place:
- 1. Slide the Cover: Slowly slide the cover back onto the mouse until it is securely in position. You should hear a soft click when it locks back into place.
- 2. Test the Click: Give the mouse a few clicks to ensure that the buttons are working correctly. This quick test will confirm that the cover is on properly and hasn’t affected the functionality of the mouse.
- 3. Ready to Go: Once you’ve confirmed that the mouse is functioning as expected, you’re all set to start using it again. Your Dell mouse should now be good to go with its new batteries, providing you with seamless navigation and control.
Remember, correctly closing your Dell mouse is just as crucial as opening it up. Ensuring everything is secure and in place will help maintain the functionality and longevity of your mouse.
Conclusion
And there you have it – your Dell mouse is now ready to go with fresh batteries. Remember to slide the cover back into place securely and test those buttons to ensure everything is working smoothly. By following these simple steps, you can keep your mouse functioning at its best for a long time. Happy clicking!
Frequently Asked Questions
What are the final steps after replacing the batteries in a Dell mouse?
After replacing the batteries in a Dell mouse, slide the cover back securely, test the mouse buttons, and ensure proper functionality before using it again. It is crucial to close the mouse correctly to maintain functionality and longevity.