
Key Takeaways
- CMOS Battery Functionality: The CMOS battery retains BIOS settings and keeps the system clock accurate when the computer is powered off.
- Location on ASUS Motherboard: Typically found near the CPU socket, the CMOS battery is a small, round lithium component, often resembling a coin.
- Signs of Battery Failure: Look for symptoms such as system date resets, lost BIOS settings, and error messages indicating a potential CMOS battery issue.
- Replacement Steps: Replacing the CMOS battery involves powering down the computer, opening the case, removing the old battery, inserting a new one, and verifying BIOS settings post-replacement.
- Troubleshooting Tips: If problems persist, ensure secure connections, inspect for corrosion, and consider resetting BIOS settings or updating firmware for optimal performance.
- Common ASUS Models: Different ASUS motherboard series, like ROG Strix, TUF, and Prime, generally share similar CMOS battery locations, making identification easier.
Ever wondered why your computer keeps losing time or settings? If you’ve noticed these issues, it might be time to check the CMOS battery on your ASUS motherboard. This small but crucial component keeps your BIOS settings intact, even when your PC is powered off.
Understanding CMOS Batteries
CMOS batteries play a crucial role in your ASUS motherboard. Primarily, they maintain BIOS settings while the computer is powered off. If your system loses time or BIOS configurations, it’s time to check the CMOS battery.
Function of the CMOS Battery
- Stores BIOS settings: The CMOS battery powers the complementary metal-oxide-semiconductor (CMOS) chip, which holds essential settings for hardware startup.
- Retains clock settings: The battery ensures that your computer’s clock and calendar remain accurate, even when unplugged.
Locations on ASUS Motherboards
The CMOS battery is typically a small, round lithium battery located near the CPU socket on the motherboard. It generally resembles a coin and is easily identifiable.
Identifying Battery Issues
If you’re experiencing problems like slow startup, incorrect time settings, or loss of BIOS information, the CMOS battery may be failing. Check for the following signs:
- System date resets: If the date resets each time you power off the computer, the battery may need replacement.
- BIOS settings lost: If you frequently need to adjust BIOS settings, the battery is likely the cause.
Replacing the CMOS Battery
Replacing a CMOS battery is straightforward. Follow these steps:
- Power down your computer: Disconnect it from the power source.
- Open the case: Carefully remove the case cover to access the motherboard.
- Locate the CMOS battery: Find the battery near the CPU socket.
- Remove the battery: Gently push the retaining clip to release the battery.
- Insert the new battery: Place a new battery, ensuring it’s seated properly.
- Close the case: Replace the case cover and reconnect the power.
By maintaining the CMOS battery, you help ensure your ASUS motherboard functions smoothly.
Locating the CMOS Battery on ASUS Motherboards
Finding the CMOS battery on your ASUS motherboard is straightforward. The battery is crucial for maintaining BIOS settings and keeping your system clock accurate.
Common ASUS Motherboard Models
You might encounter several models when working with ASUS motherboards, each having a similar CMOS battery location. Here are some common models:
- ASUS ROG Strix Series: Often found in gaming setups, these motherboards usually feature the CMOS battery near the CPU socket.
- ASUS TUF Series: Designed for durability, the battery is typically located at the bottom right of the motherboard.
- ASUS Prime Series: Commonly used for productivity, you’ll find the CMOS battery accessible near the RAM slots.
- ASUS Maximus Series: High-end models often position the battery close to the power connectors.
Visual Identification Tips
You can easily identify the CMOS battery by looking for these characteristics:
- Shape: The battery is usually a round, silver coin cell, similar to a button battery.
- Label: Check for labels or markings near the battery; it often identifies it as a CMOS or RTC battery.
- Placement: Look for the battery near the CPU socket or bottom right corner of the motherboard.
If you’re unsure, consult your motherboard manual for an exact location. Taking a picture or noting where your battery is located can help in future replacements.
How to Replace the CMOS Battery
Replacing the CMOS battery is straightforward, and it can restore your BIOS settings and system clock accuracy. Follow these steps to ensure a smooth process.
Recommended Products

Voltage: 3V; Capacity: 240mAh; Diameter: 20.5mm, Height: 6.5mm. Connector: CR2032-MX51021.
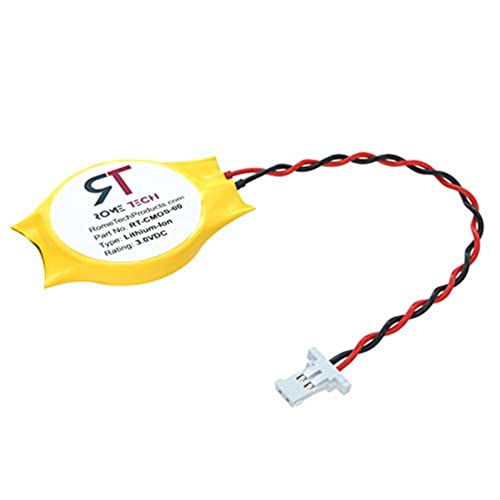
Designed To Fit Dell Alienware Alpha & Alienware Steam Machine - CMOS motherboard battery battery best suits to replace broken old CMOS battery for PC motherboard. Please contact us if the connector is not compatible with the motherboard

1.Product Specifications--Model: CR2032; Connector: molex51021(Reversed Polarity). Make Sure Device Polarity Matches with Battery Connector Before Purchase. Connector Polarity IS NOT UNIVERSAL!!! (It will cause a shortage if the polarity of the battery connector does not match your device.) DO NOT Charge battery.
Required Tools and Materials
- Phillips screwdriver: Use this for removing screws from the case.
- New CMOS battery: Purchase a CR2032 lithium coin cell battery.
- Anti-static wrist strap: Wear this to prevent static damage to components.
Step-by-Step Replacement Guide
- Power down your computer: Shut down the system completely and unplug it from the wall.
- Open the computer case: Use the Phillips screwdriver to remove screws securing the side panel. Slide off the panel.
- Locate the CMOS battery: Identify the round, silver coin cell battery near the CPU socket or bottom corner of the motherboard.
- Remove the old battery: Gently push the metal clip holding the battery in place. Pop the battery out.
- Insert the new battery: Align the new battery in the same orientation as the old one. Ensure the “+” side faces up.
- Reconnect power and close the case: Plug the computer back in, and replace the side panel using the screws.
- Power up and check settings: Turn on the computer. Enter BIOS to verify the date and settings are correct.
This process should help you replace the CMOS battery quickly and effectively, bringing your system back to optimal performance.
Troubleshooting CMOS Battery Issues
If you’re experiencing issues with your ASUS motherboard, a failing CMOS battery might be the culprit. Understanding the signs and finding solutions can help you address these problems effectively.
Recommended Products


LONG-LASTING BATTERIES DESIGNED FOR DEPENDABILITY: Duracell Lithium Coin CR2032 3 Volt batteries deliver long-lasting power and performance you can count on for devices throughout the home or on-the-go, such as key fobs, remote controls, Apple AirTag️, flameless candles, wireless cameras, thermometers, glucose monitors, toys, and more.

Rome Tech Dell Inspiron CMOS Battery Replacement – This dell inspiron cmos battery is a CR2032 3V BIOS RTC coin cell designed to restore motherboard clock and BIOS settings in compatible Dell Inspiron laptops. Please verify your exact model before purchasing.
Signs of a Failing CMOS Battery
- System Date Resets: If your computer resets the date and time each time you power it on, the CMOS battery might not hold charge efficiently.
- Loss of BIOS Settings: You notice the settings in your BIOS reverting to default values. This behavior often indicates a dying battery.
- Error Messages: You encounter error messages like “CMOS Checksum Error” during startup. This message signals potential battery failure.
- Inability to Recognize Hardware: Your BIOS fails to recognize installed hardware components, suggesting that proper settings aren’t retained due to battery issues.
Solutions for Common Problems
- Replace the CMOS Battery: If you identify any signs of a failing battery, replacing it is the first step. Use a CR2032 lithium coin cell battery, which is widely available.
- Reset BIOS Settings: After replacing the battery, reset the BIOS settings. This process ensures accurate configuration, allowing your system to recognize all components correctly. Access the BIOS setup during startup, then save the settings to confirm.
- Check Connections: Ensure that all connections are secure. Loose cables or poorly seated components can lead to issues that mimic battery problems.
- Look for Corrosion: Inspect the battery holder for corrosion or damage. If you notice any, clean the area carefully with isopropyl alcohol. A damaged holder may require further attention or replacement.
- Update BIOS Firmware: Keeping your BIOS updated can resolve recognition issues caused by outdated settings. Download the latest firmware from the ASUS support website specific to your motherboard model.
By following these troubleshooting steps, you can identify and resolve issues related to the CMOS battery on your ASUS motherboard efficiently.
Conclusion
Taking care of your CMOS battery is key to keeping your ASUS motherboard running smoothly. By knowing where to find it and how to identify signs of a failing battery, you can avoid frustrating issues like lost settings or incorrect system dates.
If you notice any of these problems don’t hesitate to check your battery. Replacing it is usually a quick and easy fix that can make a big difference.
With a little attention to this small component, you can ensure your system stays reliable and performs at its best. Happy computing!
Frequently Asked Questions
What is the role of the CMOS battery on ASUS motherboards?
The CMOS battery stores BIOS settings and maintains accurate clock settings when the computer is powered off. It ensures that your system retains essential configurations, which would otherwise reset each time the computer is unplugged.
How can I tell if my CMOS battery is failing?
Signs of a failing CMOS battery include system date resets, loss of BIOS settings, frequent error messages like “CMOS Checksum Error,” and issues recognizing hardware components. If you notice any of these, it may be time to check or replace the battery.
Where is the CMOS battery located on ASUS motherboards?
The CMOS battery is typically found near the CPU socket on ASUS motherboards. Specific locations can vary across models such as ROG Strix, TUF, Prime, and Maximus series. Consulting your motherboard manual can provide the exact location.
What type of battery do I need to replace my CMOS battery?
Most ASUS motherboards use a CR2032 lithium coin cell battery for the CMOS. When replacing the battery, ensure you purchase a compatible CR2032 battery for proper function.
How do I replace the CMOS battery on my ASUS motherboard?
To replace the CMOS battery, power off your computer, unplug it, and open the case. Locate the battery, gently remove it, and insert the new CR2032 battery in the same orientation. After replacement, reconnect everything and power on the computer.
What should I do if I still have issues after replacing the CMOS battery?
If problems persist after replacing the CMOS battery, reset the BIOS settings, check all connections, inspect for corrosion, and ensure the motherboard firmware is updated. Following these steps can help resolve lingering issues related to the CMOS battery.