
Are you tired of running out of power while enjoying the great outdoors? Connecting a solar panel to your camper battery can keep your adventures powered up without the hassle of noisy generators or limited shore power. Imagine waking up to a fully charged battery, ready for another day of exploration.
Key Takeaways
- Understanding Solar Panel Types: Familiarize yourself with the different solar panel options (monocrystalline, polycrystalline, thin-film, bifacial) to choose the best fit for your camper’s power needs and space limitations.
- Choosing the Right Battery: Select the appropriate battery type (lead-acid, lithium-ion, gel, nickel-cadmium) based on your energy requirements, budget, and maintenance preferences to ensure reliable power sources during your adventures.
- Essential Tools for Installation: Gather essential tools like wire strippers, a multimeter, and a solar charge controller to streamline the installation process and ensure safety and efficiency when connecting your solar panel to the camper battery.
- Follow a Step-by-Step Setup: Adhere to a structured installation guide, including selecting the right location for solar panels, wiring properly, and verifying connections, to establish a dependable solar energy system for your camper.
- Avoid Common Mistakes: Prevent issues by ensuring proper wiring, selecting the appropriate solar panel size, and confirming connections to enhance the functionality and efficiency of your solar setup.
- Regular Maintenance Checks: After installation, monitor the system regularly for optimal performance, ensuring your solar panel continues to meet your energy needs while camping.
Understanding Solar Panels and Camper Batteries
Connecting solar panels to camper batteries enhances your camping experience by providing a reliable power source. Understanding the types of solar panels and camper batteries helps you make informed choices for your setup.
Types of Solar Panels
- Monocrystalline Panels: These panels offer high efficiency, converting up to 22% of sunlight into electricity. They’re compact, which saves space on your camper. Consider them for limited roof space.
- Polycrystalline Panels: With a slightly lower efficiency, around 15-20%, these panels come at a lower cost. They require more space for the same power output as monocrystalline panels. Choose them if you’re budget-conscious.
- Thin-Film Panels: These lightweight panels are flexible and easier to install. They provide lower efficiency, typically 10-12%, making them ideal for unconventional surfaces or portable setups. Use them in areas with ample sunlight.
- Bifacial Panels: Capable of collecting sunlight from both sides, these panels can increase efficiency up to 30%. They perform well in snowy or reflective environments. Opt for them if you want to maximize energy collection.
- Lead-Acid Batteries: Commonly used, these batteries come in two types—flooded and sealed (AGM). Flooded lead-acid batteries are cost-effective but need regular maintenance. AGM batteries require less maintenance and offer better performance. Use them for trusted reliability.
- Lithium-Ion Batteries: Known for their high capacity and lightweight design, lithium-ion batteries are more expensive but last longer and need no maintenance. They offer deep discharge capabilities. Choose them for extended camping trips or frequent use.
- Gel Batteries: These are a hybrid between sealed lead-acid and flooded batteries. They offer safety and efficiency while reducing the risk of leakage. Use gel batteries when space and weight are a concern.
- Nickel-Cadmium Batteries: Less common but durable, nickel-cadmium batteries handle extreme temperatures well. They offer long cycle life, making them suitable for rugged camping. Keep them as an option for specialized applications.
Tools and Equipment Needed
To connect a solar panel to your camper battery, gather the necessary tools and equipment. Having the right items simplifies the installation process and ensures safety and efficiency.
Recommended Products

4-STAGE PWM Technology: The Voyager controller is equipped with advanced smart PWM technology with high charging efficiency. It provides 4-stage charging (Bulk, Absorption, Float and Equalization) in order to protect the battery.
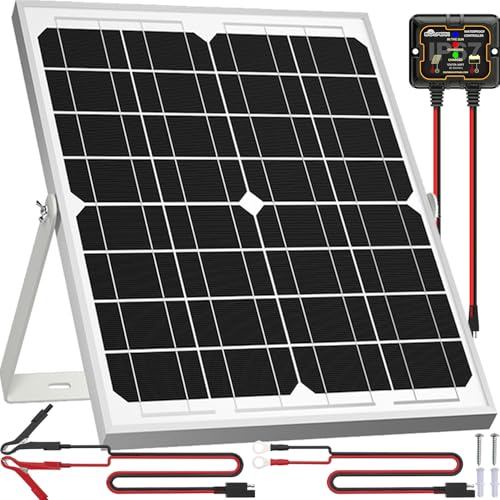
【High Conversion Rate】This 20W solar panel with monocrystalline A+ solar cell has an excellent cell efficiency of 21%-30%. Designed to charge and maintain 12V rechargeable batteries like LiFePO₄, Lithium Ion, AGM, SLA, GEL, EFB, MF, etc. Keep batteries in charged for trailer, tractor, truck, boat, motorcycle, RV, car, lawn mower, water pump, gate opener, electric fence, etc

𝐒𝐦𝐚𝐫𝐭 𝟒-𝐒𝐭𝐚𝐠𝐞 Renogy Solar Charge Controller- PWM controller can automatically detects 12V/24V systems & charges 𝐥𝐢𝐭𝐡𝐢𝐮𝐦/ 𝐀𝐆𝐌/ 𝐠𝐞𝐥/𝐟𝐥𝐨𝐨𝐝𝐞𝐝 𝐛𝐚𝐭𝐭𝐞𝐫𝐢𝐞𝐬. Features Bulk/ Boost/ Float /Equalization phases to extend battery life, 30A solar charge controller revives over-discharged lithium batteries.
Essential Tools
- Wire Strippers: Strip the insulation off wires for proper connections.
- Screwdriver Set: Use a screwdriver to secure connections or install brackets.
- Wrench Set: Tighten or loosen battery terminals or panel mounts.
- Multimeter: Check voltage and ensure proper electrical flow.
- Drill: Create holes for mounting brackets if necessary.
- Solar Charge Controller: Regulates the battery charging process, preventing overcharging.
- Cables and Connectors: Heavy-duty cables with appropriate connectors are essential for durability and conductivity.
- Fuses: Use fuses to protect your system from overcurrent situations.
- Mounting Brackets: Secure your solar panels to the roof or ground with sturdy brackets.
- Battery Monitor: Track battery voltage and state of charge for better management.
By preparing this list of tools and accessories, you’re well-equipped to connect your solar panel to the camper battery efficiently and safely.
Step-by-Step Guide to Connecting Solar Panel to Camper Battery
Connecting a solar panel to your camper battery requires careful preparation and execution. Follow these steps to set up your solar charging system effectively.
Preparing Your Solar Panel
- Choose a Location: Select an area on your camper roof with maximum sun exposure. Ensure it’s free from obstructions like branches or other equipment.
- Gather Components: Assemble your solar panel, mounting brackets, and necessary tools. Ensure your solar charge controller matches your panel’s voltage and battery type.
- Secure the Panel: Attach the mounting brackets to your solar panel. Position the panel on your chosen spot and secure it firmly to prevent movement during travel.
Wiring the Solar Panel
- Connect the Charge Controller: Run the wires from the solar panel to the solar charge controller. Ensure correct polarity; positive wires connect to positive terminals, and negative wires connect to negative terminals.
- Use Heavy-Duty Cables: Utilize heavy-duty cables rated for outdoor use. These handle the current without excess heat buildup, ensuring safety and efficiency.
- Test Connections: Before finalizing the installation, use a multimeter to test the voltage coming from the solar panel. Confirm it matches your charge controller specifications.
- Shut Off the Power: Ensure the battery is not connected to any devices while you work on it.
- Attach the Charge Controller to the Battery: Connect the charge controller to the camper battery. Again, maintain proper polarity: attach the positive wire from the charge controller to the positive terminal on the battery, followed by the negative wire to the negative terminal.
- Install Fuses: Place fuses in line with the wires to protect against overcurrent. This adds an extra layer of safety to your system.
- Verify Functionality: After connections are made, turn on the charge controller and check for proper charging. A green light often indicates a successful connection.
By following these steps, you’ll establish a reliable solar energy system for your camper, enhancing your outdoor experiences.
Common Mistakes to Avoid
Avoiding common mistakes ensures a smooth installation and operation of your solar panel system. Here are key areas to focus on.
Improper Wiring
Ensure correct wiring connections to prevent system failures. Use color-coded cables and match the positive and negative terminals consistently. Double-check connections before powering the system. For example, connecting wires incorrectly might cause shorts or damage your equipment. Use a multimeter to test connections after completion to confirm everything’s functioning properly.
Inadequate Solar Panel Size
Choosing the right solar panel size is crucial. A panel that’s too small won’t generate enough power to charge your battery adequately. Calculate your energy needs by assessing how much power you use while camping. For instance, if your devices require 400 watt-hours each day and you’re charging during 5 hours of sun, select a panel that can produce at least 80 watts. This ensures your battery stays charged, enhancing your camping experience.
Conclusion
Setting up a solar panel to charge your camper battery can truly transform your outdoor adventures. With the right tools and a bit of know-how you can enjoy the freedom of off-grid camping without the hassle of noisy generators.
By choosing the right components and following the steps outlined you’ll ensure a smooth installation process. Remember to double-check your connections and calculate your energy needs for optimal performance.
Now that you’re equipped with this knowledge you can hit the road with confidence knowing your battery is charged and ready for whatever your journey brings. Enjoy the great outdoors and the peace of mind that comes with sustainable energy!
Frequently Asked Questions
What are the main benefits of using solar panels for camper batteries?
Using solar panels for camper batteries allows for a fully charged battery each morning, eliminating noise from generators and reducing reliance on shore power. This convenience enhances the overall camping experience and promotes a more sustainable lifestyle.
What types of solar panels are available for campers?
The main types of solar panels for campers include monocrystalline, polycrystalline, thin-film, and bifacial panels. Each type has unique characteristics, making some better suited for specific camper needs and energy requirements.
What types of camper batteries can I use with solar panels?
You can use various camper batteries with solar panels, including lead-acid (flooded and AGM), lithium-ion, gel, and nickel-cadmium batteries. Each type has its advantages and ideal use cases for camping.
What tools do I need to connect a solar panel to a camper battery?
Essential tools include wire strippers, screwdrivers, wrenches, a multimeter, and a drill. You’ll also need components like a solar charge controller, heavy-duty cables, fuses, mounting brackets, and a battery monitor for a successful installation.
Can you provide a brief overview of the installation process?
To install a solar panel, choose a location for maximum sun exposure on your camper roof, gather necessary components, and secure the panel. Connect the solar charge controller using heavy-duty cables, ensuring power is off during installation, and test connections with a multimeter.
What common mistakes should I avoid during installation?
Common mistakes include improper wiring, which can lead to failures, and incorrect solar panel sizing. It’s crucial to use color-coded cables, double-check connections, and accurately calculate energy needs for optimal charging efficiency.
How can I ensure my solar energy system is reliable?
To establish a reliable solar energy system, carefully follow installation guidelines, use quality components, and regularly monitor battery performance. Proper maintenance and understanding system requirements will enhance your camping experience with reliable power.