
Have you ever thought about harnessing solar energy but felt overwhelmed by the wiring process? You’re not alone. Many people want to make the switch to renewable energy but aren’t sure how to connect their solar panels to batteries effectively.
Key Takeaways
- Understand Solar Panel Components: Familiarize yourself with key components such as solar panels, charge controllers, batteries, inverters, and wiring to successfully wire solar panels to batteries.
- Wiring Essentials: Gather necessary tools like wires, connectors, a multimeter, and safety gear before starting the wiring process to ensure a smooth installation.
- Follow a Step-by-Step Guide: Break down the wiring process into clear steps: connect solar panels to the charge controller, then connect the charge controller to the battery, and finalize connections.
- Avoid Common Mistakes: Double-check all wiring for correct polarity to prevent damage and be aware of the battery’s capacity to avoid overloading, which can reduce lifespan.
- Safety First: Always disconnect power, work in a well-ventilated area, and secure connections tightly to minimize risks during the installation process.
Understanding Solar Panel Systems
Solar panel systems harness sunlight to generate electricity. These systems convert solar energy into usable power for various applications, including charging batteries. Understanding the key components and their functions is essential for successful installation and operation.
Basics of Solar Energy
Solar energy is the energy captured from sunlight. It typically gets transformed into electricity using solar panels, which contain photovoltaic (PV) cells. When sunlight hits these cells, it generates direct current (DC) electricity. Your solar panel system’s ability to produce power depends on factors like sunlight availability, panel orientation, and the efficiency of the solar cells.
Components of a Solar Panel System
A solar panel system consists of several key components:
- Solar Panels: The primary source of energy generation, capturing sunlight and converting it into electricity. Consider using high-efficiency panels for better energy output.
- Charge Controller: This device regulates the voltage and current coming from the solar panels to the batteries, preventing overcharging and prolonging battery life. Always choose a charge controller compatible with your battery type.
- Batteries: Batteries store excess energy generated by the solar panels for later use. Common types include lead-acid and lithium-ion batteries. Select batteries that meet your energy storage needs.
- Inverter: If you plan to use household appliances, an inverter converts DC electricity from the solar panels and batteries into alternating current (AC) electricity. Make sure to match the inverter capacity with your energy consumption.
- Wiring and Connectors: Quality wiring and connectors ensure efficient energy transfer between components. Use appropriate gauge wire for your system’s voltage and current to minimize energy loss.
Understanding these components helps you wire your solar panel system effectively and ensures optimal performance.
Wiring Essentials
Wiring your solar panel to a battery involves specific tools and safety precautions. Understanding these essentials ensures a successful connection and enhances your solar energy system’s performance.
Recommended Products
![[Upgraded] 30A PWM Solar Charge Controller with Auto Parameter LCD Display](https://m.media-amazon.com/images/I/41opvkWthjL._SL500_.jpg)
【UPGRADED SOLAR CONTROLLER】This solar charge controller helps you manage the working of solar panels and batteries in solar systems automatically with the build-in industrial microcontroller. You don't need to reset it when the battery runs out cause it will memorize various parameters set by the user
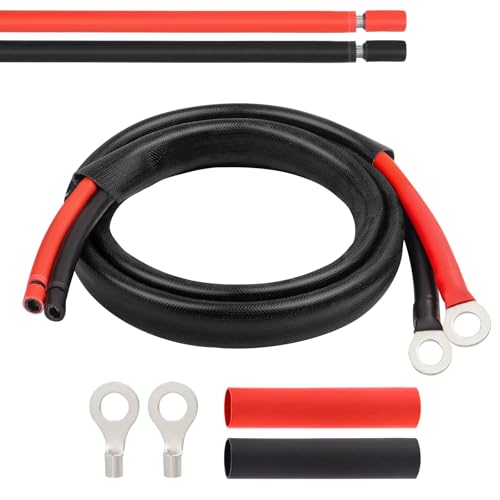
10AWG Tinned Copper Wire -- MOOKEERF solar battery cable is made of larger diameter 10AWG tinned copper wire which is minimize power loss in solar panel systems, the inner conductor consists of 84 tin-plated copper, well constructed and good conductive.
Tools Required
- Solar Panel: The primary component that captures sunlight.
- Battery: Store the energy generated.
- Charge Controller: Regulates the voltage and current coming from the solar panel to the battery.
- Wires: Use appropriate gauge wires designed for DC applications.
- Connectors: Items like MC4 connectors for easy connections between solar panels and charge controllers.
- Multimeter: Displays voltage and current levels to verify the system’s performance.
- Screwdriver: Helps with securing connections.
- Wire Strippers: Essential for preparing wires for connection.
- Heat Shrink Tubing or Electrical Tape: Provides insulation and ensures weather resistance.
- Disconnect Power: Always disconnect wires before starting any work.
- Use Proper Gear: Wear gloves and safety glasses for protection.
- Check Voltage: Utilize a multimeter to check voltage levels before connecting components.
- Avoid Direct Sunlight: Perform wiring in shaded or covered areas to prevent overheating.
- Secure Connections: Ensure all connections are tight to prevent sparks and ensure optimal current flow.
- Ventilation: Work in a well-ventilated area to avoid any buildup of gases from batteries.
Following these guidelines helps you wire solar panels to batteries safely and effectively.
Step-by-Step Guide on How to Wire Solar Panel to Battery
Wiring a solar panel to a battery can seem daunting, but breaking it down step-by-step simplifies the process. Follow these clear guidelines to ensure a successful connection.
Recommended Products

10AWG Wire Tinned Copper Tray Extension Cable to connect the charge controller to the battery, also can be used as solar wires with tools to cut and crimp with new connectors.Widely used for solar panels, marine, automotive, RVs, Lawn mower,camper and inverter wiring.

8AWG Tinned Copper Wire -- MOOKEERF solar battery cable is made of larger diameter 8AWG tinned copper wire which is minimize power loss in solar panel systems, the inner conductor consists of 140 tin-plated copper, well constructed and good conductive.

UPGRADED SOLAR CONTROLLER: With the built-in industrial microcontroller, this PWM solar charge controller automatically helps you manage the working of solar panels and batteries in solar systems. When the battery runs out, it will memorize various parameters you set, so you don't need to reset it, which is easy and safe
Step 1: Gather Materials
Collecting the necessary materials sets the stage for a smooth installation. Ensure you have:
- Solar panels
- Charge controller
- Batteries (suitable for your setup)
- Appropriate gauge wires (typically 10-12 AWG)
- Connectors
- Multimeter
- Screwdrivers
- Wire strippers
- Insulation tape
Organizing these items before starting keeps the process efficient and helps avoid disruptions.
Step 2: Connect Solar Panels to Charge Controller
Connecting solar panels to the charge controller directs the generated electricity safely. Here’s how:
- Identify positive and negative terminals on both the solar panels and the charge controller.
- Use appropriately gauged wires for connections; shorter distances minimize energy loss.
- Attach the positive wire from the solar panel to the positive terminal on the charge controller.
- Connect the negative wire from the solar panel to the negative terminal on the charge controller.
- Secure connections tightly to prevent arcing or loosening over time.
Confirm connections visually and with a multimeter to ensure there are no shorts.
Step 3: Connect Charge Controller to Battery
This step is crucial for directing energy to the battery. Follow these instructions:
- Verify polarity; positive and negative terminals must match between the charge controller and battery.
- Connect the positive wire from the charge controller to the positive battery terminal.
- Then, attach the negative wire from the charge controller to the negative battery terminal.
- Check all connections again before proceeding. Ensuring correct wiring prevents damage and enhances efficiency.
Step 4: Final Connections and Testing
After connecting everything, it’s time to finalize the setup:
- Connect the battery to any inverter if needed for AC power.
- Turn on the charge controller to initiate the charging process.
- Use a multimeter to check voltage levels at different points. This verifies that power is flowing correctly throughout the system.
- Monitor the charge controller’s indicators; they often display battery status and operational information.
Troubleshoot any discrepancies immediately. A simple inspection of connections often resolves issues. Following these steps ensures a reliable solar energy system.
Common Mistakes to Avoid
Wiring a solar panel to a battery can seem straightforward, but certain mistakes can hinder performance and efficiency. Being aware of these common pitfalls can save you time and money.
Recommended Products
![[Upgraded] 30A Solar Charge Controller, Black Solar Panel Battery Intelligent Regulator with Dual USB Port 12V/24V PWM Auto Paremeter Adjustable LCD Display (30a)](https://m.media-amazon.com/images/I/41M0gMi3O2L._SL500_.jpg)
UPGRADED SOLAR PANEL CONTROLLER: Compatible with 12V 24V system.This solar charge controller helps you manage the working of solar panels and battery in solar systems automatically with the build-in industrial microcontroller. You don't need to reset it when the battery runs out cause it will memorize various parameters set by the user. You can also charge your mobile phone, tablet, PCs through Dual USB output 5V/2.5A (max)

12V Universal Solar Charge Controller- Renogy Solar controller optimizes charging for 𝐋𝐢𝐭𝐡𝐢𝐮𝐦, 𝐀𝐆𝐌, 𝐆𝐞𝐥, & 𝐅𝐥𝐨𝐨𝐝𝐞𝐝 𝐛𝐚𝐭𝐭𝐞𝐫𝐢𝐞𝐬. Smart PWM solar panel controller technology auto-selects the perfect charging curve (𝐁𝐮𝐥𝐤/𝐁𝐨𝐨𝐬𝐭/ 𝐅𝐥𝐨𝐚𝐭/ 𝐄𝐪𝐮𝐚𝐥𝐢𝐳𝐚𝐭𝐢𝐨𝐧) for your RV, boat, or off-grid setup. Renewable energy controllers easily switch battery types and monitor real-time charging stages via intuitive LEDs, mmaximizing battery lifespan.

Settable battery charging controller board for DC6-60V lead acid battery and lithium ion battery also comatible with solar panel.
Incorrect Wiring
Incorrect wiring can lead to serious issues. Always connect the positive terminal of the solar panel to the positive terminal of the charge controller, and the negative terminal to the negative terminal. Mixing up these terminals can damage the battery or charge controller. Double-check your connections before powering the system. Use color-coded wires to help identify connections easily.
Overloading the Battery
Overloading the battery can significantly reduce its lifespan. Ensure the solar panel’s output does not exceed the battery’s capacity. For example, a 100Ah (amp-hour) battery should not be charged with a solar panel that outputs more than 100W (watts) continuously. Use a charge controller with a built-in overcharge protection feature to prevent excessive charging. Regularly monitor the battery voltage to avoid overloading.
Conclusion
Wiring solar panels to batteries might seem daunting at first but with the right approach and knowledge you can make the process smooth and rewarding. You’ve learned about the essential components tools and safety measures needed to ensure a successful installation.
By following the step-by-step guide and being mindful of common mistakes you’ll not only enhance the efficiency of your solar energy system but also enjoy the benefits of renewable energy. So take a deep breath gather your materials and get started on your solar journey. You’re on your way to harnessing the power of the sun!
Frequently Asked Questions
What is a solar panel system?
A solar panel system converts sunlight into electricity using photovoltaic (PV) cells. It typically includes solar panels, charge controllers, batteries, and inverters. These components work together to generate, store, and supply energy for various applications.
Why is wiring important in solar energy systems?
Wiring is crucial as it connects the different components of a solar energy system, ensuring efficient energy transfer and functionality. Proper wiring helps prevent energy loss, equipment damage, and safety hazards.
What tools do I need to wire solar panels to batteries?
You will need solar panels, batteries, a charge controller, appropriate gauge wires, connectors, a multimeter, screwdrivers, wire strippers, and insulation materials. Each tool plays a significant role in ensuring a successful installation.
What safety precautions should I take when wiring solar panels?
Always disconnect power before starting, use proper gear, check voltage, avoid direct sunlight during installation, secure connections, and ensure good ventilation. Following these guidelines is vital for safe wiring.
How do I connect solar panels to a battery?
Start by connecting the solar panel to the charge controller, matching the positive and negative terminals. Then, connect the charge controller to the battery, ensuring correct polarity to prevent damage. Finally, secure all connections.
What common mistakes should I avoid when wiring?
Avoid incorrect wiring, like mixing up positive and negative terminals. Also, don’t overload the battery by exceeding its capacity, and ensure you use a charge controller with overcharge protection. Regularly monitor battery voltage to prevent issues.